,

How to Make a Popup Pumpkin Card for Fall

How to Make a Popup Pumpkin Card for Fall

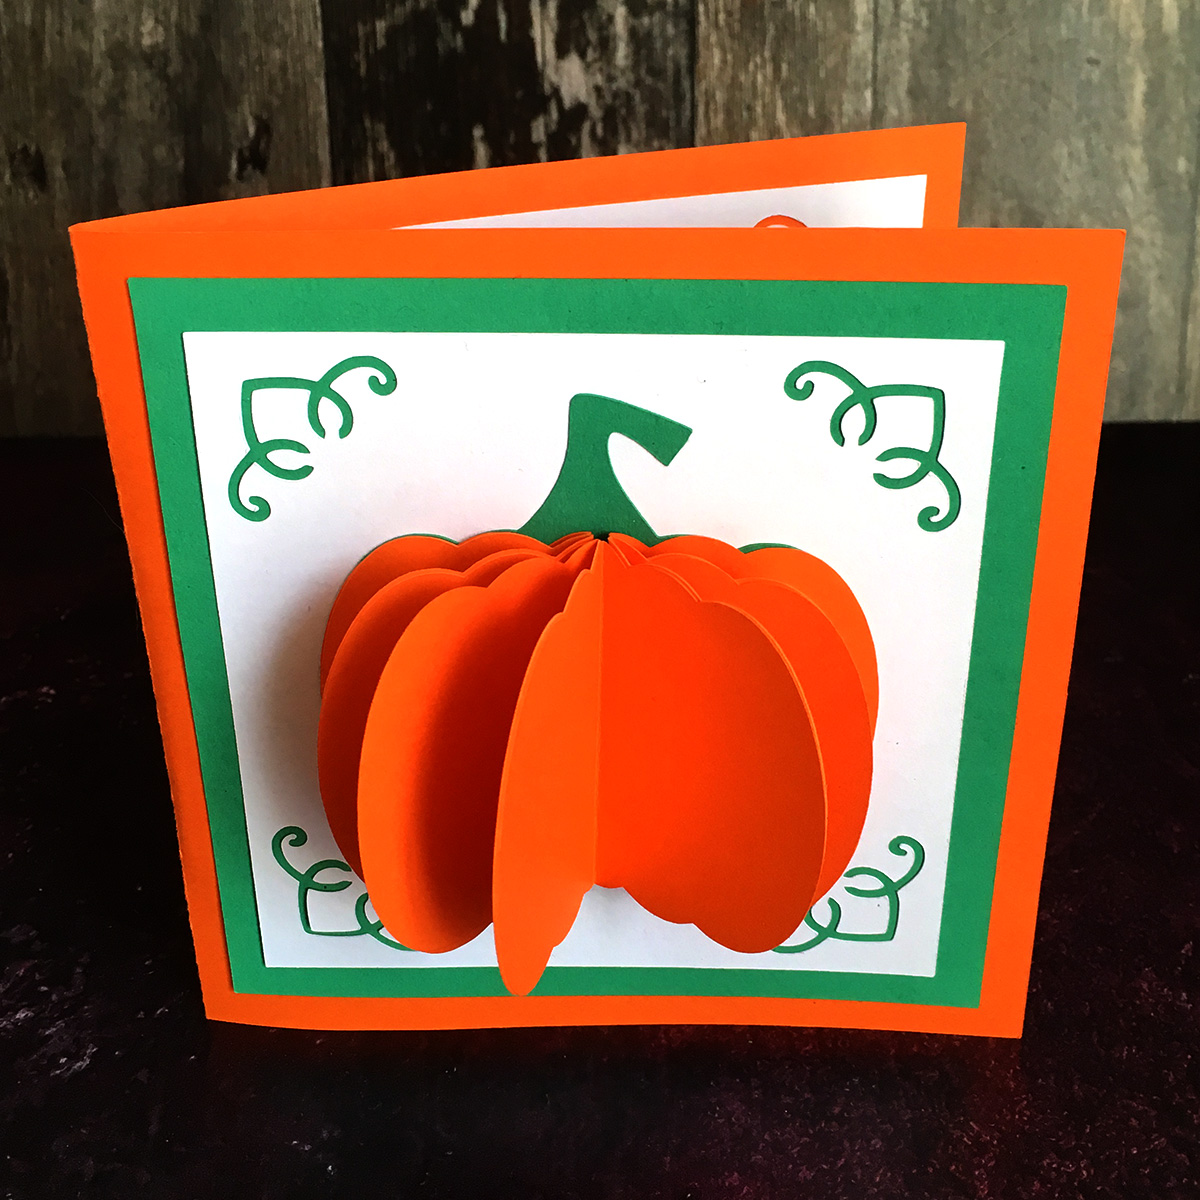
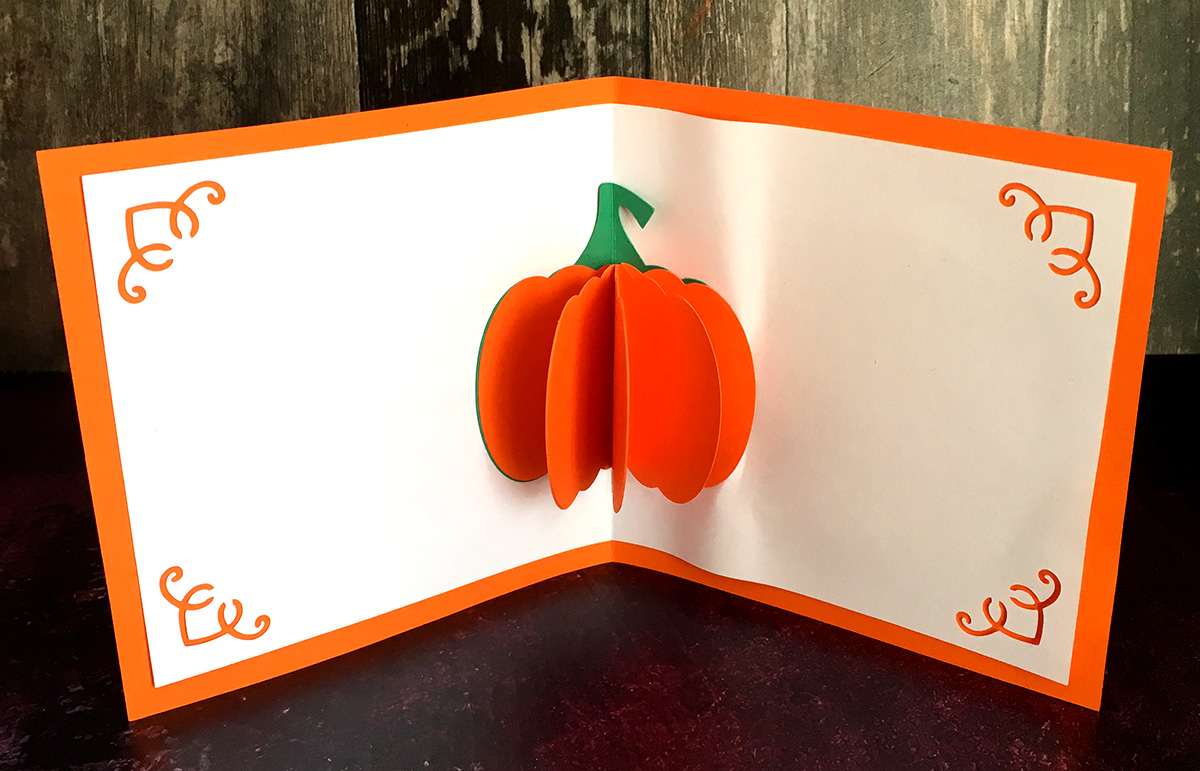
Make a DIY popup card with this cute little pumpkin. This handmade popout card has a pumpkin on the outside AND the inside, for double the 3D fun.

This little pumpkin card is so cute! It’s easy to make and would be suitable for kids to craft, as well as adults of course!

The best thing about this card is that despite how spectacularly 3D the pumpkins are, it folds completely flat for posting!

Popup pumpkin card

Please note that some of the links included in this article are affiliate links, which means that if you click through and make a purchase I may receive a commission (at no additional cost to you). You can read my full disclosure at the bottom of the page.


How to make DIY pumpkin popup card

Watch this video to find out how to make this cute pumpkin popup card.


How to make a pumpkin popout card

The instructions below are how to make this adorable autumnal handmade card.

Download the Free Cutting File

Reset password

Don't have an account? Register for free

TERMS OF USE:
You may sell finished, handmade physical craft items that you have made using this product but must not sell or share the digital files. Read full terms of use

Step 1) Prepare the SVG

Download the free SVG using the button above and then cut out all of the pieces with your cutting machine.

After uploading the SVG into Cricut Design Space, resize the whole group (of all layers) to 15.2 inches in width and 15.2 inches in height.

Then, change all the score lines to the “Score” line-type and then attach them to the corresponding layer so that the design will cut correctly.

There are score lines on the main card front, white insert and one of the green pumpkins.

After doing this, your Design Space screen should look like this, with the dashed lines showing the score lines:

Prepare the score lines

Step 2) Cut out all of the pieces

I recommend cutting the pumpkin shapes from orange paper or really thin card.

Using regular cardstock for the pumpkins isn’t as effective on the finished card as it’s a little thick, but it does still work. I used card for mine as I didn’t have any orange paper, but paper would have looked better!

Cut out all of the pieces

Step 3) Glue the card front together

Fold the orange card base down the score line to create your card front.

Glue the green square and white square to the front.

Glue the card front together

Step 4) Create the popup pumpkin

Glue the green pumpkin WITHOUT a score line to the front of your card.

Glue the green pumpkin WITHOUT a score line to the front of your card

Fold all your little pumpkin shapes in half.

Put glue down half of one of the sides of the pumpkin and glue it to one side of the green pumpkin.

Glue the first pumpkin

Glue pumpkins shapes together until you are happy with the amount, up to a maximum of 8.

If you’re using paper pumpkins then you’ll probably need all 8, but if you’ve used card then 6 or 7 may be enough.

Glue pumpkins shapes together

Finish the pumpkin by gluing the side of the top pumpkin to the remaining side of the green pumpkin.

Finish the sides of the popup pumpkin

Step 5) Prepare the inside of the card

Fold the white insert in half along the score line and stick to the inside of the card.

Glue in the card insert

Fold the remaining green pumpkin down the score line and stick to the middle of the insert so that the score lines match up.

Green pumpkin on the inside

Repeat the steps you did on the front of the card for the popup pumpkin on the inside of the card.

You may prefer to use less pumpkin shapes so that the card doesn’t end up too thick – I only used four pumpkin shapes for the inside of mine.

Pumpkin pop up card

And that’s it – your DIY pumpkin popup card is complete!

I hope that you enjoyed this card making tutorial.

Happy crafting,
Sarah x