
How to Make Split Picture Monograms in Cricut Design Space
I’m always looking for ways to personalize my craft projects, and a popular way of doing that is with split picture monograms.
This is where you cut a rectangle out of a picture and then add a name to it – either a first name, or a family name/surname.
It’s SO easy to create your own custom split picture monogram artwork in Cricut Design Space.
Learn just how simple it is in this quick 10-minute video tutorial…
Please note that some of the links included in this article are affiliate links, which means that if you click through and make a purchase I may receive a commission (at no additional cost to you). You can read my full disclosure at the bottom of the page.
About this project
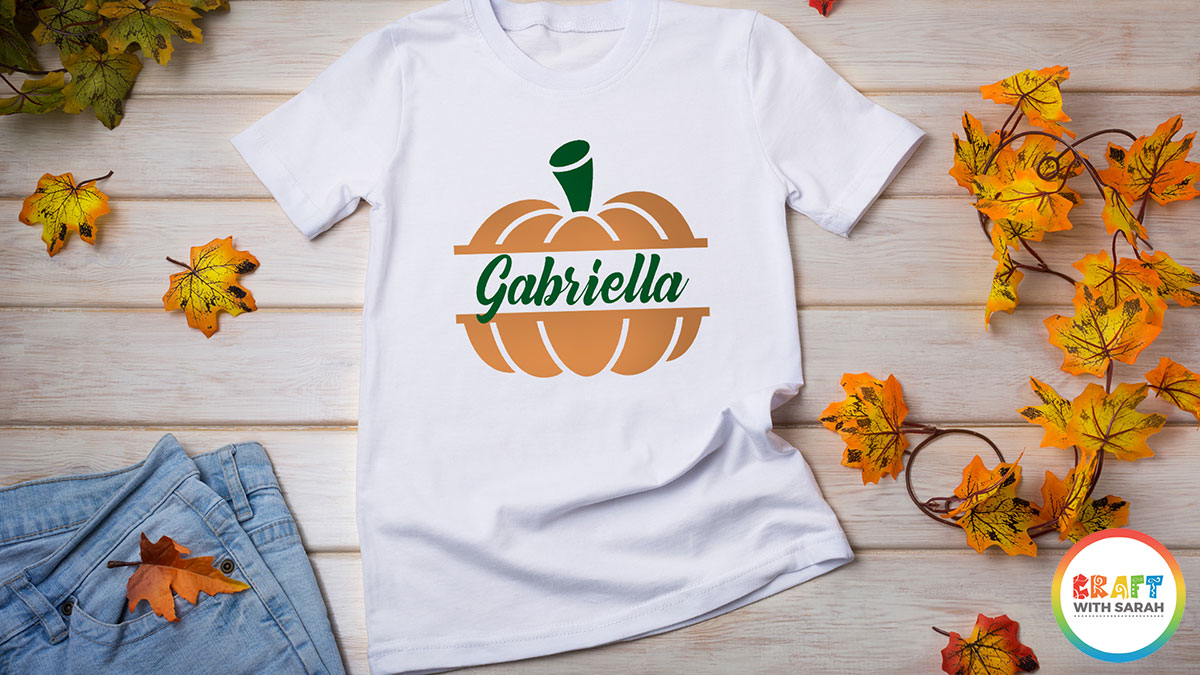
You aren’t just limited to pumpkins! You can use this same technique for ANY image.
Here’s a unicorn design I created that would look great put on to a tote bag:
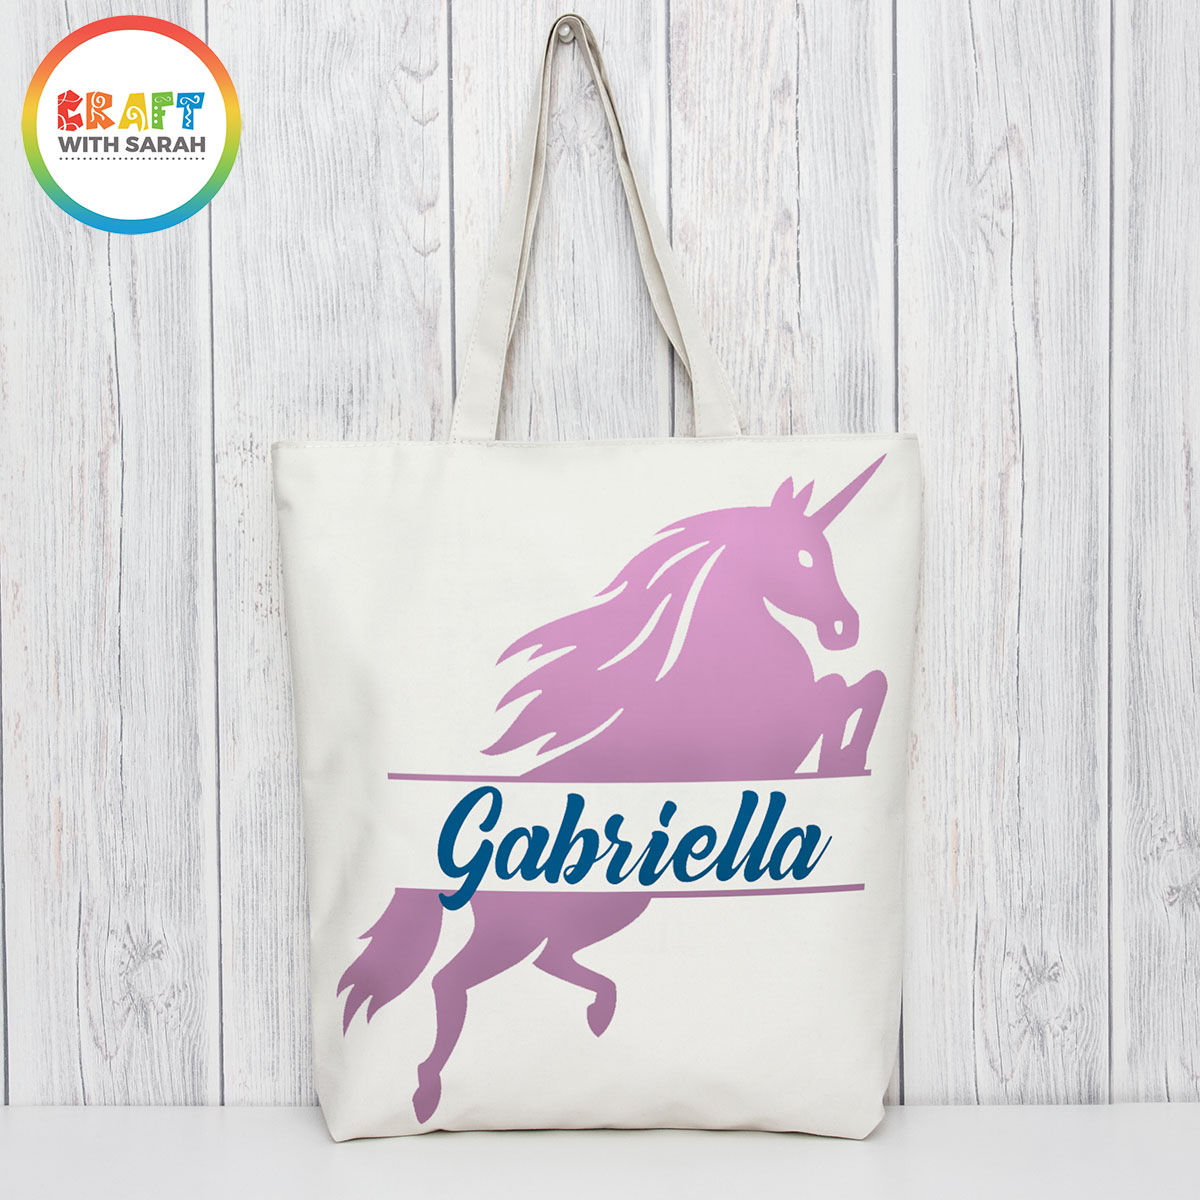
You can really let your imagination go wild with choosing your graphics for these split picture monograms.
Let’s find out how to make them…
Design Space video tutorial: How to design split picture monograms
Watch this video to see how to design your own split image monogram in Cricut design space.
A full written tutorial is available further down on this page.
How to design a split picture monogram in Cricut Design Space
I wanted to include a written tutorial for this project as I know that many of my readers prefer this to watching a video, however if you are new to Design Space then I’d recommend watching the video because you’ll be able to see exactly how I use the Design Space software, in real-time.
Here is how to design your split picture monogram in Design Space…
Step 1) Choose your picture
Choose the picture you want to split. There are thousands to choose from in Cricut Access – to get to them, click the “Images” button in Design Space.
If you’re new to creating these designs, I recommend choosing a fairly simple image with only one layer.
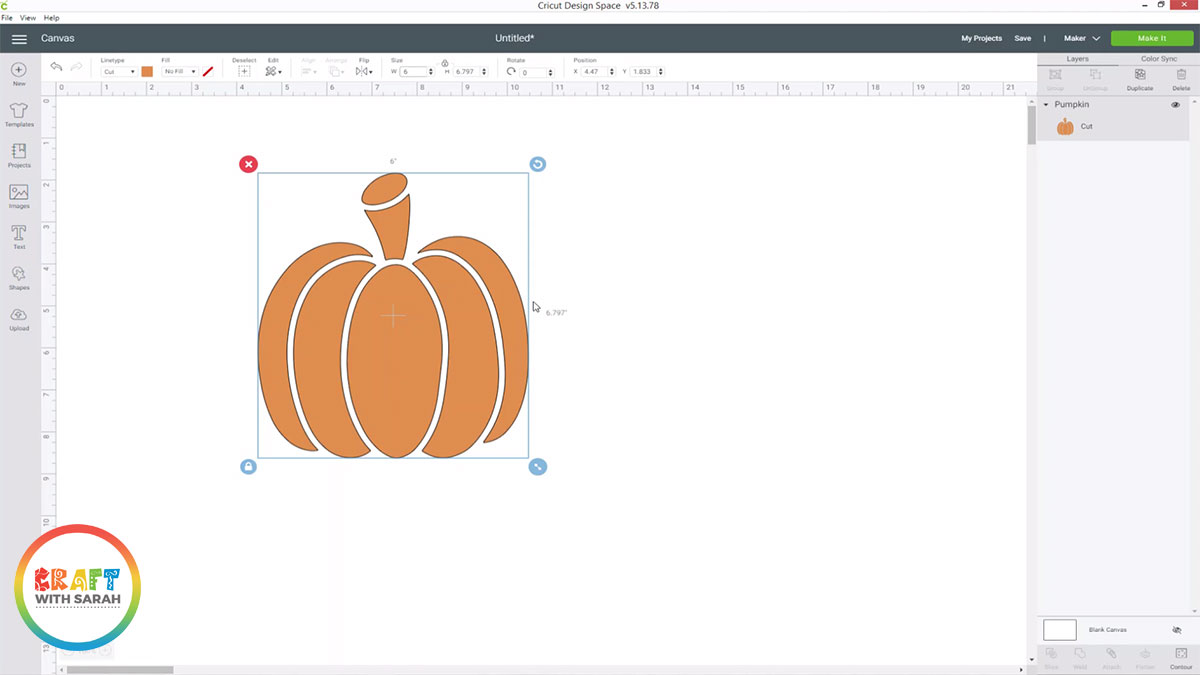
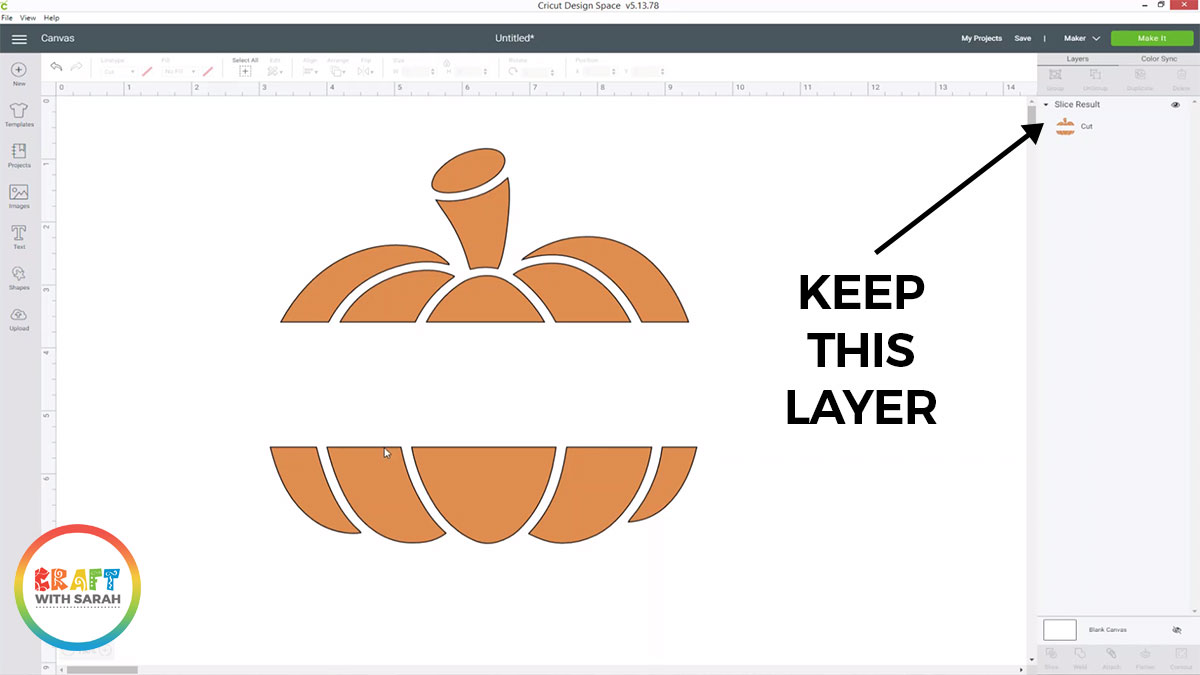
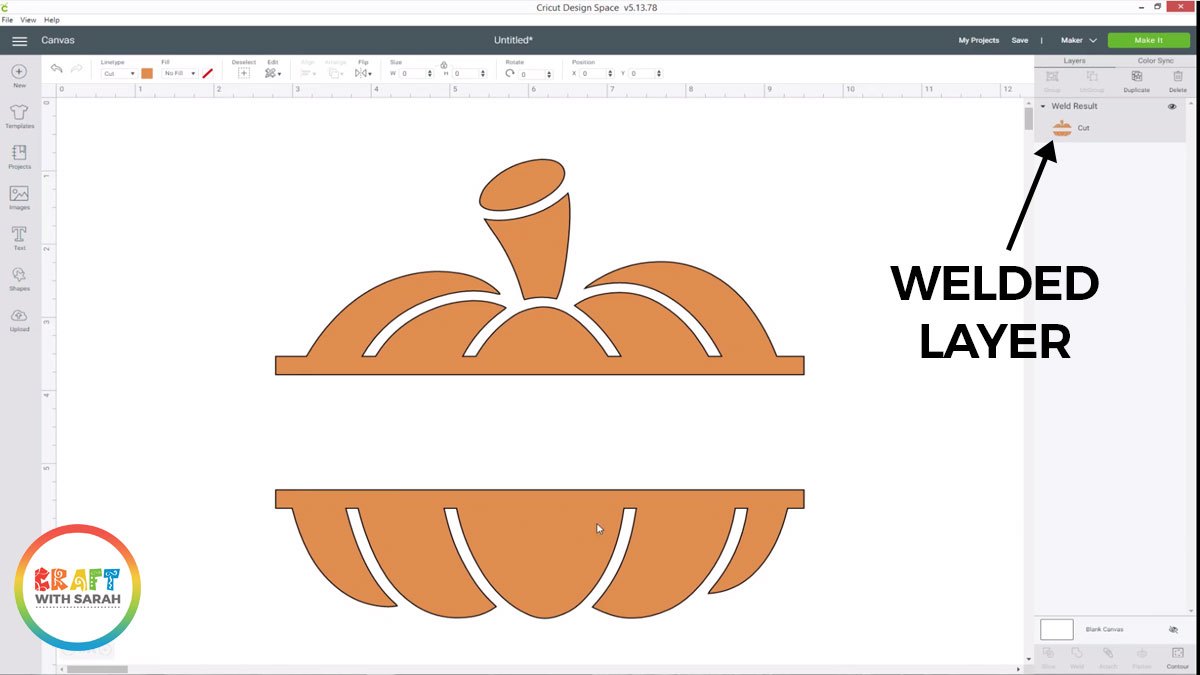
Step 2) Slice out the middle
Click “Shapes” and choose a square.
Click the padlock icon on the bottom left of the square and resize it into a long, thin rectangle that fully covers the width of your image.
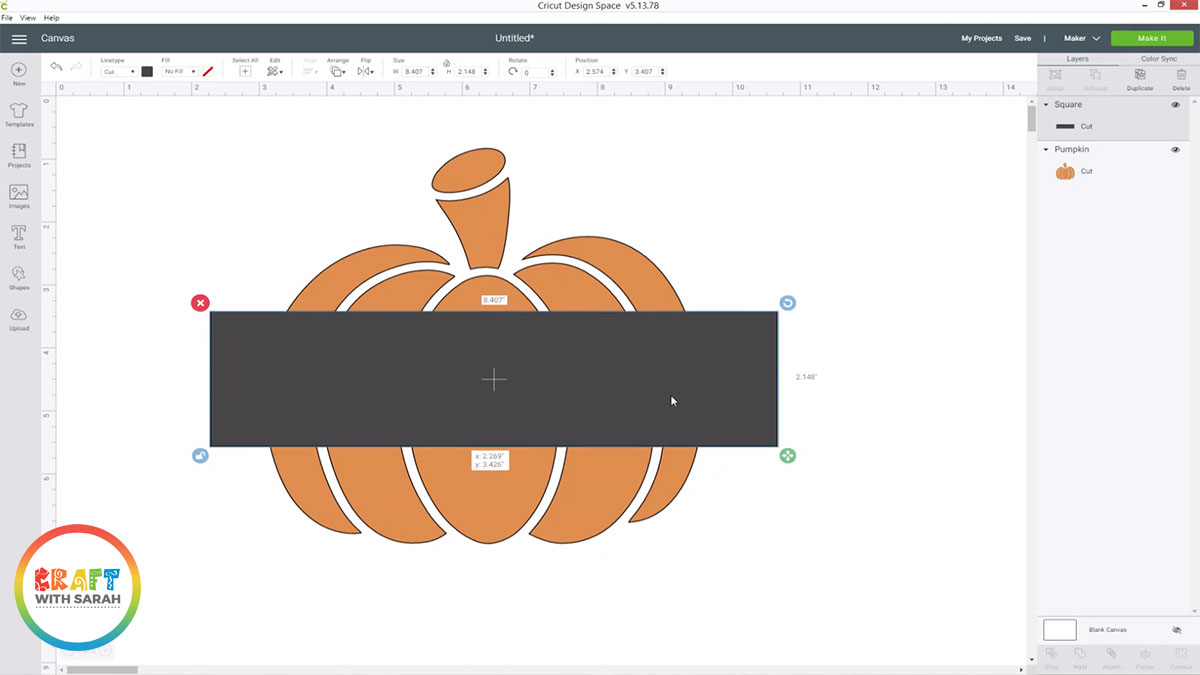
Select your image layer and the rectangle then press the “Slice” button at the bottom of the Layers panel.
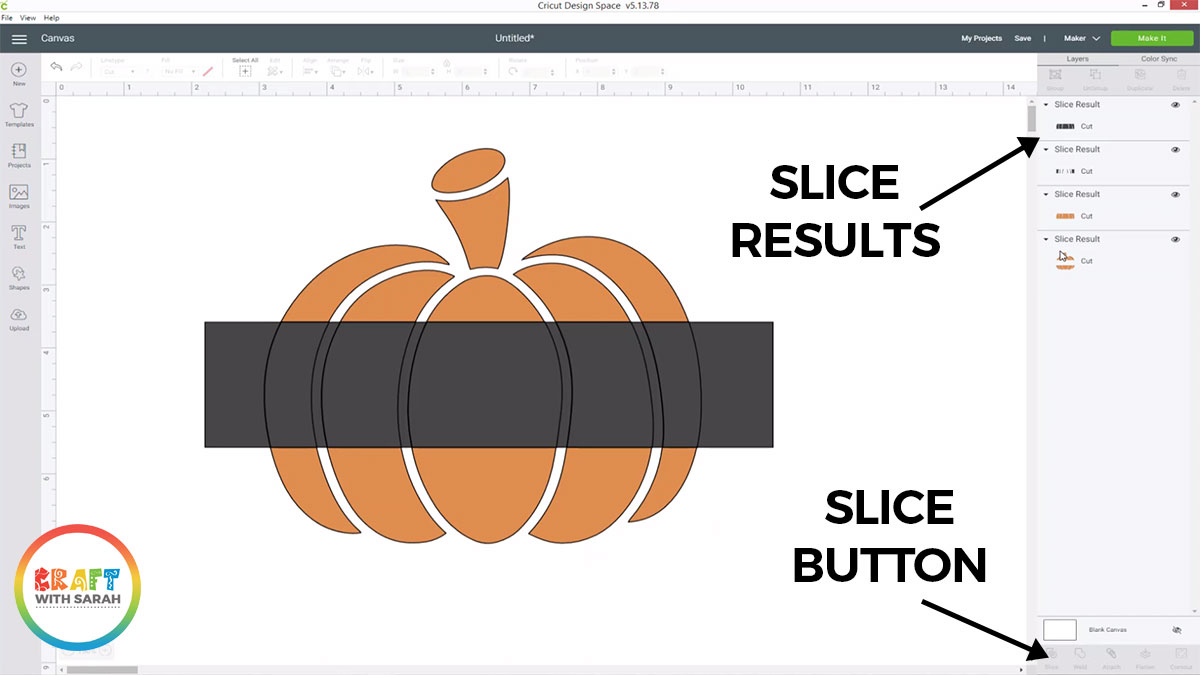
Delete the first few slice results, so you are just left with the main image with a rectangle cut out of it.
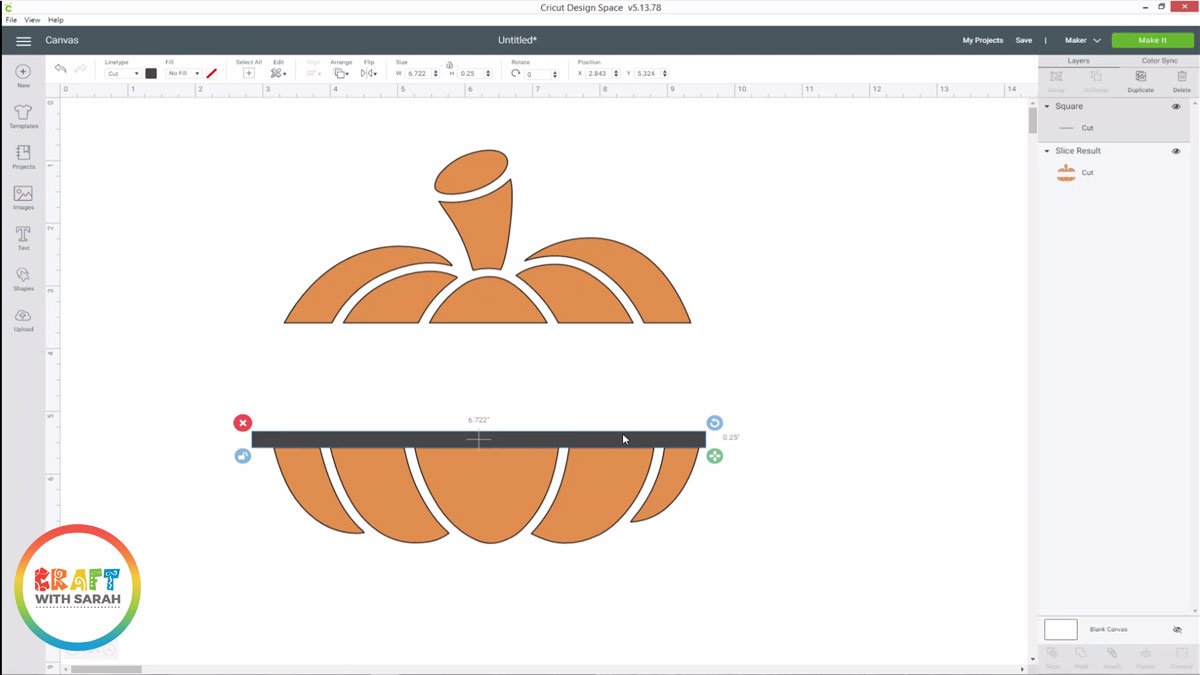
Step 3) Add small, thin rectangles
Insert another square and made it long and thin.
Position this over one side of your image, along where you split it in the previous step.
Right-click and press ‘Duplicate’ then move the second rectangle to the other side of your image.
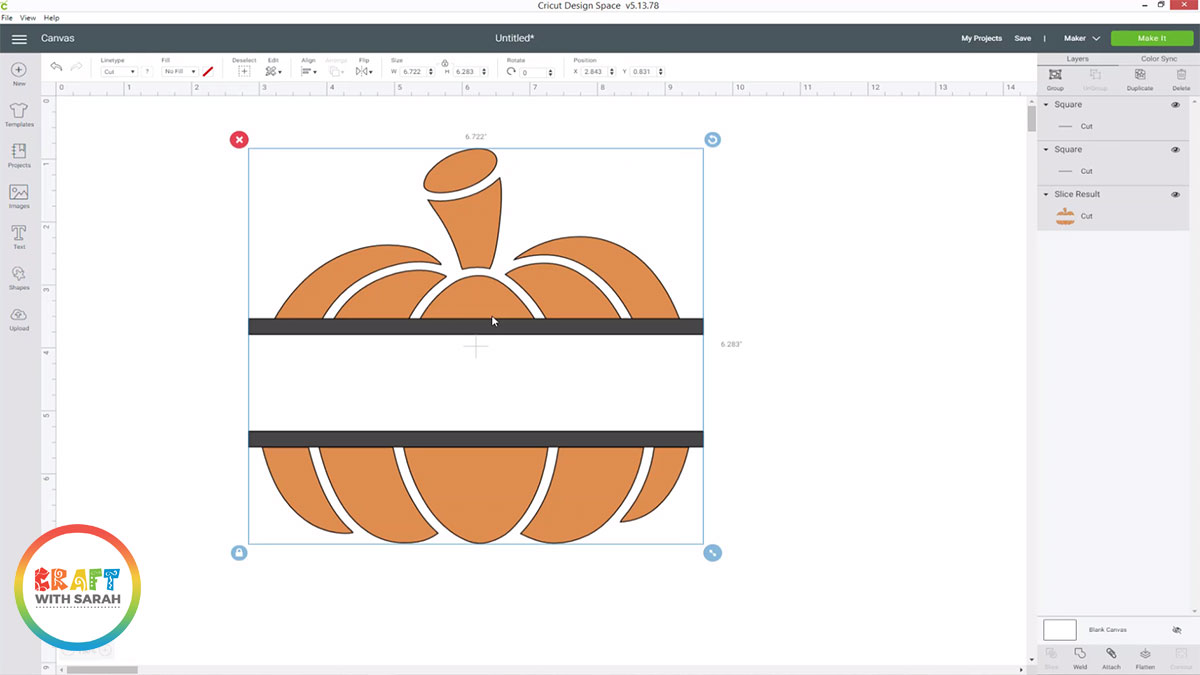
Select all of your layers and press “Align” in the top menu and then “Center Horizontally”.
Make sure your rectangles are lined up by selecting them both and then clicking “Align” in the top menu, followed by “Align Left”.
Make the rectangles the same colour as your image.
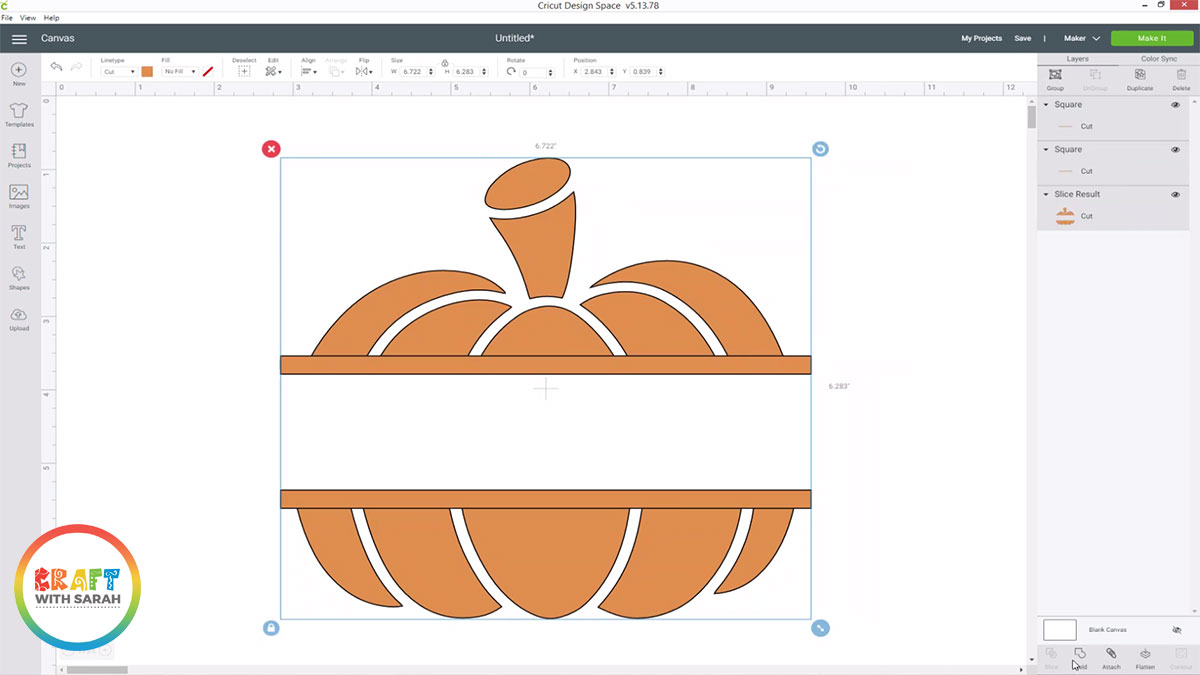
Join the rectangles to your picture by selecting all of the layers and pressing the “Weld” button down the bottom of the Layers panel.
Step 4) Add your text
Click “Text” and then type in your chose name.
Choose a font by selecting the text and then going in to the font dropdown near the top of the screen.
Design Space tends to put big, ugly gaps in between the letters when you change the font.
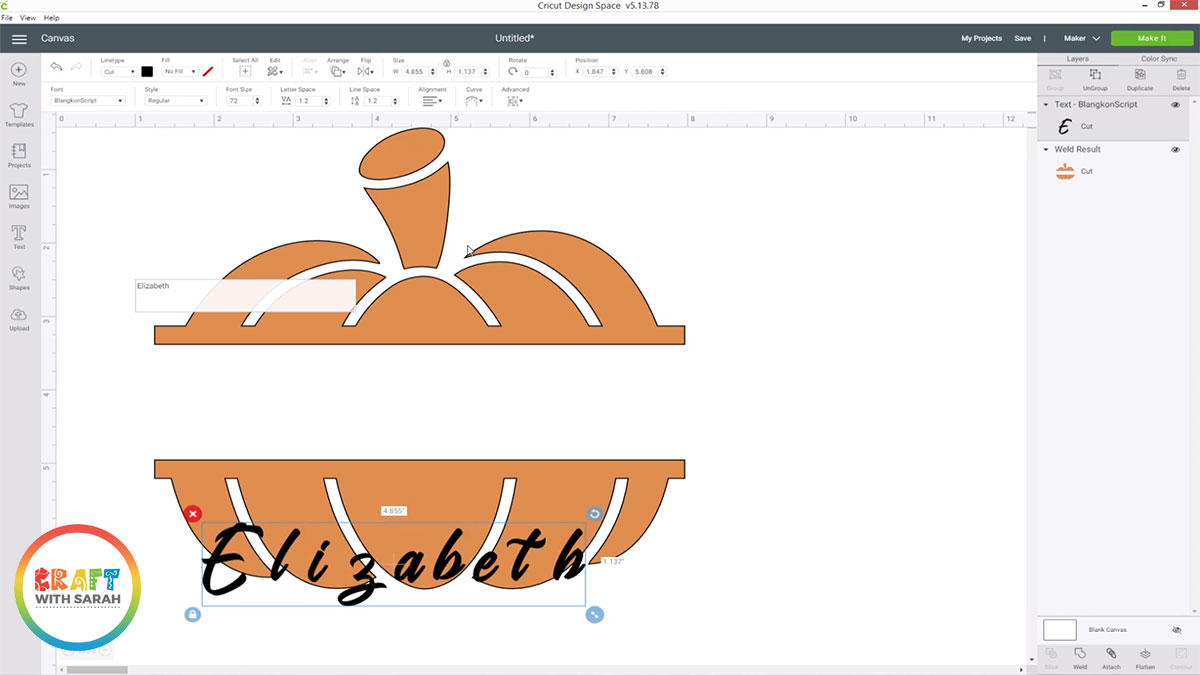
To fix this, click on the word layer in the Layers panel and then press the “Ungroup” button.
This separates the word into individual letters, with a separate layer for each letter.
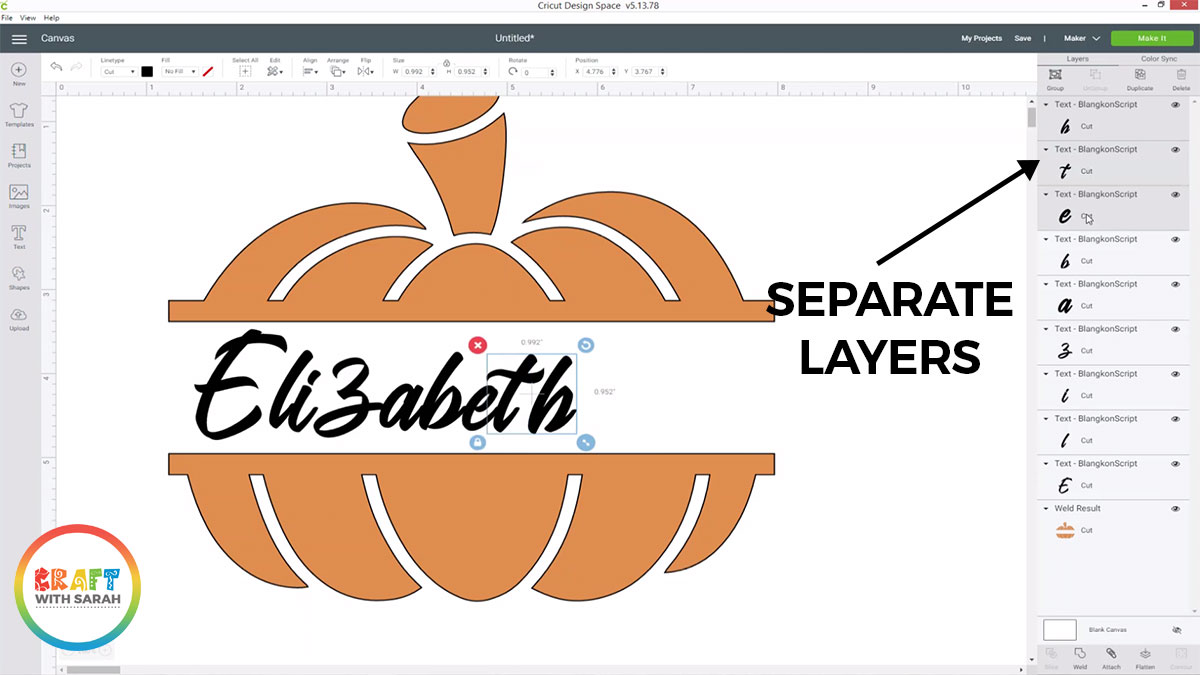
Click and drag the letters to get them looking as they are supposed to. For script fonts, this often means that the letters should be touching each other.
When you’re happy with how the word is looking, select all of the letter layers and click “Weld”.
This will merge all of the letters back into one layer.
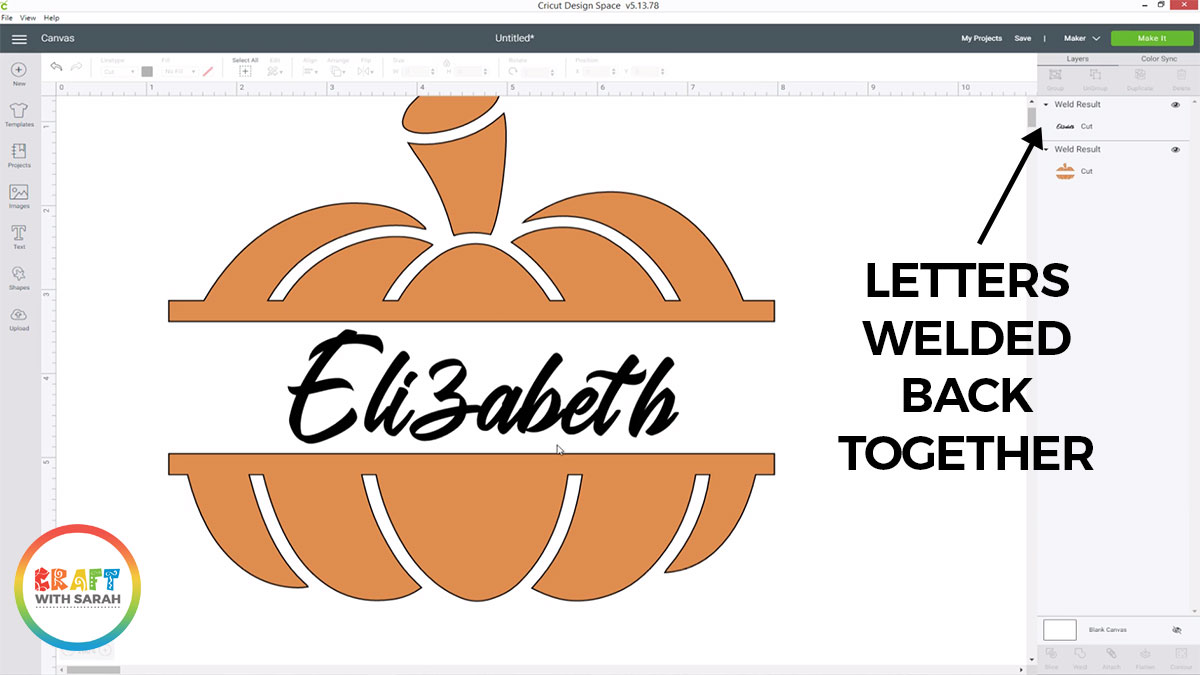
Select your welded name layer and the image and press “Align” and then “Center horizontally” to make sure the name is exactly in the middle of the picture.
Step 5) Add the finishing touches
Now your design is mostly done, but you might want to add some extra touches such as recolouring parts of the design.
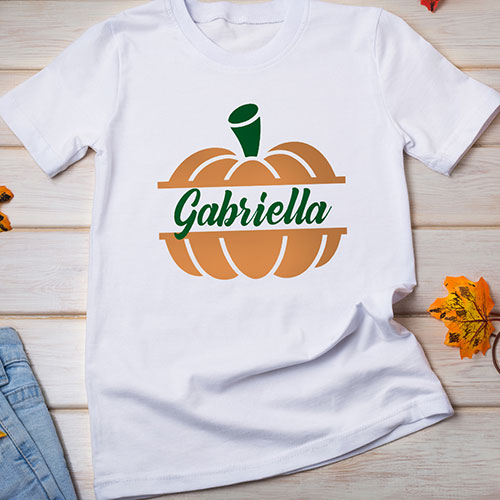
For example, in my pumpkin design I made the stalk of the pumpkin green.
To do that, I duplicated the pumpkin layer and perfectly positioned them on top of each other using “Align” and then “Align Center”.
I turned the top pumpkin green and then pressed “Contour” and clicked the parts of the pumpkin that are supposed to be orange to hide those parts.
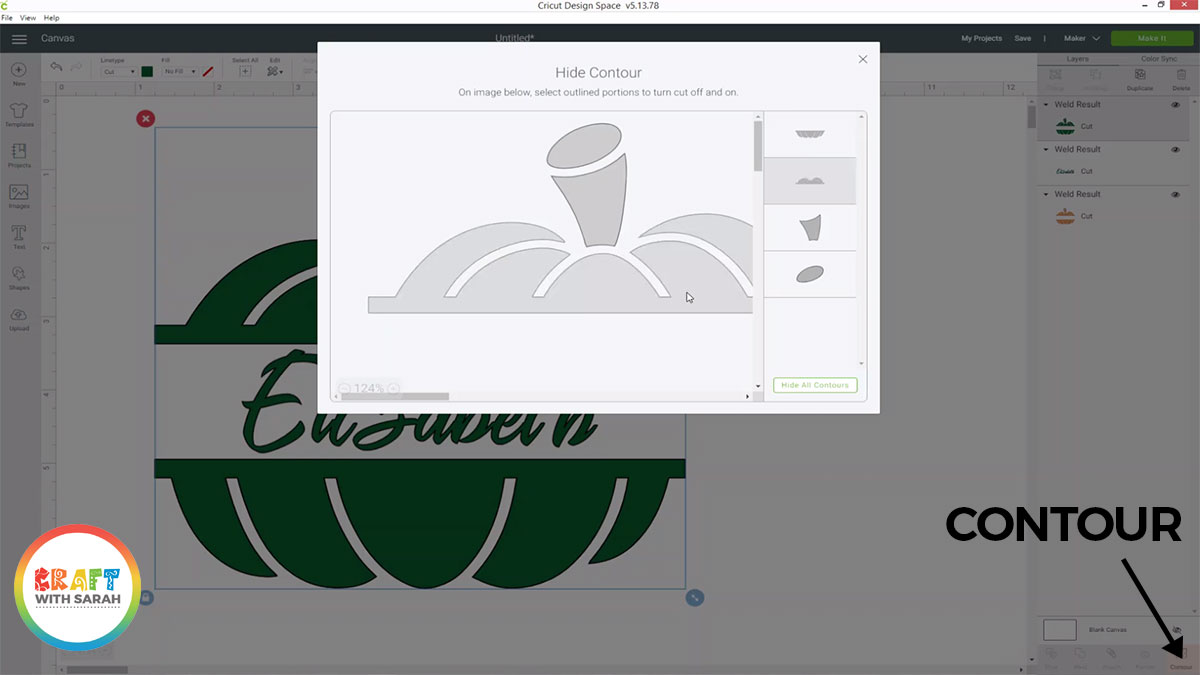
Next, I hid the green layer by clicking the eye icon next to it in the layers panel, then clicked the ORANGE pumpkin, pressed “Contour” and then clicked the stalk of the pumpkin to hide those parts on the orange layer.
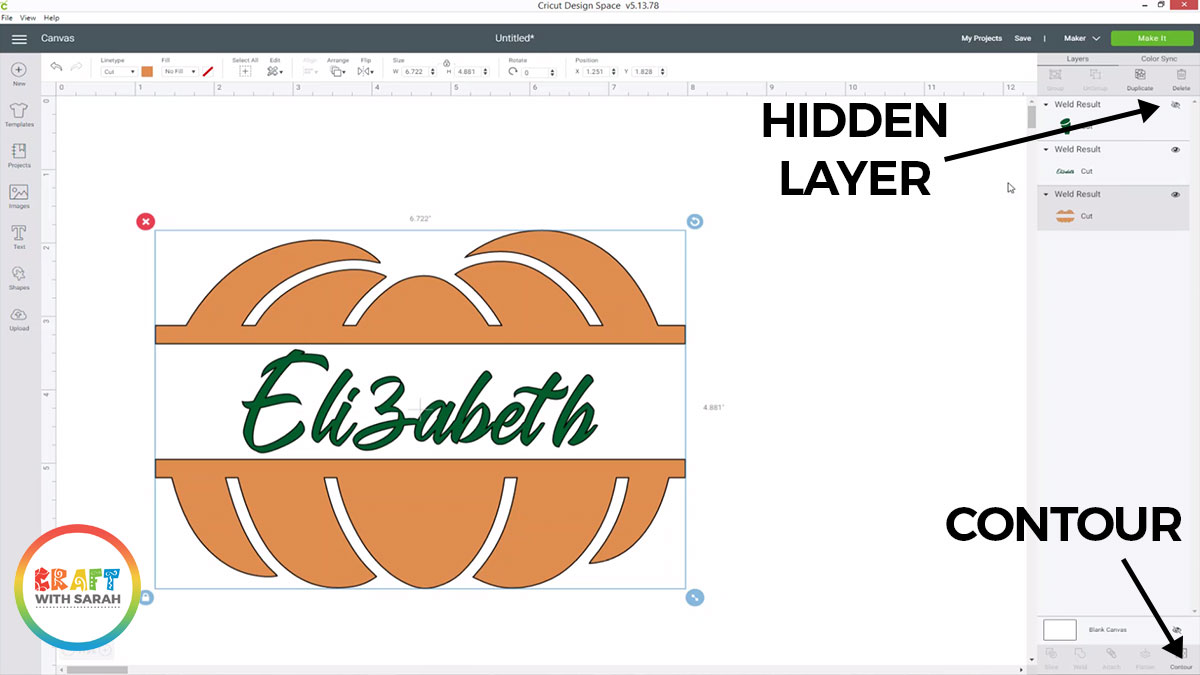
I turned the green pumpkin layer back on by clicking the eye icon again, and then it was finished!
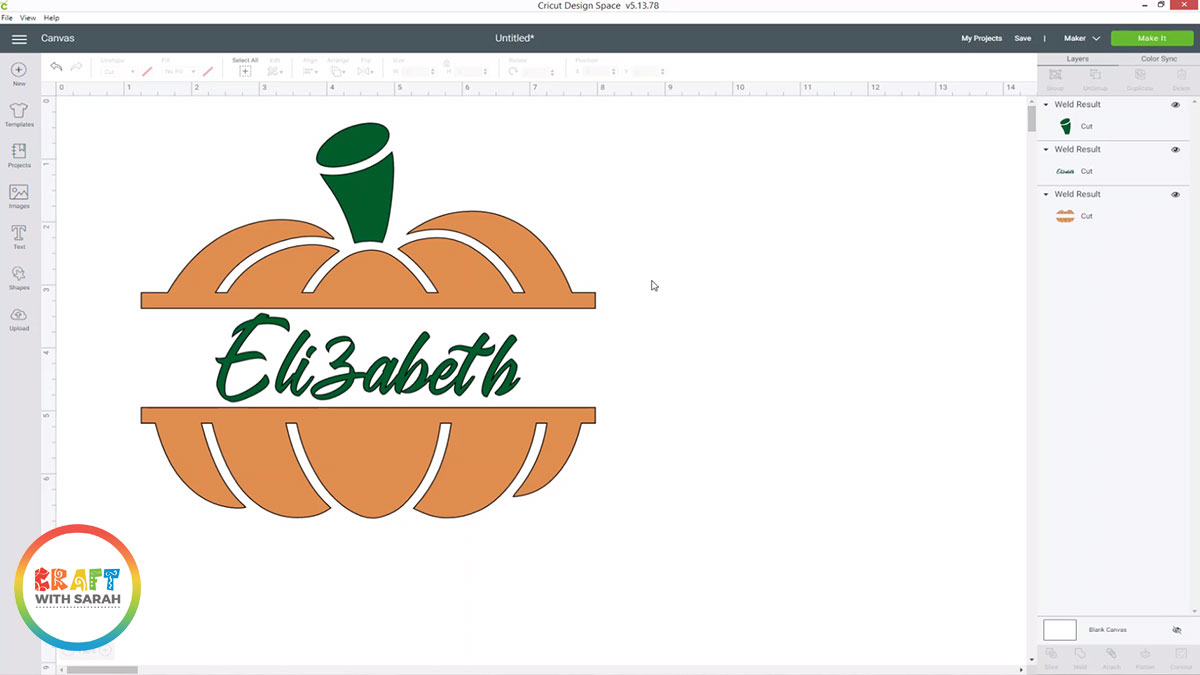
And here’s my final design, isn’t it cute?
I hope that you enjoyed this tutorial on how to design split picture monograms in Design Space.
Design Space Project Link
Pumpkin Split Picture Monogram
Please note that you need an active Cricut Access subscription to be able to cut this Project for free.
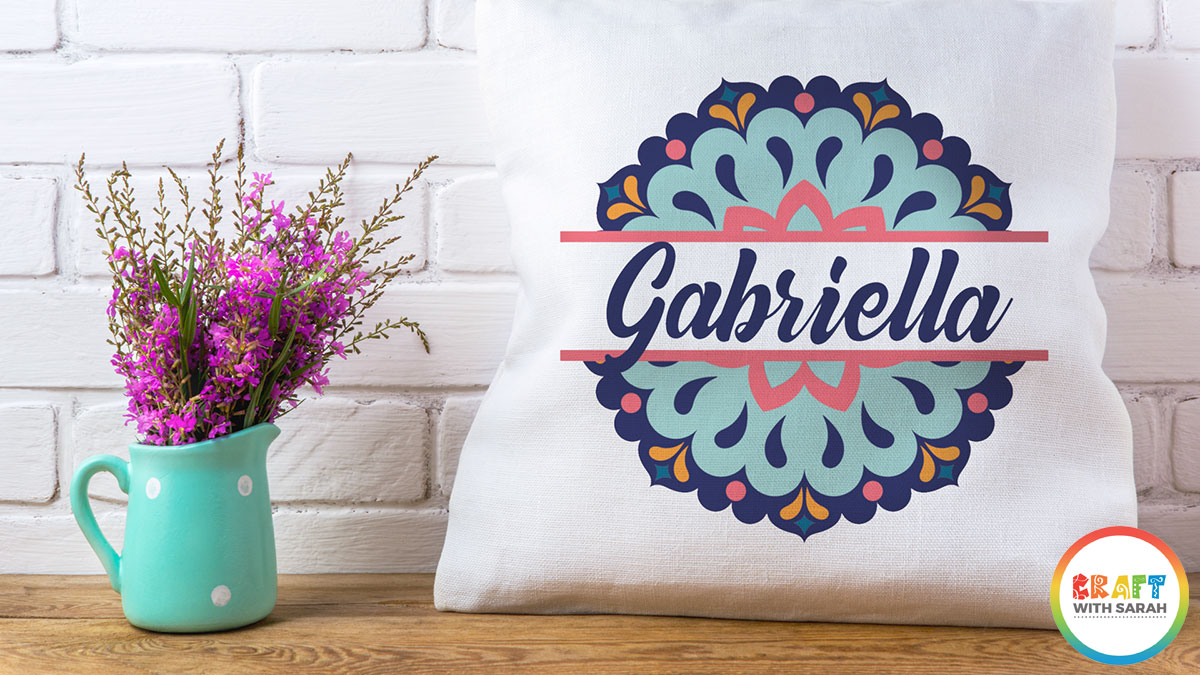
There are so many ways that you could use this technique to create your own Cricut crafts.
For example, you could put a design onto a pillow like this!
Happy crafting,
Sarah x