
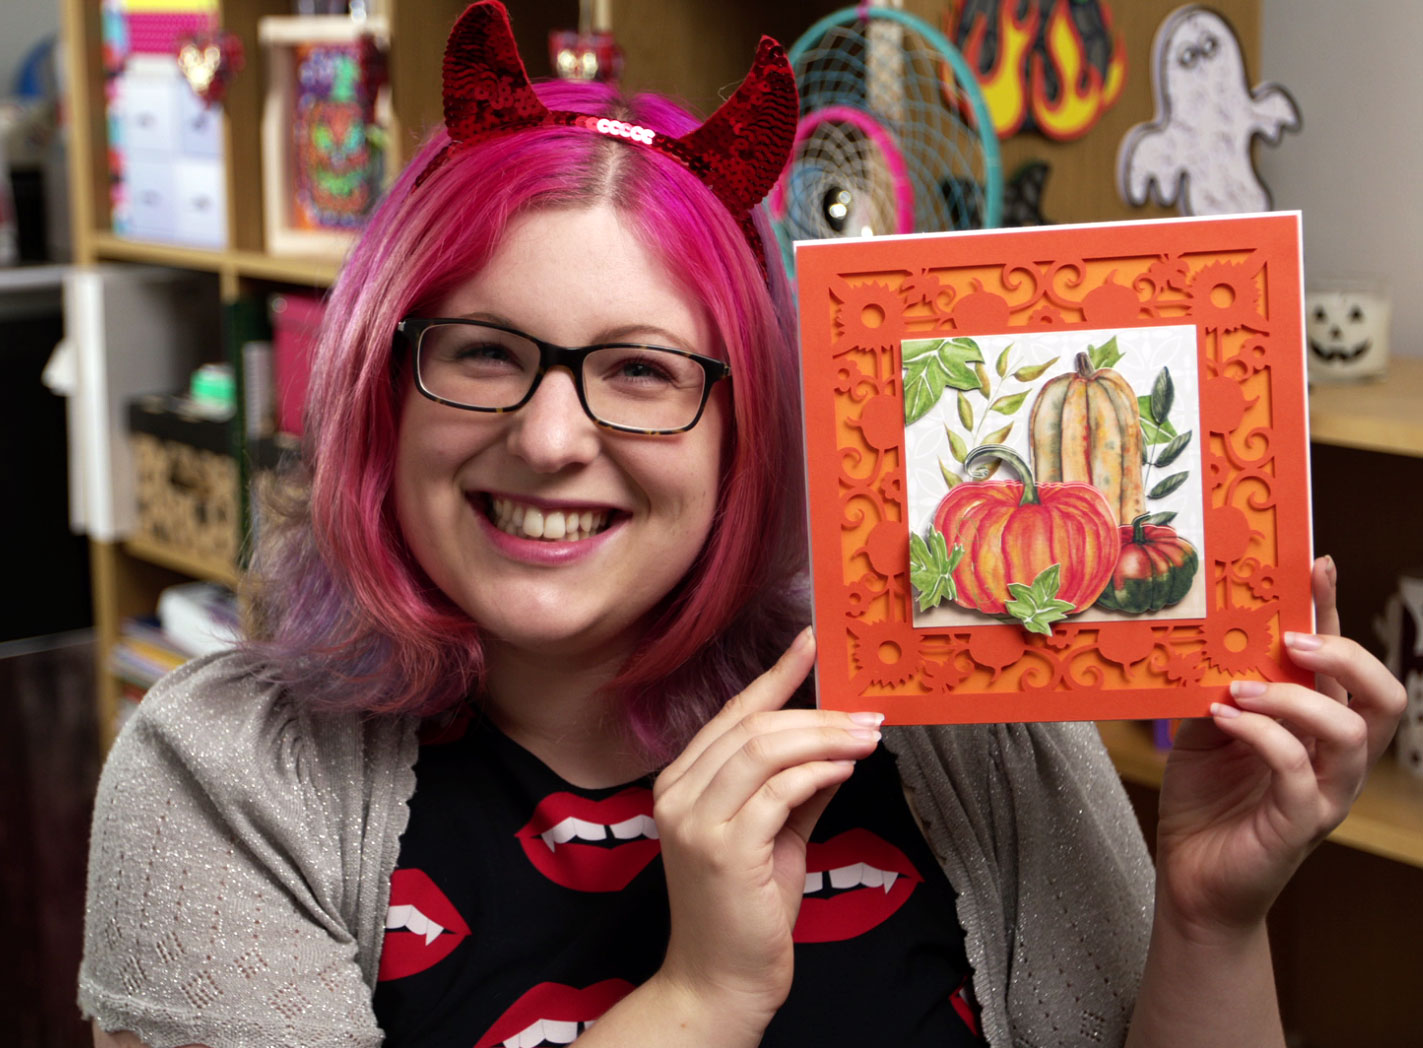
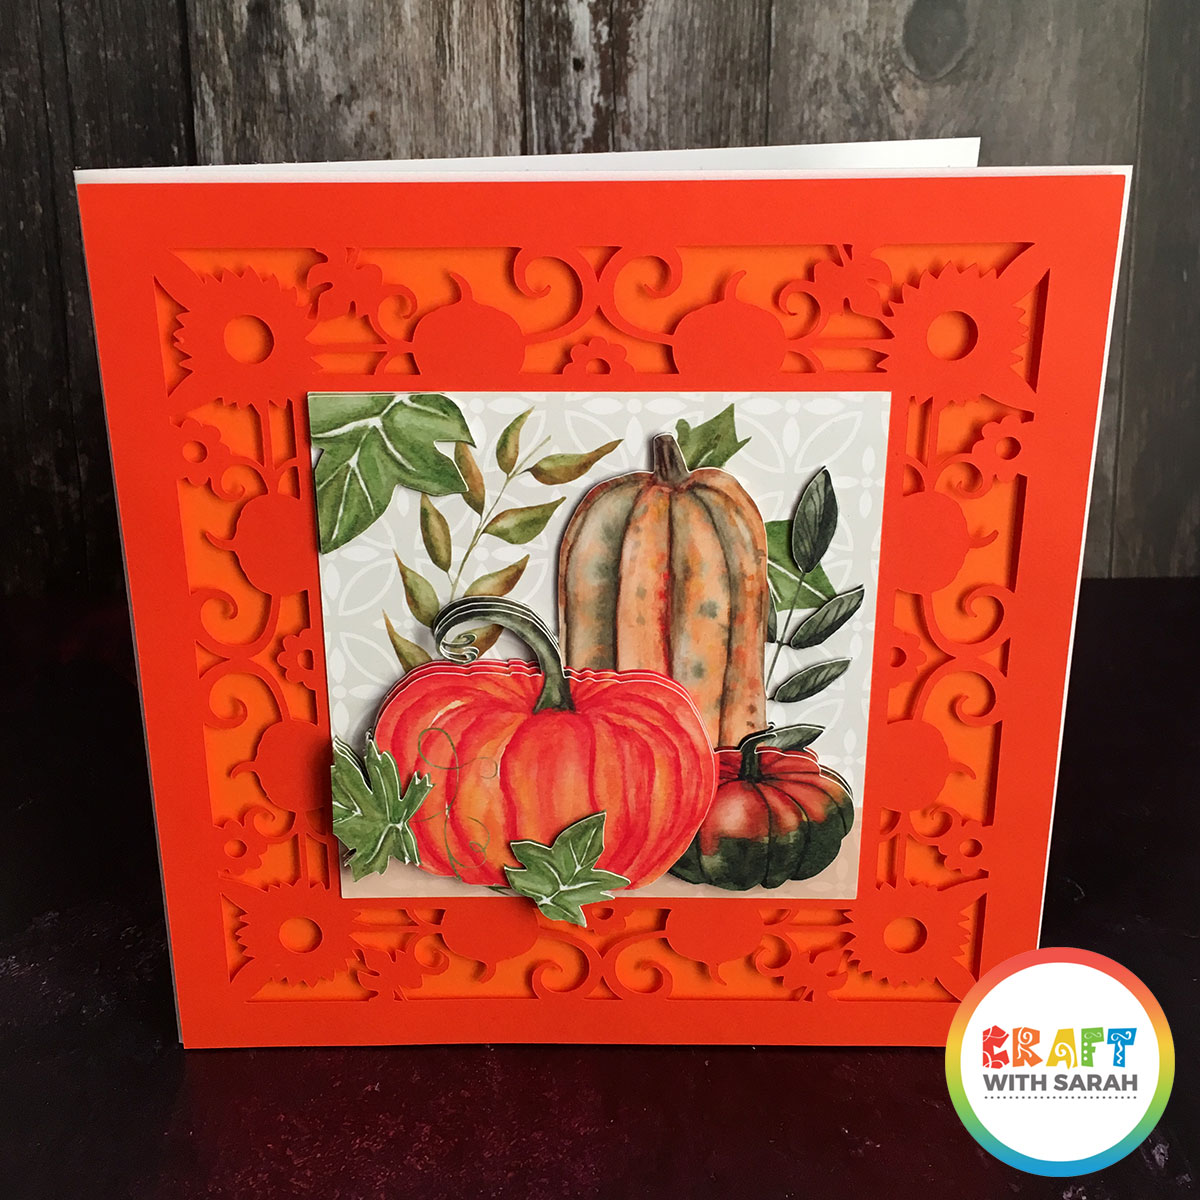
Filigree Fall Card with Pumpkins Decoupage
Make a gorgeous handmade card for fall with this filigree background to cut with a Cricut machine, plus a free pumpkin decoupage printable to go in the middle.
This card is covered in beautiful orange colours and pretty autumnal leaves.
Keep reading to get the free cutting files…
Please note that some of the links included in this article are affiliate links, which means that if you click through and make a purchase I may receive a commission (at no additional cost to you). You can read my full disclosure at the bottom of the page.
Make a gorgeous pumpkin card for Fall
I really enjoy making handmade cards, but it’s even BETTER when my Cricut does all the hard work for me!
I’ve always loved the effect of decoupage, which is where you build up an image using layers and 3D foam pads to create a dimensional effect, however I HATED having to cut all those layers out!
But now… problem solved! For this card, my Cricut cut all the leaves and pumpkins out, so all I had to do was to stick it together. Magic!
Here’s how to turn the free card making printables from this website into print-then-cut images that your Cricut will cut perfectly, every time.
Video tutorial for this project
Watch this video to see how to cut and assemble the filigree pumpkin card base, PLUS how to turn the free decoupage printable into a print-then-cut image so that you Cricut can do all the hard work for you!
A full written tutorial, along with links to the free files, is available further down on this page.
Materials list making Fall cards with Cricut
- A digital cutting machine such as a Cricut Maker or Cricut Explore
- A light grip Cricut mat
- A colour printer and glossy photo paper to print on
- Free printables (see links above)
- 8×8 inch card blank
- Two shades of orange card
- 3D foam pads
- Double sided tape
Download the Free Cutting File
Please login to your account to download this file.
Don't have an account? Register for free
TERMS OF USE:
You may sell finished, handmade physical craft items that you have made using this product but must not sell or share the digital files. Read full terms of use

How to make filigree pumpkins card with a Cricut
Here is the step-by-step tutorial on how to make this card with your Cricut machine.
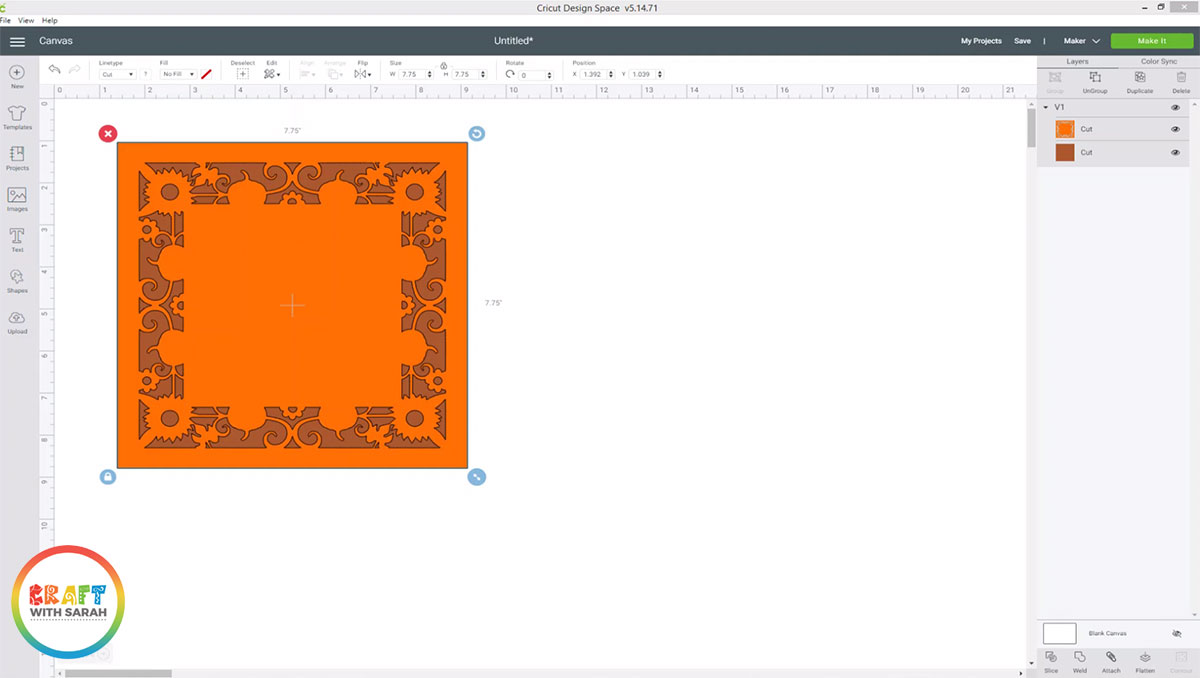
Step 1) Load in the free SVG
Load the free SVG into Design Space and resize it to fit your card.
Step 2) Upload the free decoupage printable
Go to “Upload” and upload the decoupage printable.

We need to erase all of the white on the image so that your Cricut will cut around the individual pumpkin pictures.
Choose the magic wand tool and then click on the white background to remove it. You’ll know when it’s removed because the background will get a checkerboard effect which means that it is transparent.
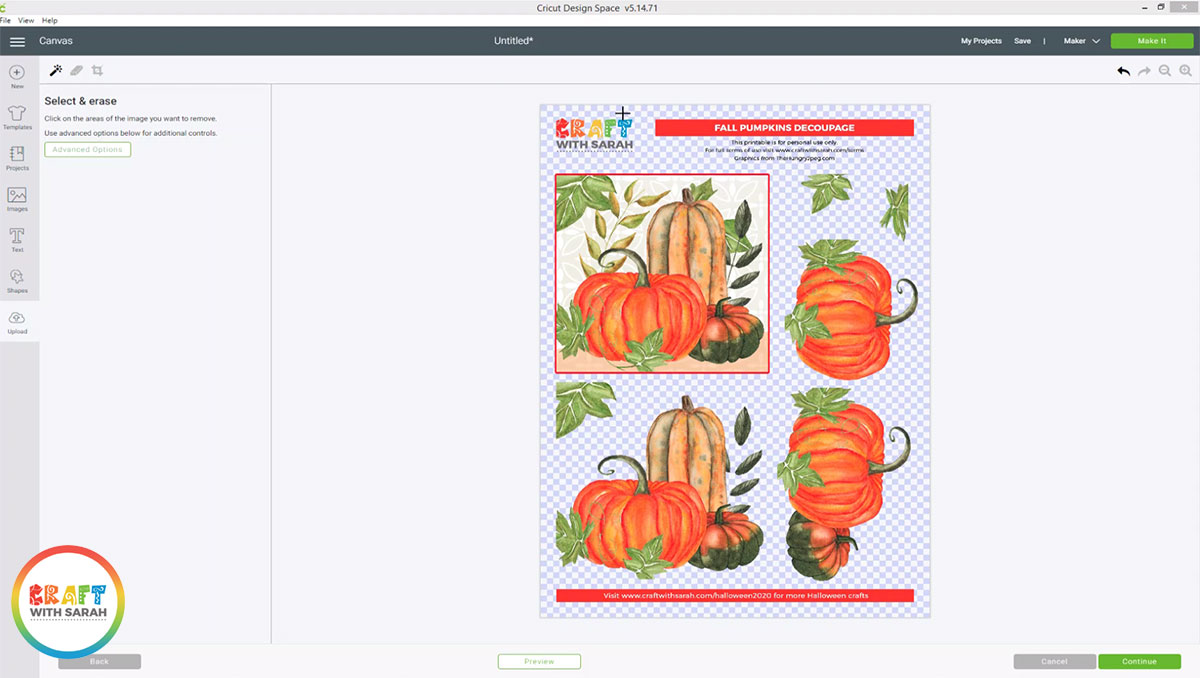
Next, select the eraser tool on the top left and erase all of the top/bottom branding so that it looks like this:
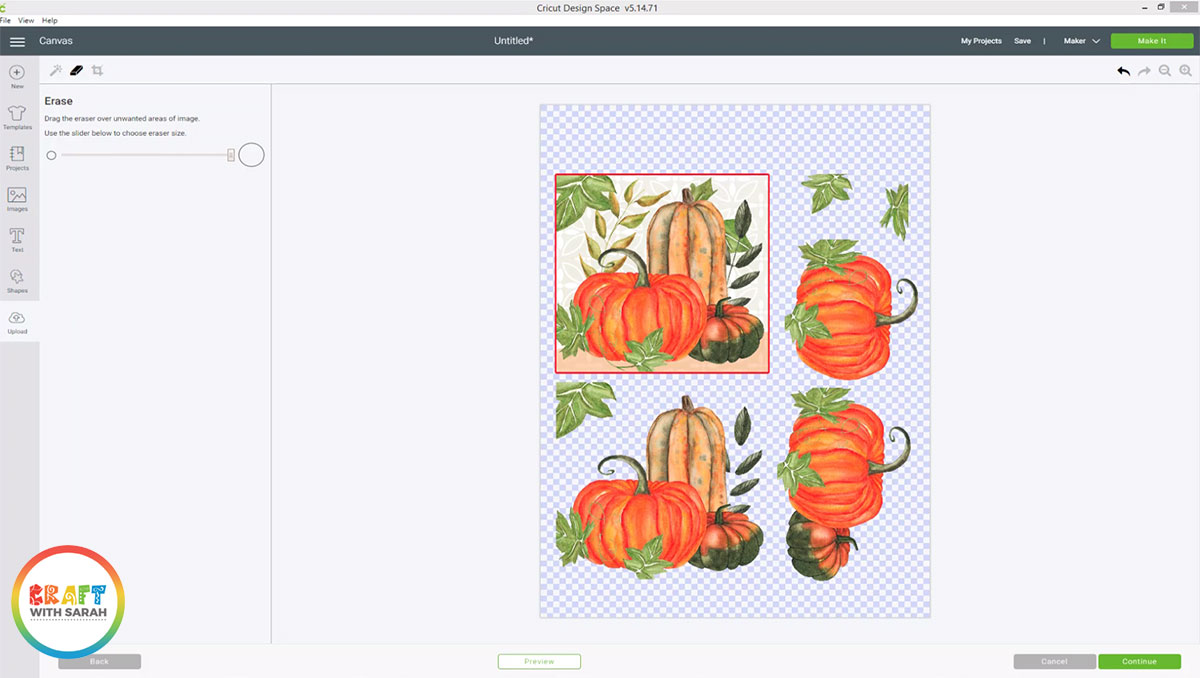
Choose the magic wand tool again and click into the red border around the square image to remove it.
When I did this, it left a few pixels of red around each of the corners, so I had to zoom in, select the eraser tool and manually erase the little bits that were left.
When your printable looks like this, it’s ready to continue:
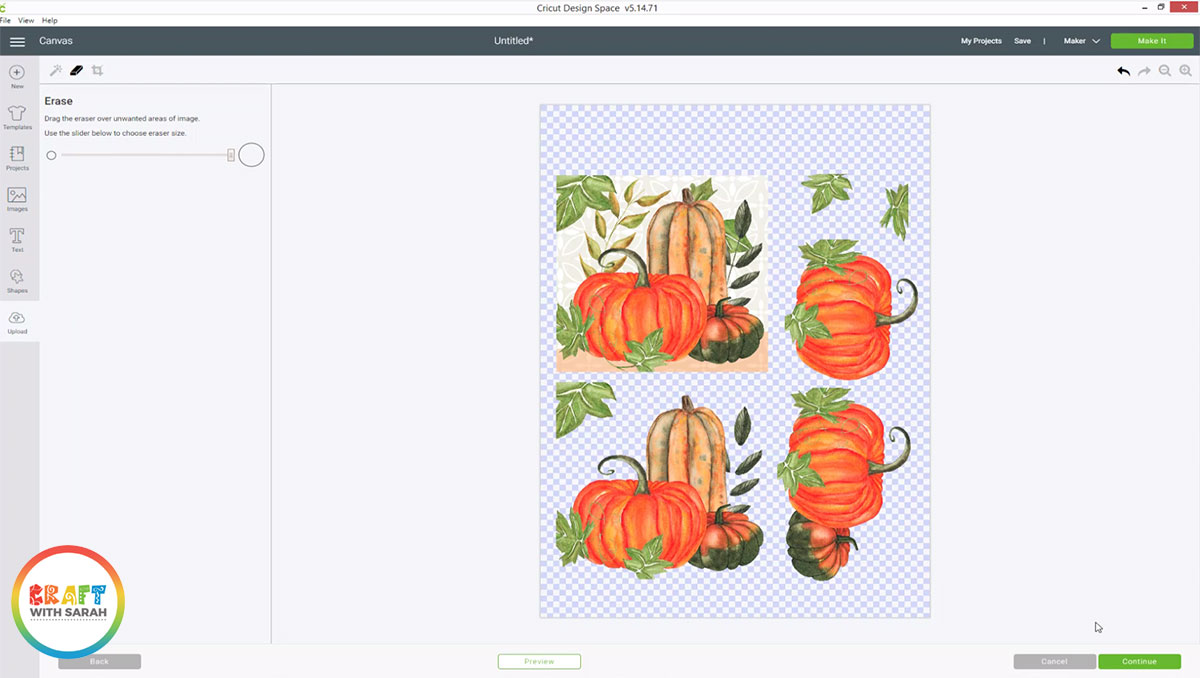
Save it as a “print then cut” image and then insert it into your project.
Step 3) Resize the decoupage printable
When it’s loaded into your project, resize the printable so that the square picture fits inside the inner square on the filigree card base.
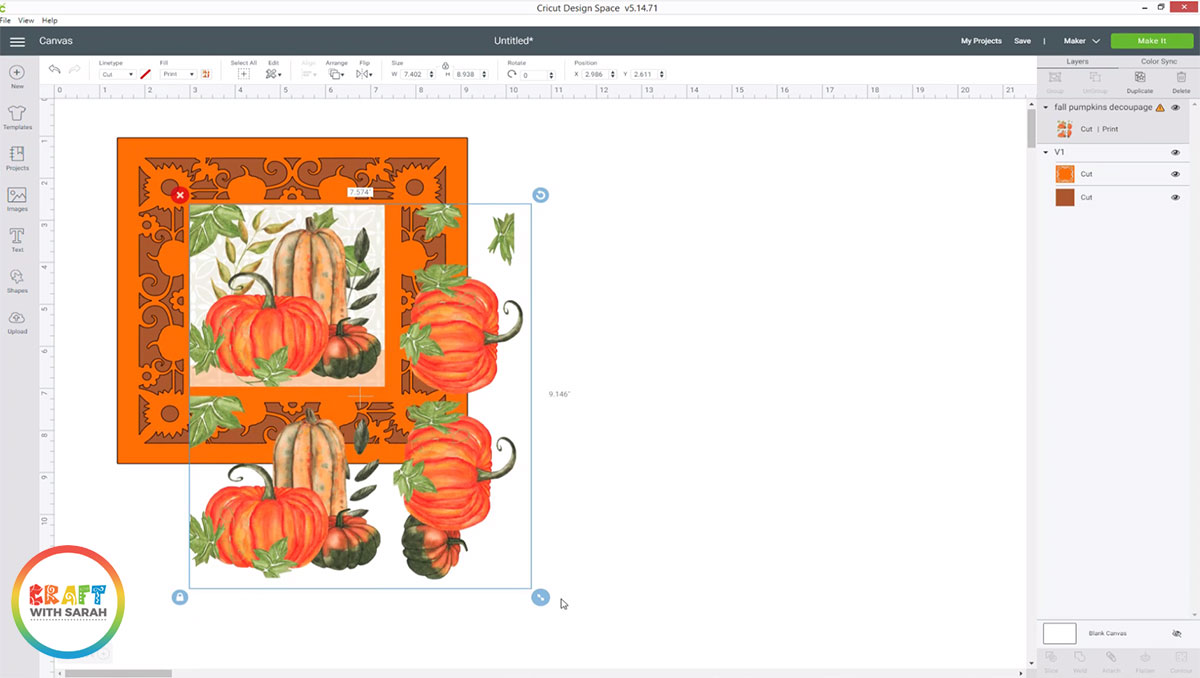
Step 4) Prepare the print-then-cut image
If you see a warning triangle in your layers panel on the decoupage layer, it means your image is too big for print-then-cut.
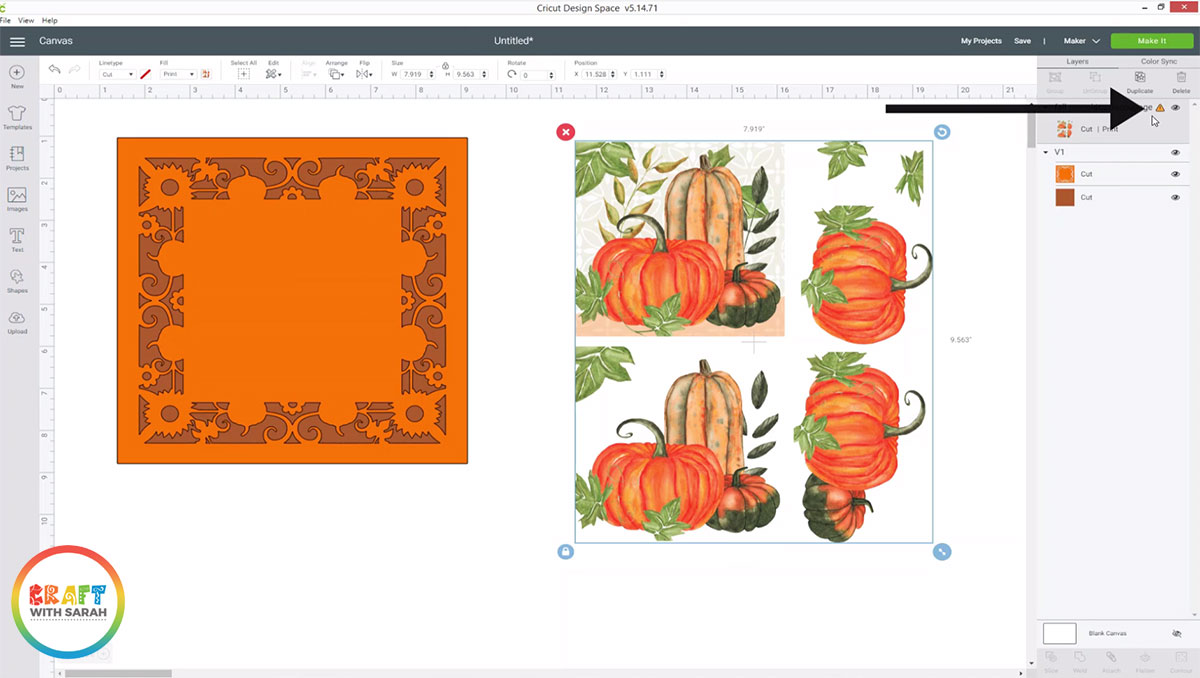
If this is the case, draw some rectangles over the bottom half of the printable.
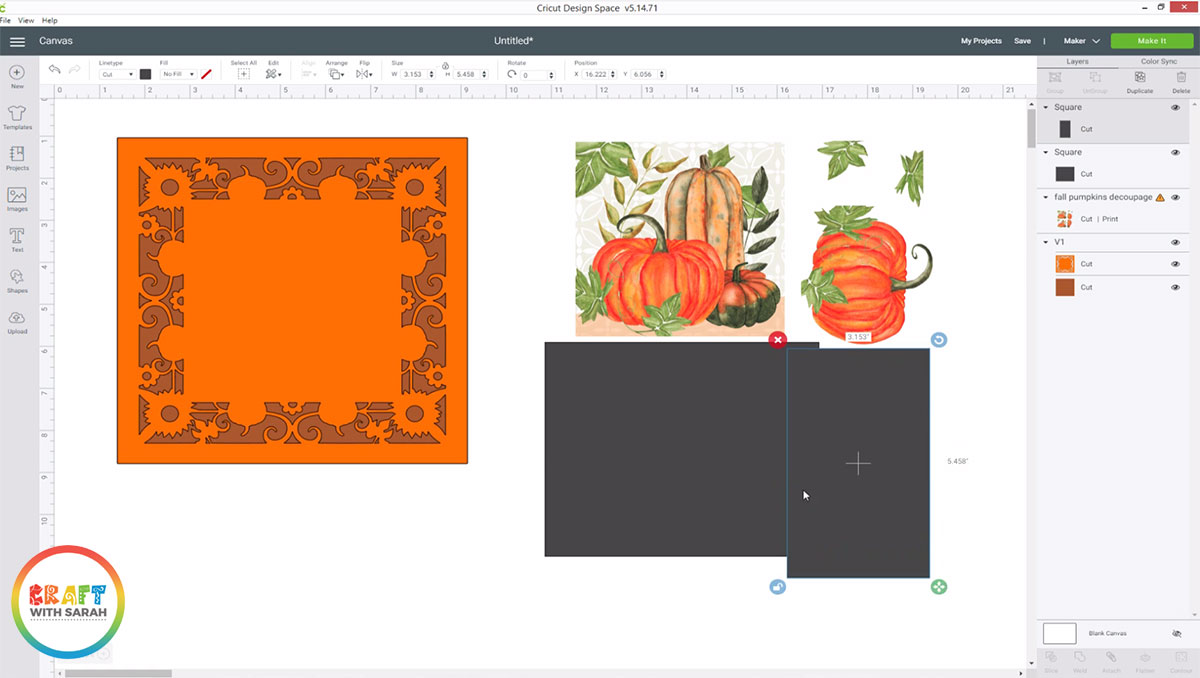
When you’ve covered the bottom images, select all of the rectangles you’ve used and click “Weld” to join them together.
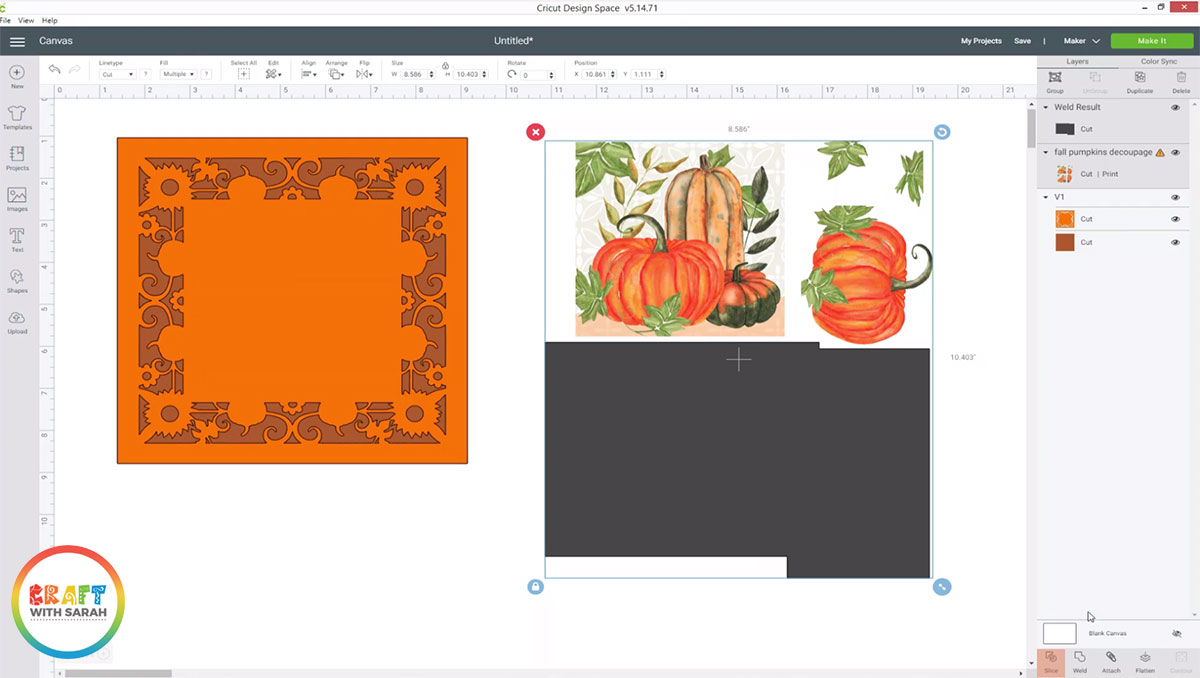
Next, select your welded rectangles and the decoupage layer and click “Slice”.
Delete the first two grey rectangle “Slice results” and you’ll be left with the decoupage printable which has now been split into two:
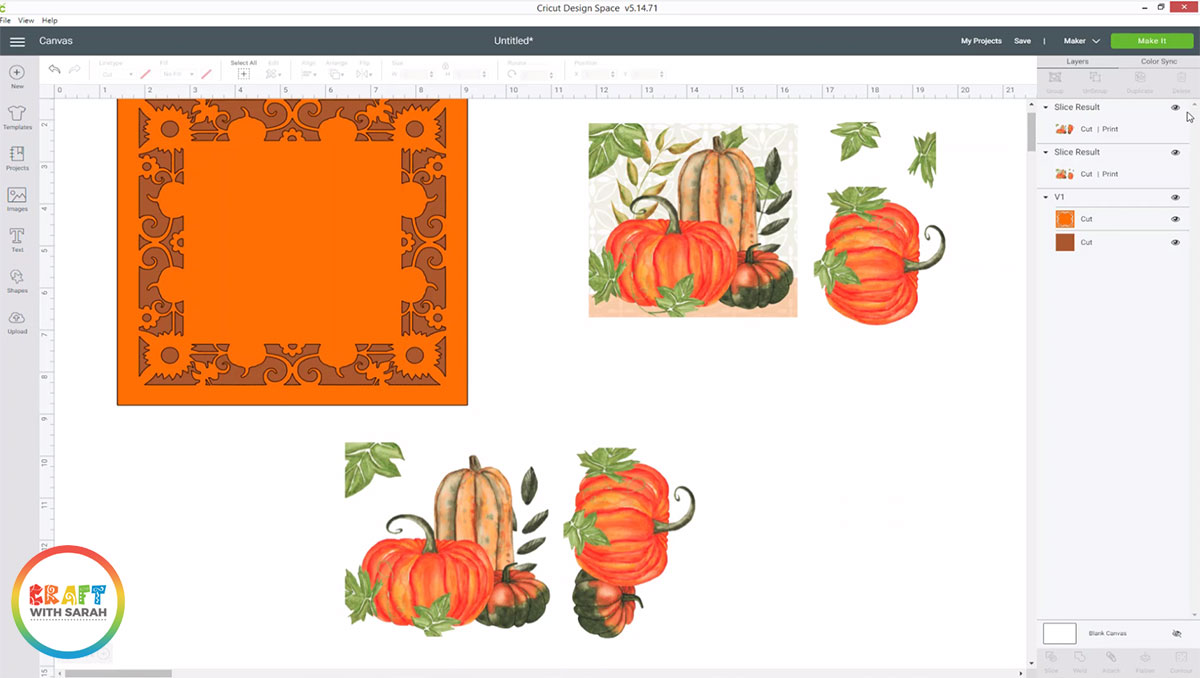
Step 5) Print and cut everything out
Click “Make It” and follow the steps to cut the filigree card and print-then-cut the decoupage sheet.
Here is a video which walks through how to print and cut on a Cricut:
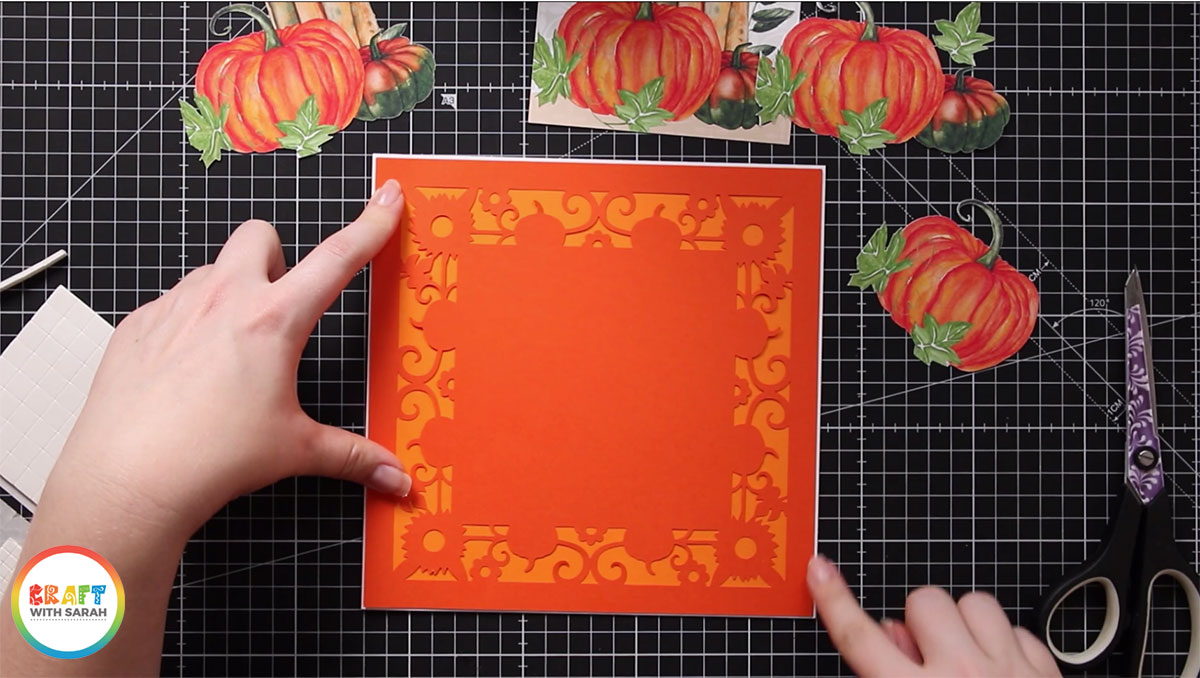
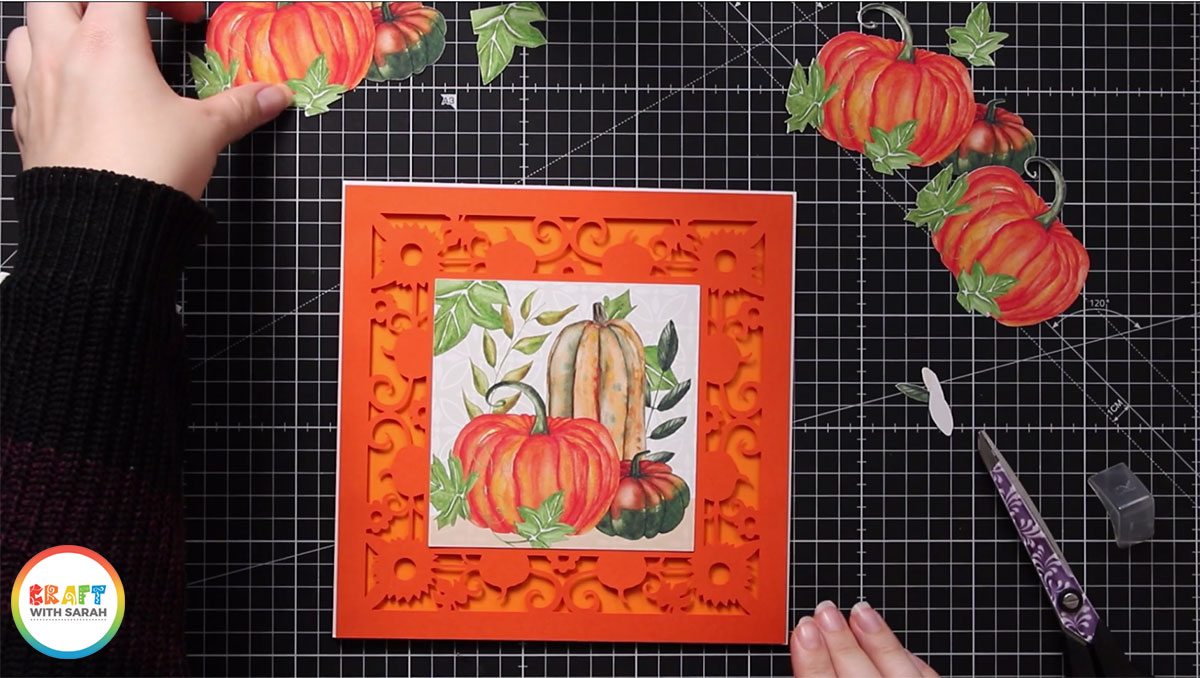
Step 6) Assemble the base card
Glue the large solid square to the front of your card base.
Put foam pads on the back of the filigree cutout piece and stick that on top of the other square.
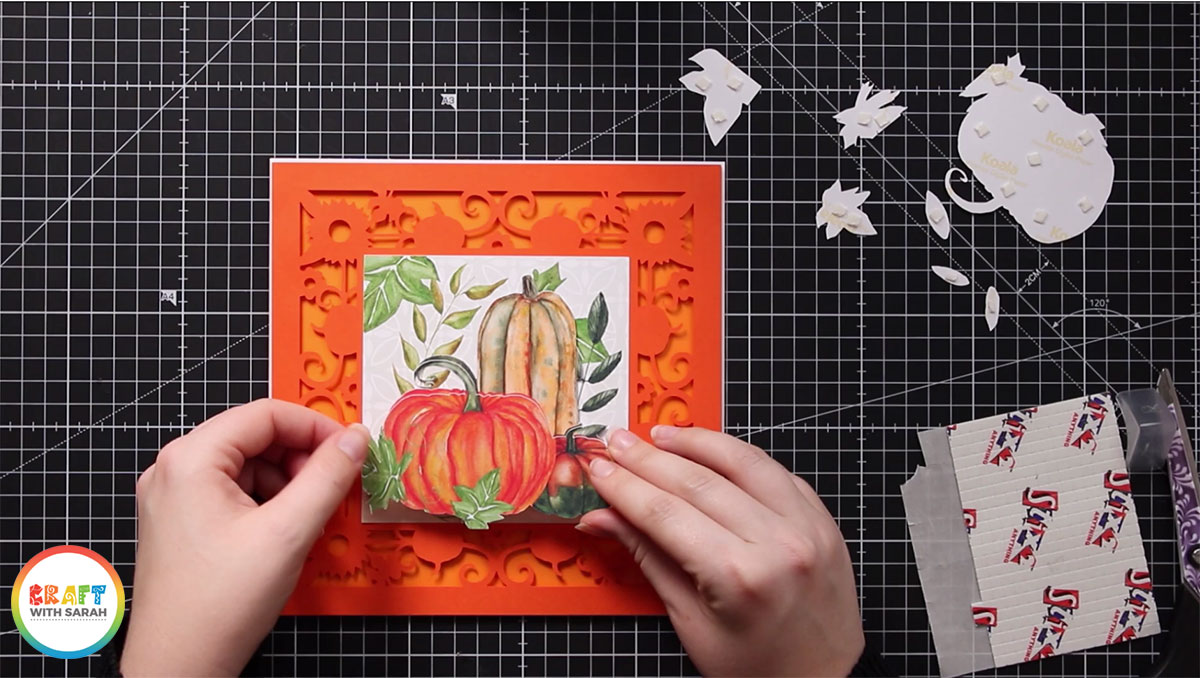
7) Assemble the decoupage layers
Stick the square pumpkin image into the middle of your card using double-sided tape.
Build up the decoupage layers by putting foam pads on the back of each layer and sticking them on to the design in size order (stick the largest layers on first).
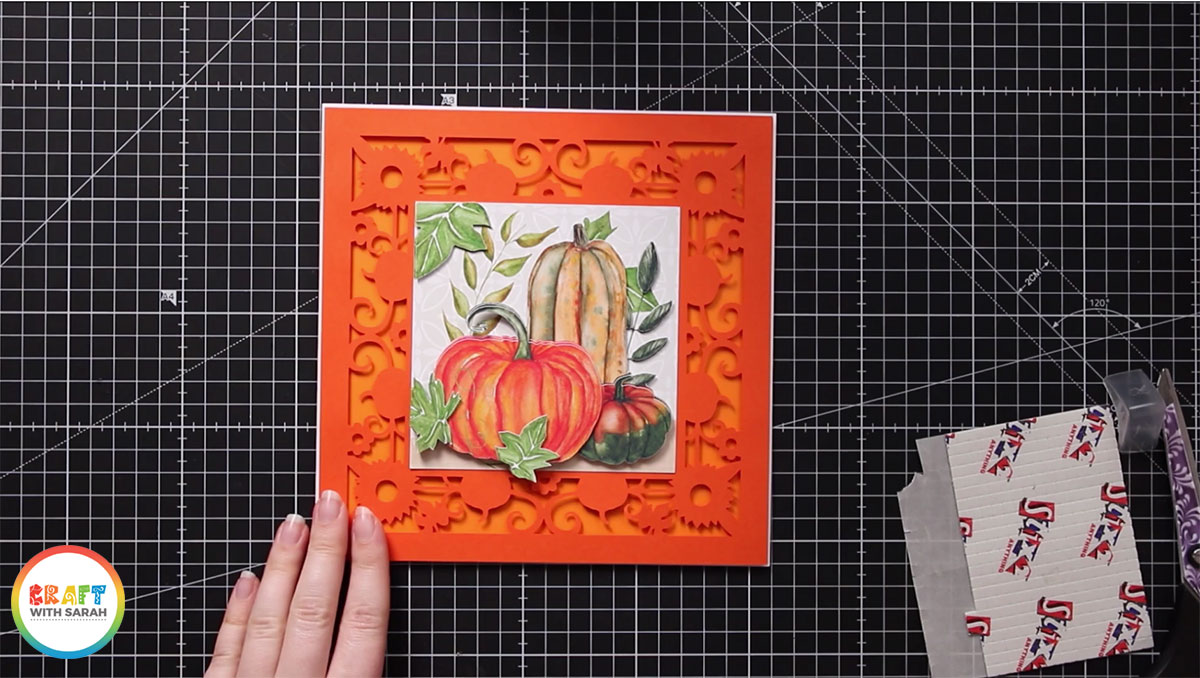
When you’re done, you’ll be left with a lovely 3D effect to the pumpkins that really makes them appear to “jump” off of the page.
I hope that you enjoyed this tutorial on how to make this beautiful fall themed card with your Cricut machine.
If you missed the links to the free SVG and printable, scroll up this post to find the links.
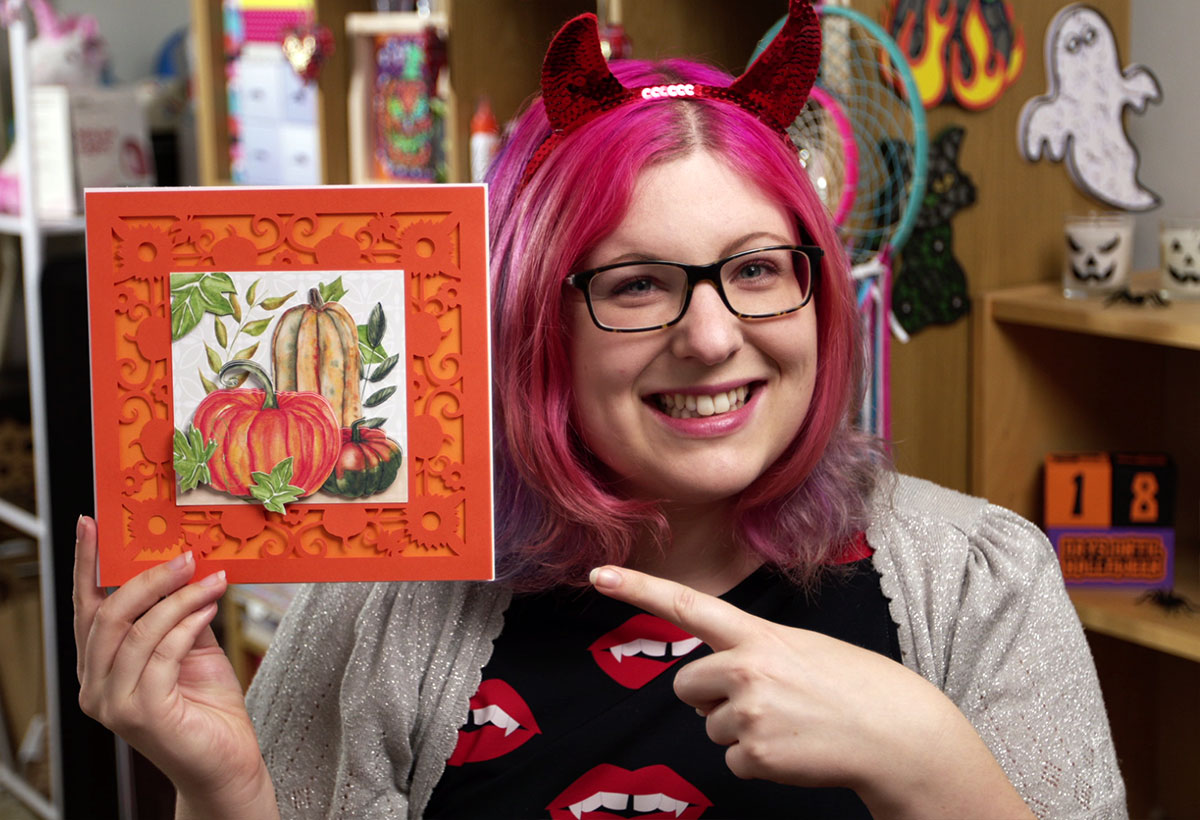
Happy crafting,
Sarah x