
Make Easy Halloween Lanterns with your Cricut!

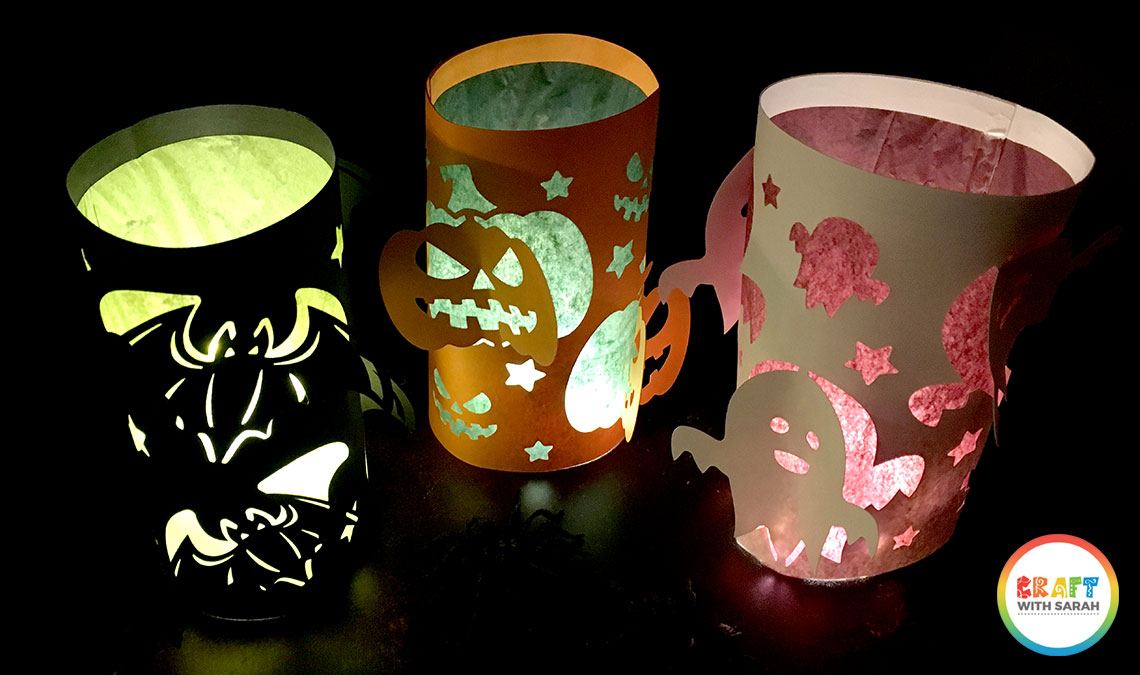
Light your home up spooky-style with these cute little Halloween lanterns which you can cut using your Cricut machine!
These adorable little lights will make your home come to life this October. Fill them with battery-powered candles or fairy lights and watch them shine!
Please note that some of the links included in this article are affiliate links, which means that if you click through and make a purchase I may receive a commission (at no additional cost to you). You can read my full disclosure at the bottom of the page.
Make your own DIY Halloween luminaries
The thing I LOVE about these lanterns is that they are SO easy to put together but they look AMAZING when they are all lit up at night.
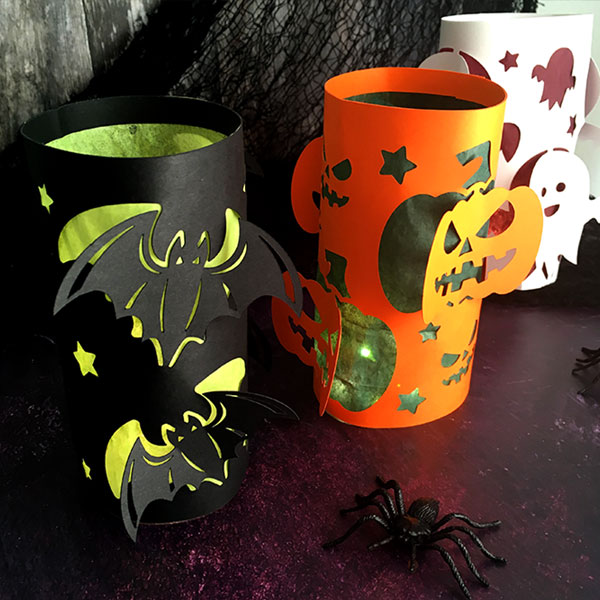
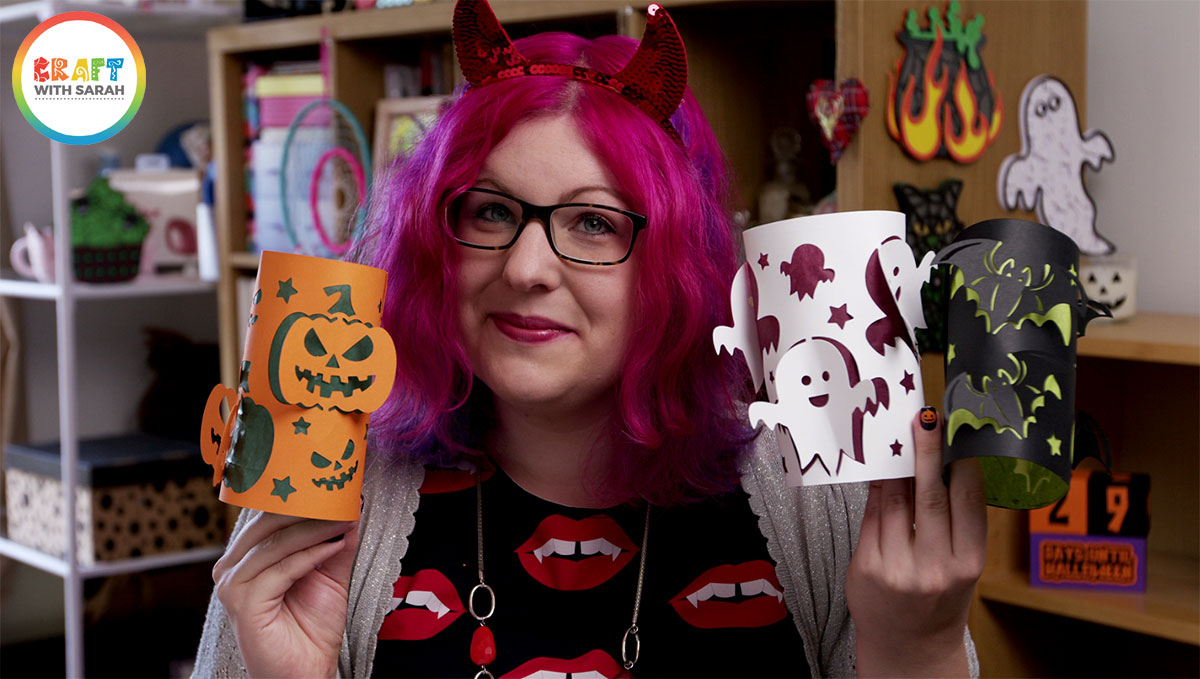
There are three separate designs to choose from: pumpkins, ghosts and bats.
Why not make all three and create a little luminary collection in your living room?
Video tutorial
Watch this step-by-step video to find out how to make these cute Halloween luminaries.
Materials list for Halloween paper lanterns
- A digital cutting machine such as a Cricut Maker or Cricut Explore
- A light-grip Cricut mat
- Free SVG cutting file (choose from pumpkins, ghosts or bats – see the download box below)
- Coloured card (light card works better than heavier)
- Double sided tape
- Glue (I use tacky glue which is quick to dry and it dries clear)
- Tissue paper
- Fairy lights or a battery powered candle (I found these lights work best)
Free luminary lantern SVGs
There are not one, not two but THREE different Halloween luminary designs to choose from.
Download the Free Cutting File
Download the free Halloween luminary SVG files using the buttons below. A pumpkin, ghost and bat design are all included.
Please login to your account to download this file.
Don't have an account? Register for free
TERMS OF USE:
You may sell finished, handmade physical craft items that you have made using this product but must not sell or share the digital files. Read full terms of use
How to make Halloween lanterns with a Cricut
Here are some step-by-step instructions for assembling the Halloween lanterns.
I think you’ll be surprised at how easy they are!
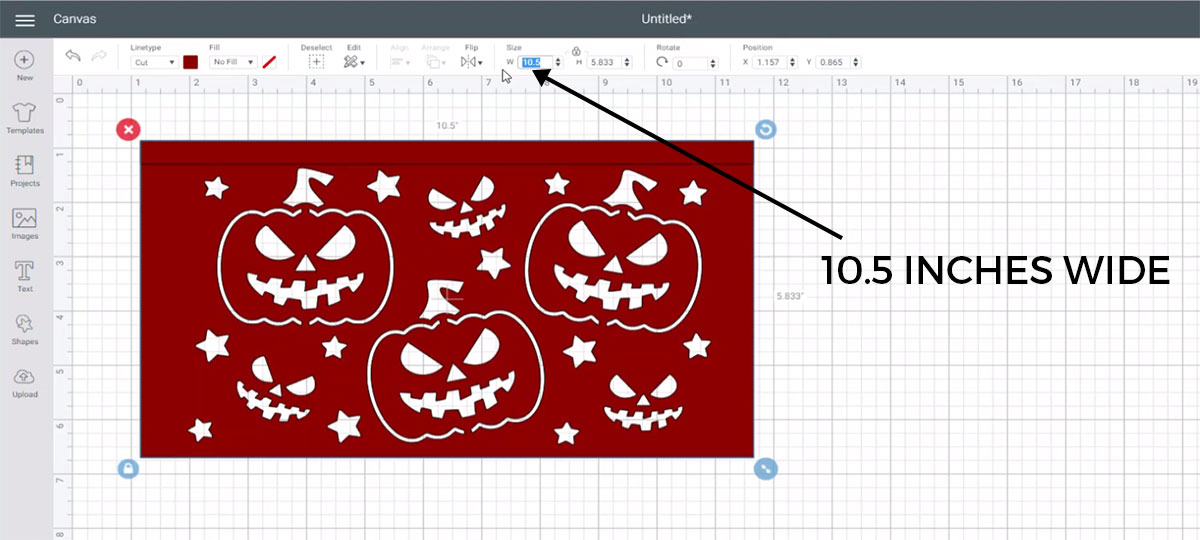
Step 1) Cut the free SVG designs
Download the free SVGs and open your chosen design in Cricut Design Space.
Make sure the luminary design is set to 10.5 inches in width.
You can make it a little smaller or larger if you want to, but I found that 10.5 inches wide makes a lovely sized lantern.
When you’ve checked the size, cut out the design onto lightweight card (I used 160gsm card).
Step 2) Measure the tissue paper
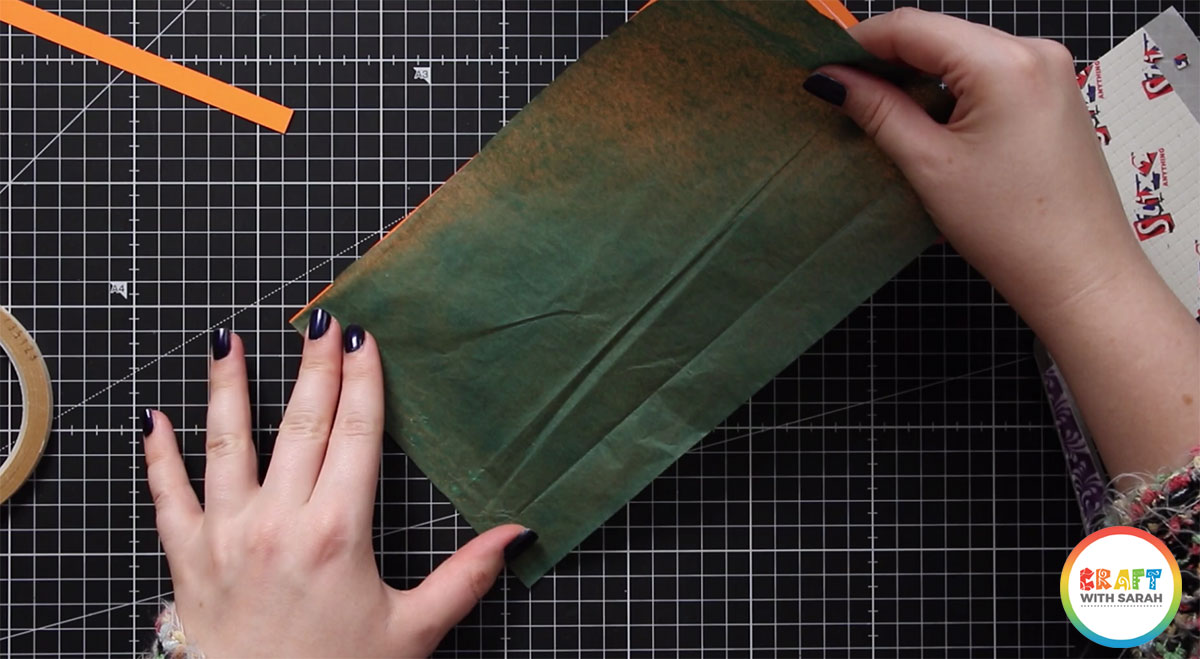
Take a piece of coloured tissue paper and draw around the edge of the lantern card, then cut it out.
I did think about trying to cut this with my Cricut, but I was worried that the tissue paper would tear when trying to get it off the mat.

Step 3) Stick the tissue paper to the back of your luminary
Use tacky glue to stick the tissue paper to the back of the luminary card.
Try to get the tissue paper flat, and do NOT put glue inside the shapes that are going to be folded outwards (pumpkins/ghosts/bats) as otherwise you won’t be able to turn them outwards at the end.
If any of your tissue paper goes over the edge of the card, trim it with a pair of scissors.
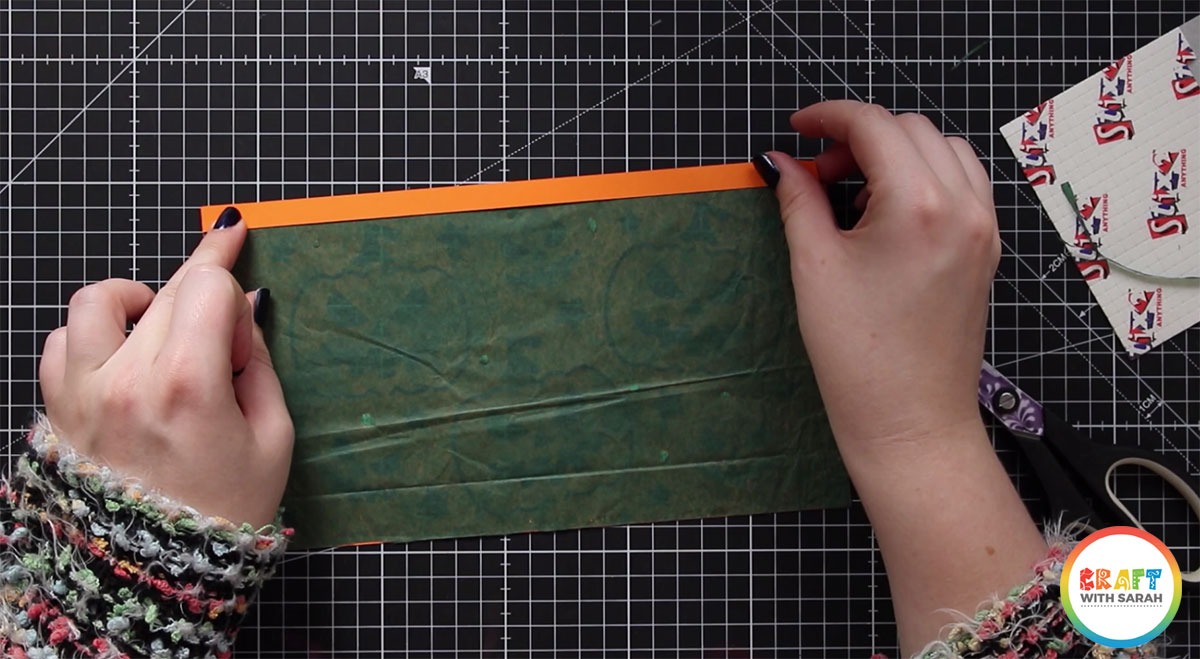
Step 4) Neaten up the top
Glue the thin strip of card which you cut with your Cricut machine to the top of the tissue paper. This is to give it a neat edge when you look at the finished lantern.
Step 5) Assemble the luminary
Place a strip of double sided tape all the way down the right-hand side of the FRONT of the luminary design.
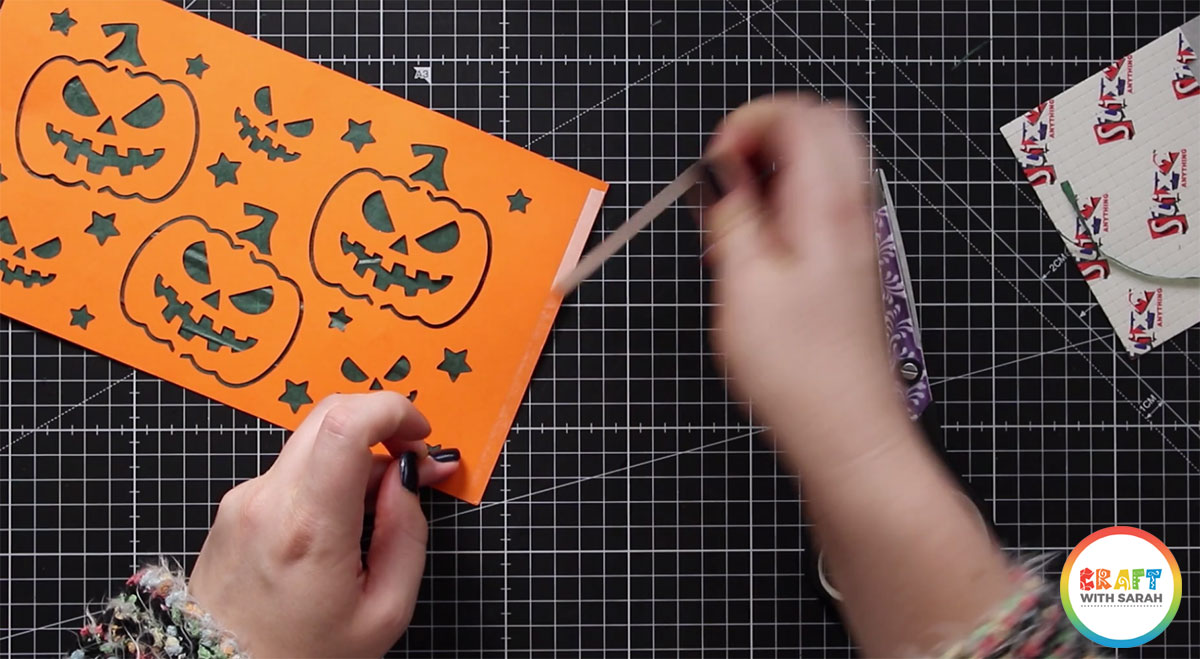
Twist the lantern into a circular shape and stick the two edges together.
Press down the double-sided tape quite firmly to ensure a good stick.
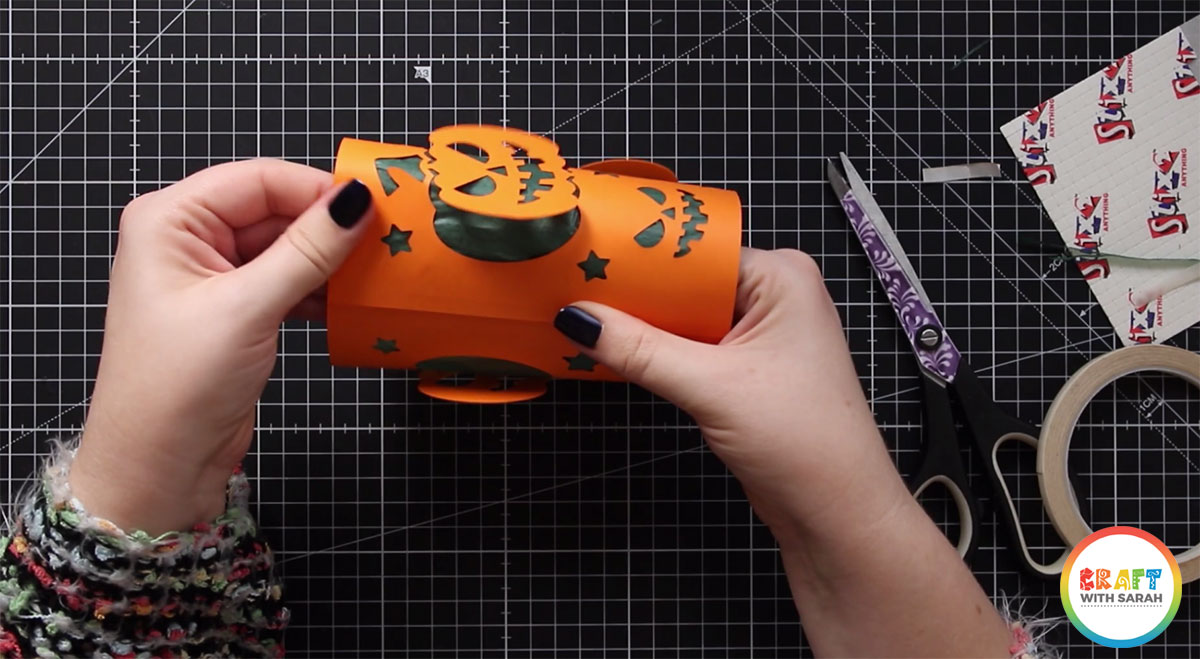
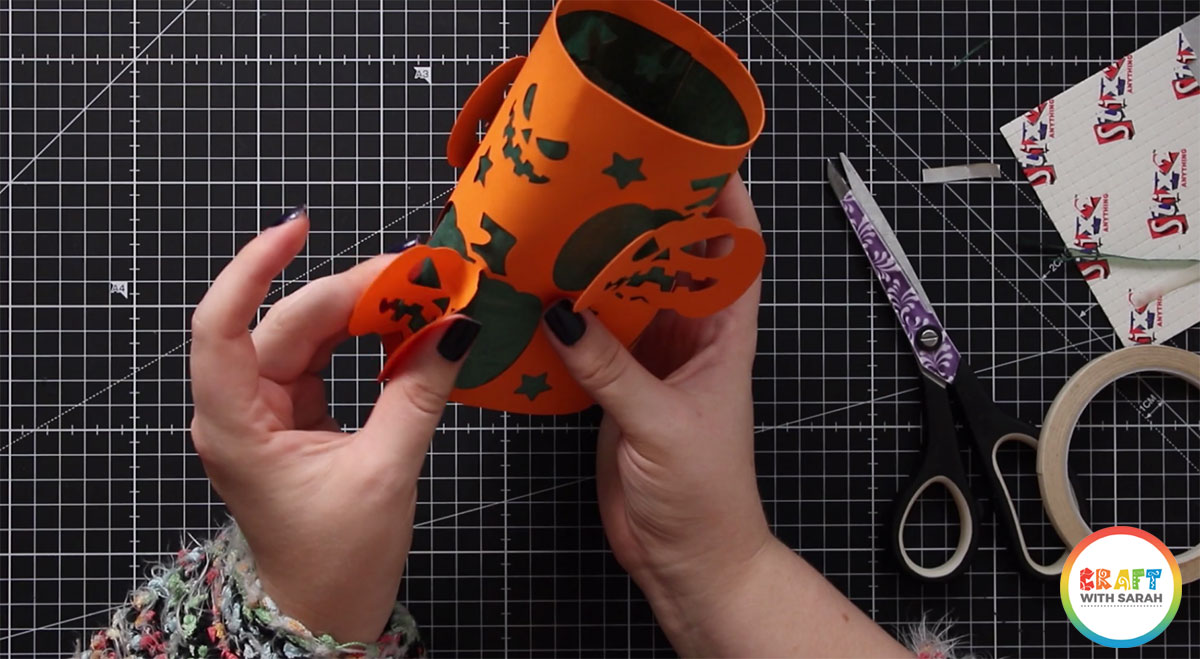
Step 6) Create the 3D shapes
Gently bend together the pictures/shapes to make them “pop out” from the main lantern.
You’re not trying to actually fold the card to create crease lines, but just to give it a little bend.
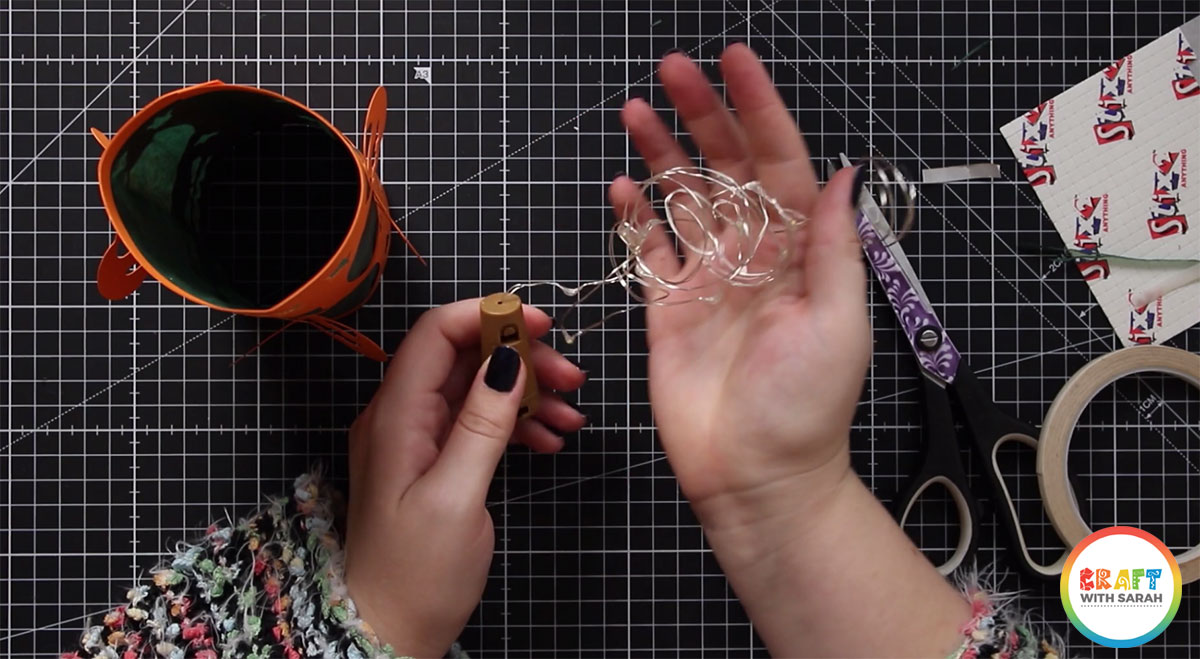
Step 7) Light it up!
Your lantern is now ready to be lit up!
Use battery powered candles or fairy lights. Do NOT use real candles as that would be a big fire risk!!
I found that the best lights to use are these “bottle top” fairy lights as they give off a really bright glow and they are nice and small to fit inside the lantern.
And there you have it, your paper lanterns for Halloween are all finished!
I hope that you enjoy making these cute little luminaries. Which one is your favourite? Let me know in the comments!
Happy crafting,
Sarah x