
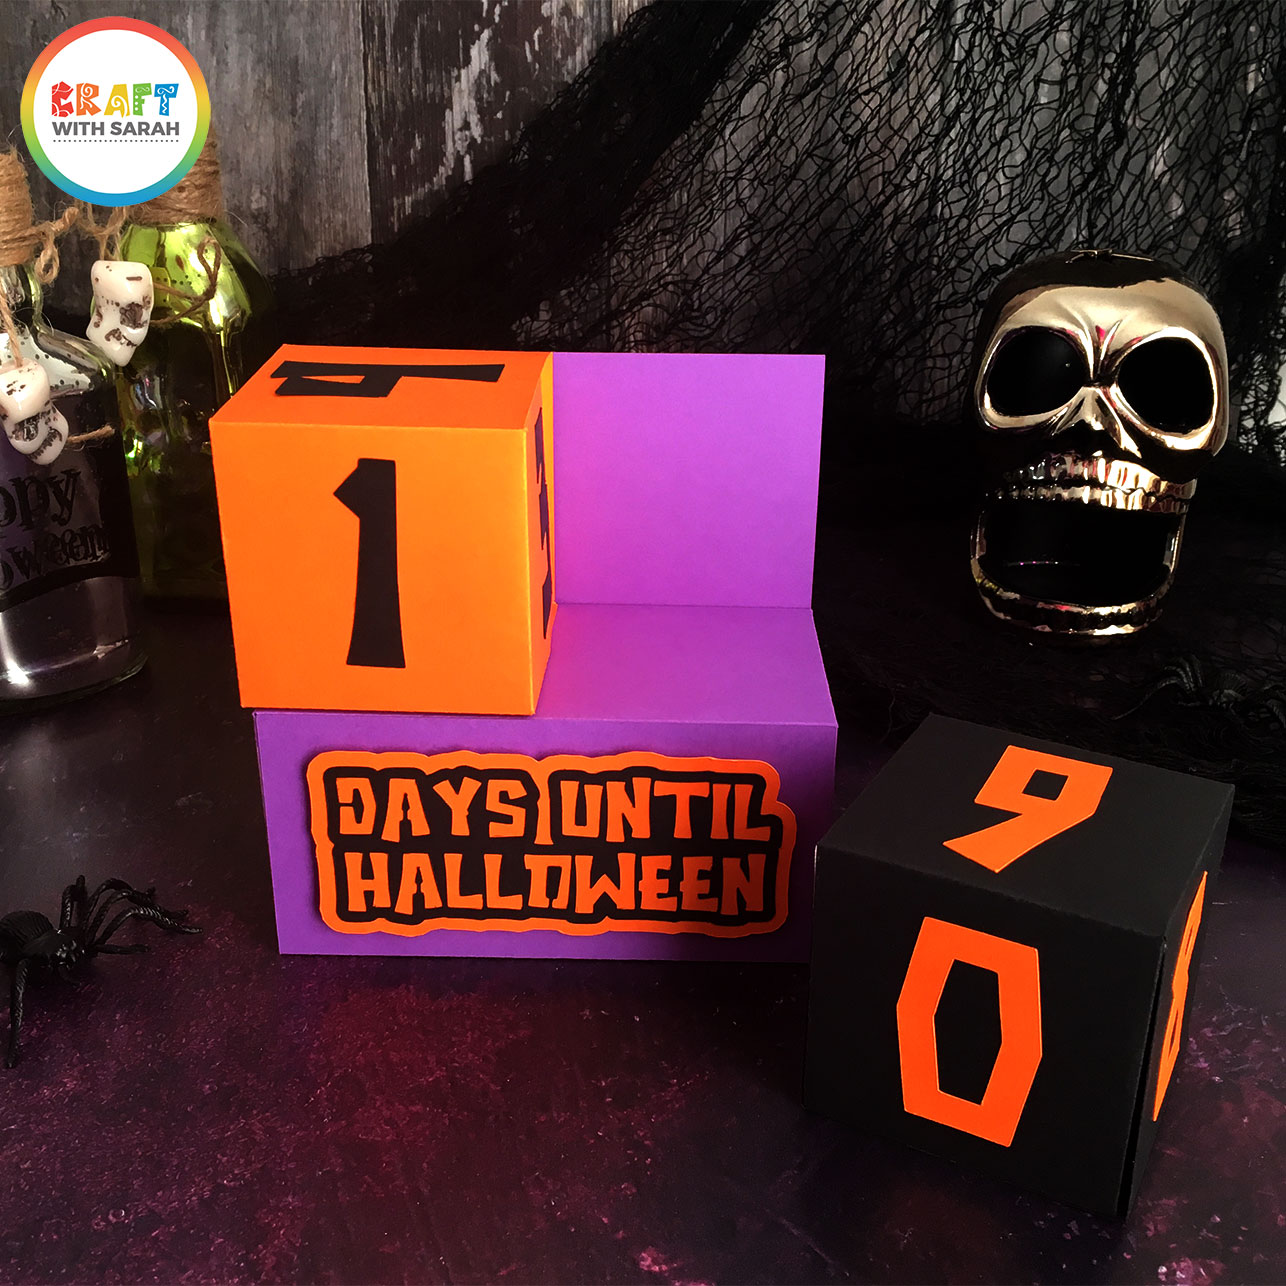
Easy DIY Halloween Countdown Cubes
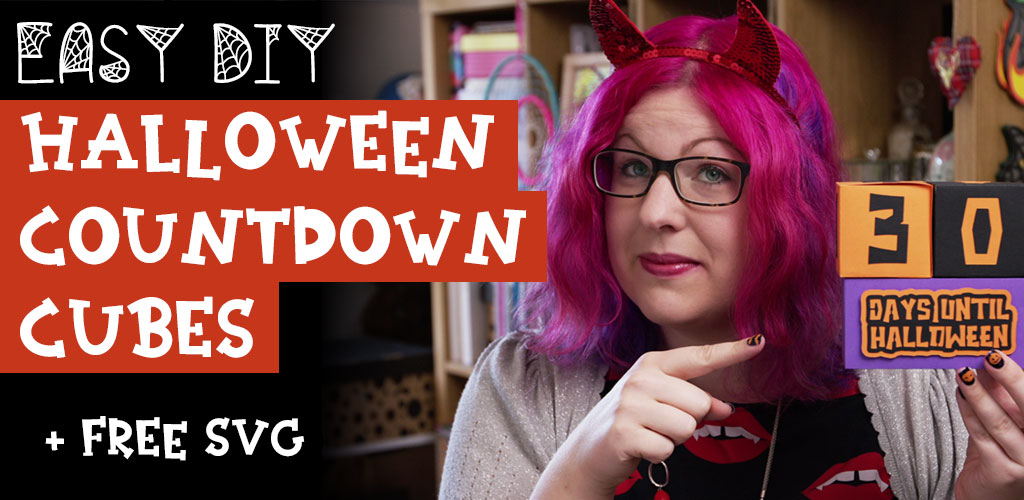
Track the days until the spookiest Holiday of the year with these easy DIY countdown cubes.
I LOVE building excitement for the holidays, and Halloween is no exception! Build suspense as the days creep ever closer to Halloween with this fun countdown cube craft project.
All you need to do each day is turn the cubes around to show the new countdown date on the front.
Contents:
Please note that some of the links included in this article are affiliate links, which means that if you click through and make a purchase I may receive a commission (at no additional cost to you). You can read my full disclosure at the bottom of the page.
About this project: Halloween countdown cubes
This is a fairly simple project to make as you only need basic crafting supplies: coloured card, double-sided tape and glue.
If you’re using 12×12 inch paper to cut the shapes from then you need one sheet each of three colours. If you’re using A4 (as I did), then you’ll need one sheet of orange, one sheet of black and two sheets on purple.
The free countdown cubes SVG is provided so that you can cut the design on your Cricut machine.
Video tutorial
Watch this step-by-step video to see how to load the free SVG into Design Space and make the necessary steps to turn some of the cut lines into score lines before you click “Make It”.
Then, see how to stick all the cutouts together to form the finished countdown cubes!
Materials to make DIY Halloween Countdown Calendar
- A digital cutting machine such as a Cricut Maker or Cricut Explore
- A sticky light-grip Cricut mat
- Free Countdown Cubes SVG cutting file (see box below)
- Coloured card (I used 160gsm card in orange, black and purple)
- Double sided tape
- Glue (I use tacky glue which is quick to dry and it dries clear)
- 3D foam pads (optional)
Download the Free Cutting File
Download the free SVG to make these fun Halloween countdown cubes.
Please login to your account to download this file.
Don't have an account? Register for free
TERMS OF USE:
You may sell finished, handmade physical craft items that you have made using this product but must not sell or share the digital files. Read full terms of use
Part 1: Design Space tutorial
Below are step-by-step instructions on how to make these Halloween countdown cubes.
Step 1: Load the SVG into Design Space
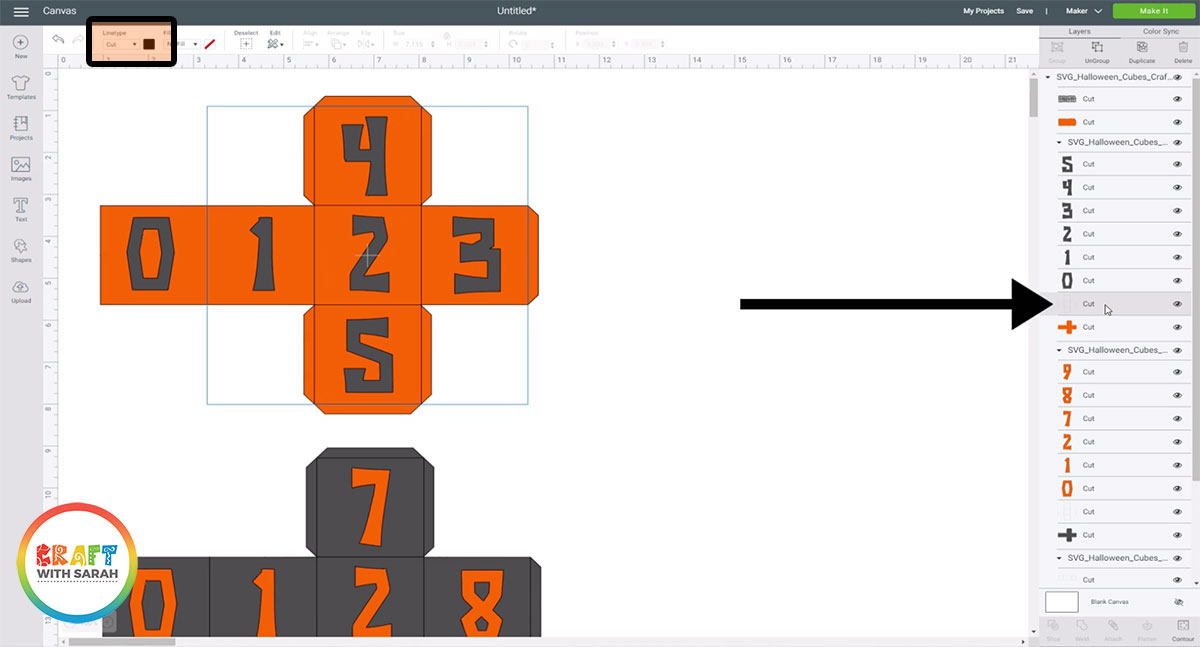
The SVG design should load at the correct size in Design Space, but it’s a good idea to check – just in case!
Click on the design and make sure that the width is set to 10 inches. The height will be approximately 36.555 inches (this is because all the layers are “grouped” so it’s counting the entire height of all layers – don’t worry, it will cut on your usual 12×12 inch Cricut mats!)
Step 2: Set up the score lines
When you upload an SVG file into Design Space, it doesn’t know which lines you want to score instead of cut so you need to manually set that up.
The images below show the layers which you need to convert to score lines.
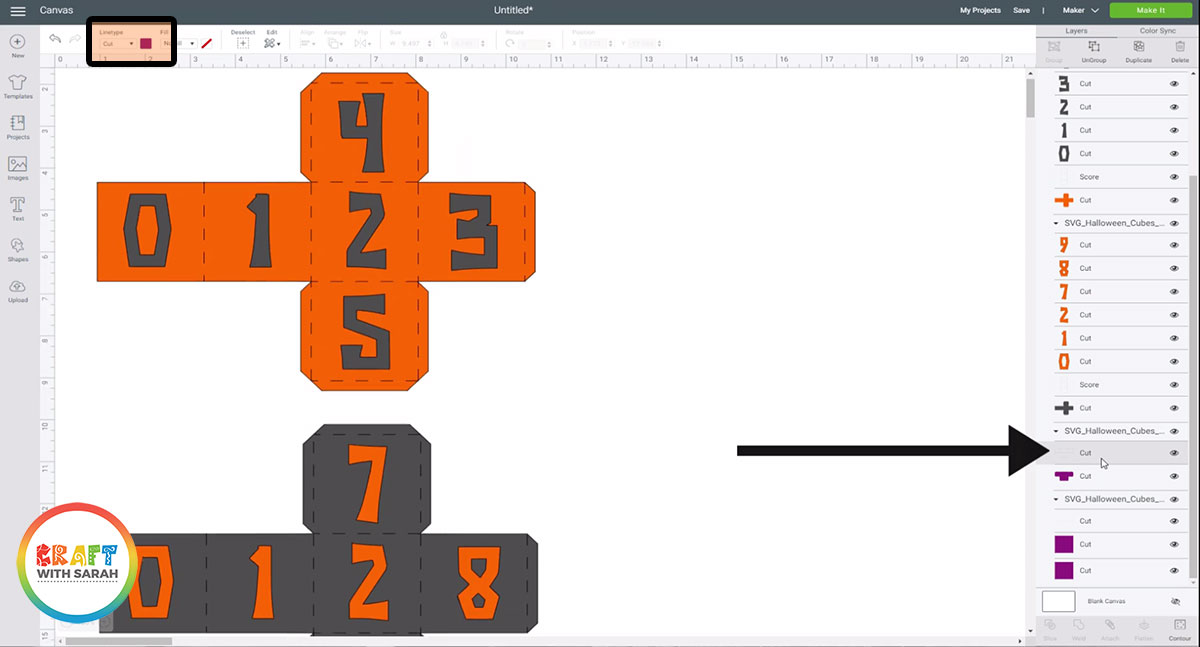
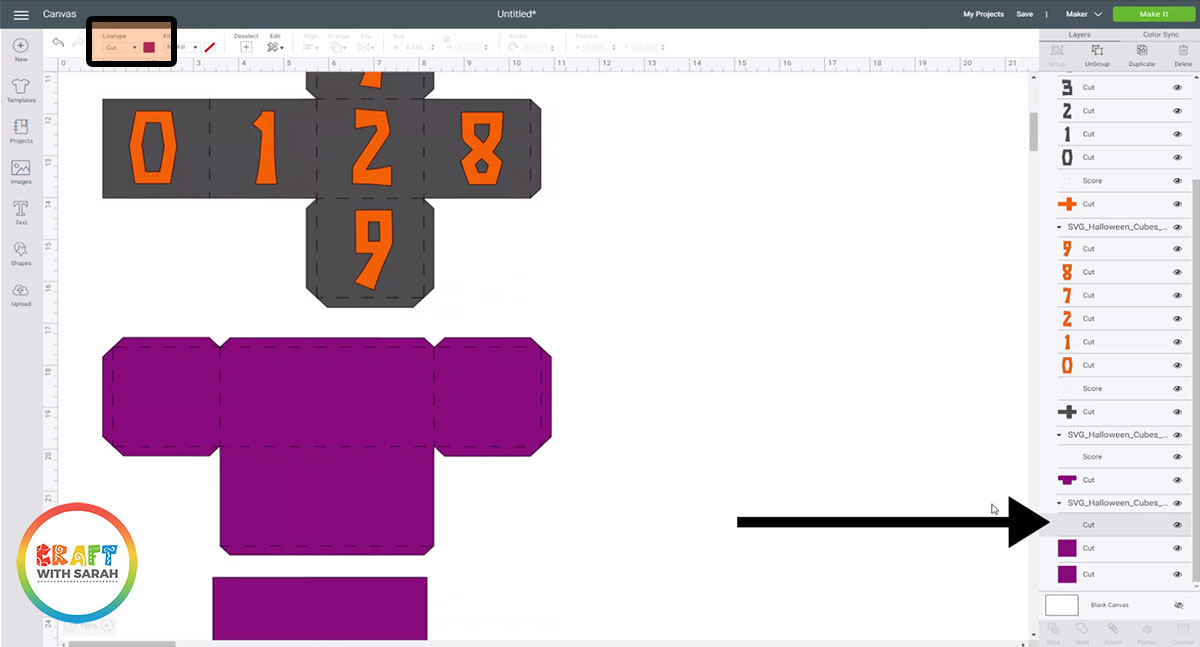
To convert a cut line to a score line, left-click on the layer in the Layers panel (shown with the black arrows) and then look for the dropdown menu called “Linetype” near the top-left of your Design Space screen.
In the dropdown, change the line from “Cut” to “Score. You can tell that it’s worked because the lines will change to “dashed” rather than a solid line.
You need to repeat that step for ALL of the layers shown in the images below. There are four layers to convert in total.
First layer to change:
Second layer to change to “Score”:
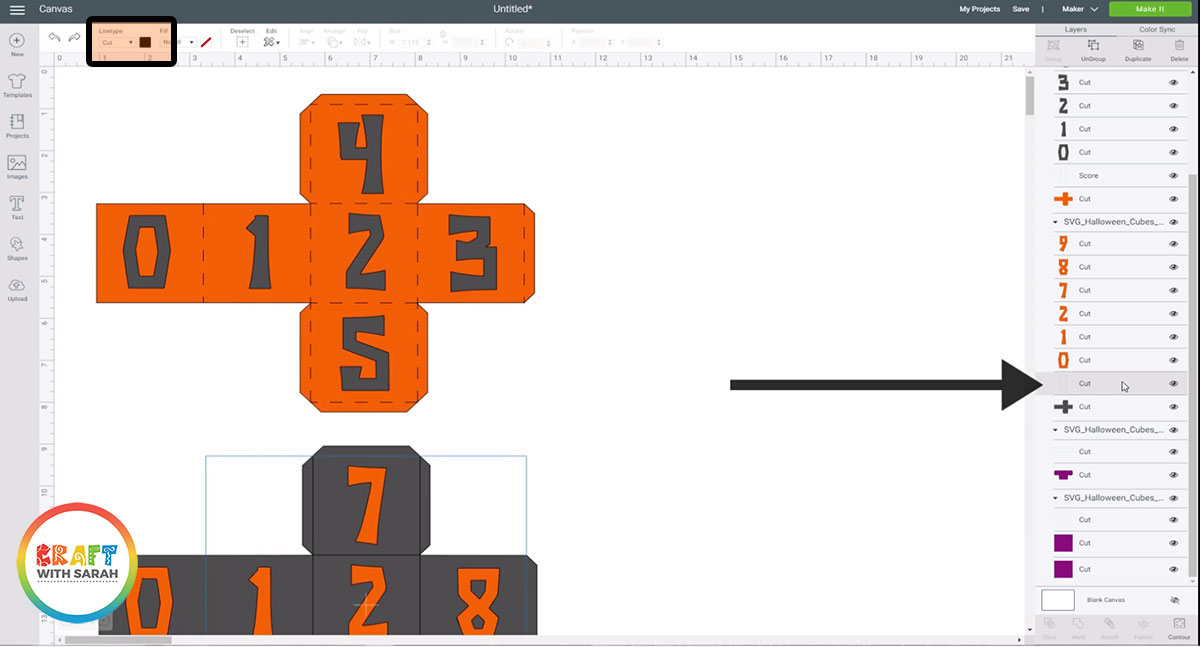
Third layer to change to “Score”:
Fourth layer to change to “Score”:
Step 3: Attach the score lines to the shapes underneath
Now that we’ve converted our score lines, we need to use the “Attach” tool to attach the score lines to the coloured shapes underneath.
If you don’t do that then the score lines will be scored on a separate piece of card to the shapes, which isn’t what we want – we need to score the shapes that will be folded up into the cubes and stand for this project.
The first step towards achieving this is to “Ungroup” all of the layers. Left-click on the very top part in the layers panel which contains the filename of the SVG that you uploaded.
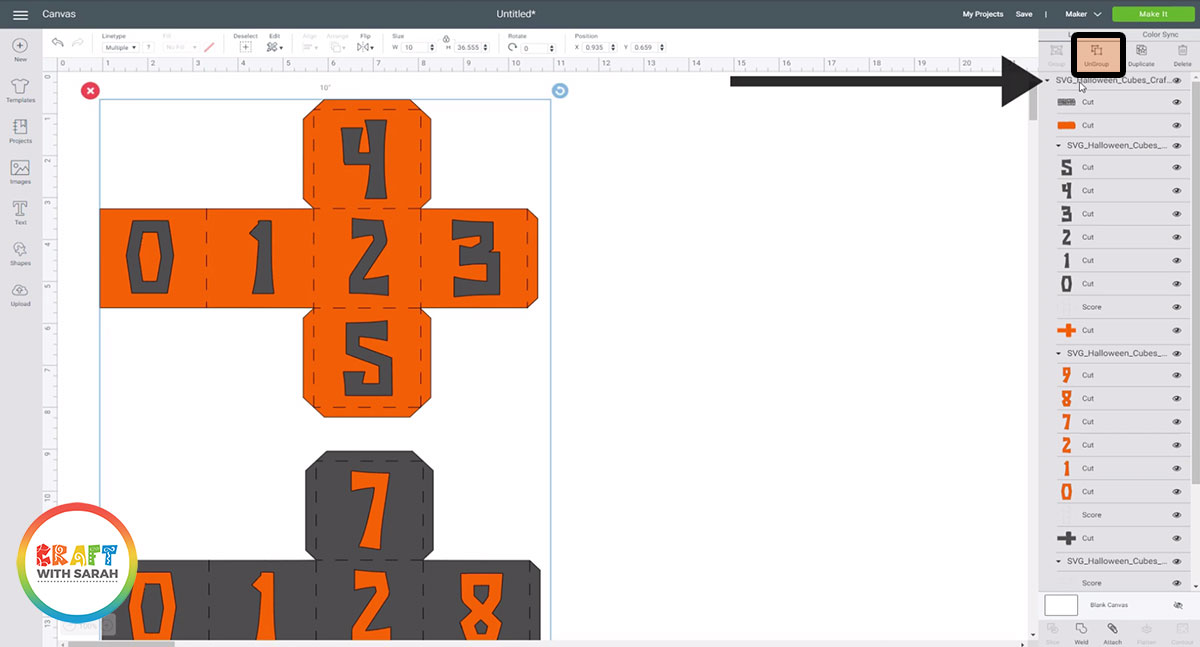
I grouped each “part” of the design separately, so we need to ungroup them too.
Let’s do the orange cube first. Click on the filename that contains the group of layers relating to the orange cube.
When you have selected the group, click the “Ungroup” icon above the layers panel.

Next, click on your “Score” layer and then hold down CTRL on your keyboard and click the orange cube layer underneath. This will select BOTH layers together.
Click the “Attach” icon at the bottom of the layers panel to attach your score and cut layers together.
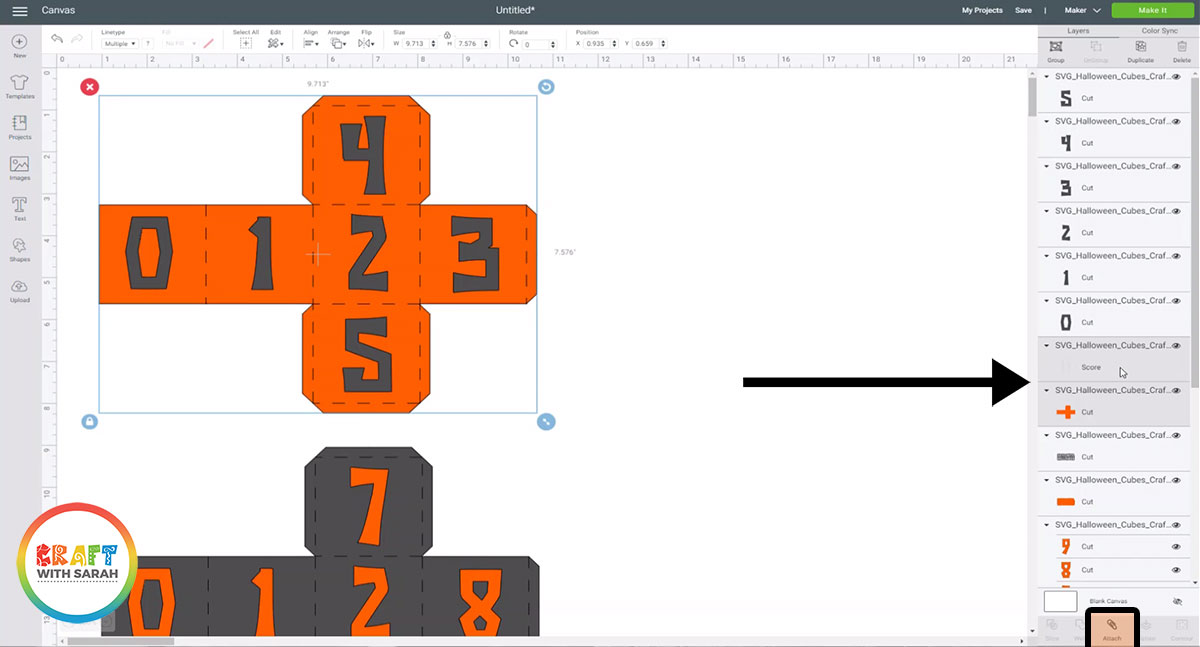
Design Space will move the attached layers to the top of the layers panel. I like to drag-and-drop them back down underneath the black letters so that all the layers are showing in the correct order.
To keep your layers panel tidy, select the orange cube layers with the black number layers and “Group” them together.
You then need to repeat these steps for all of the Score lines to attach the “Score” line to the “Cut” shape underneath.
Once you’ve done that, you are ready to cut out the design!
Part 2: Countdown Cube Assembly
Once you’ve cut out the shapes, it’s time to get crafting!
Step 4: Assemble the orange cube
Turn the orange cube shape upside down and then fold all of the score lines INWARDS (towards you).
Be sure to fold all the lines along the tabs and the lines that appear between the different shapes on the card.
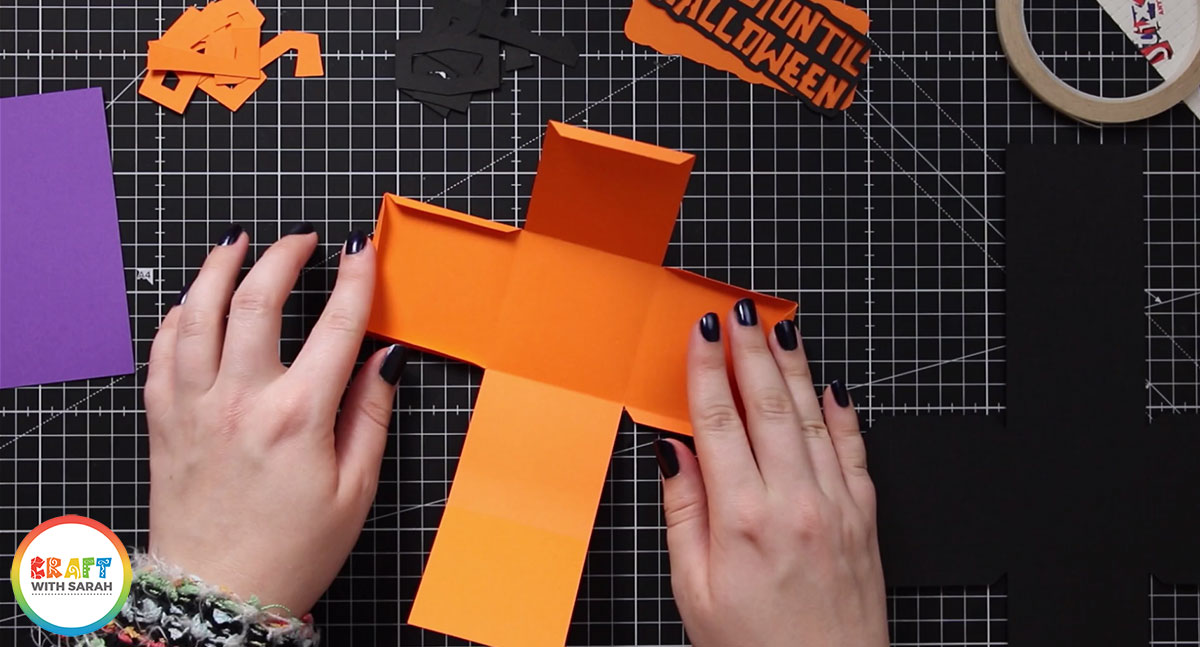
Turn the shape the correct way up and open out the tabs. Add double-sided tape to all of the tabs.
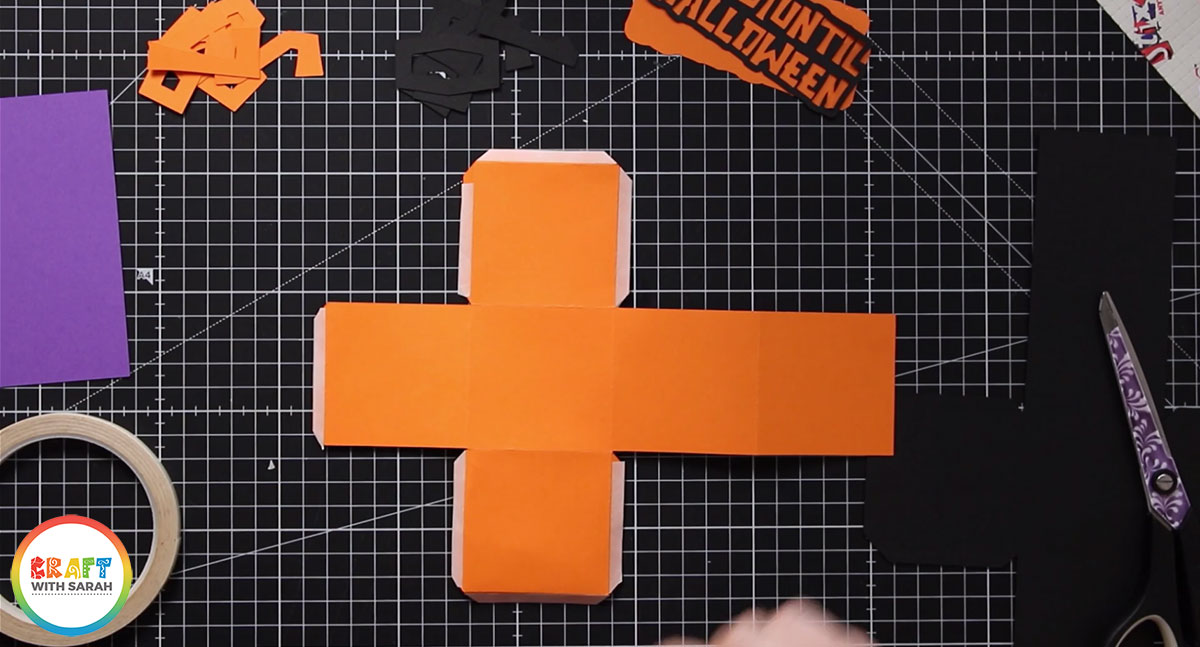
Assemble the cube by folding it up and sticking the tabs to the corresponding edges.

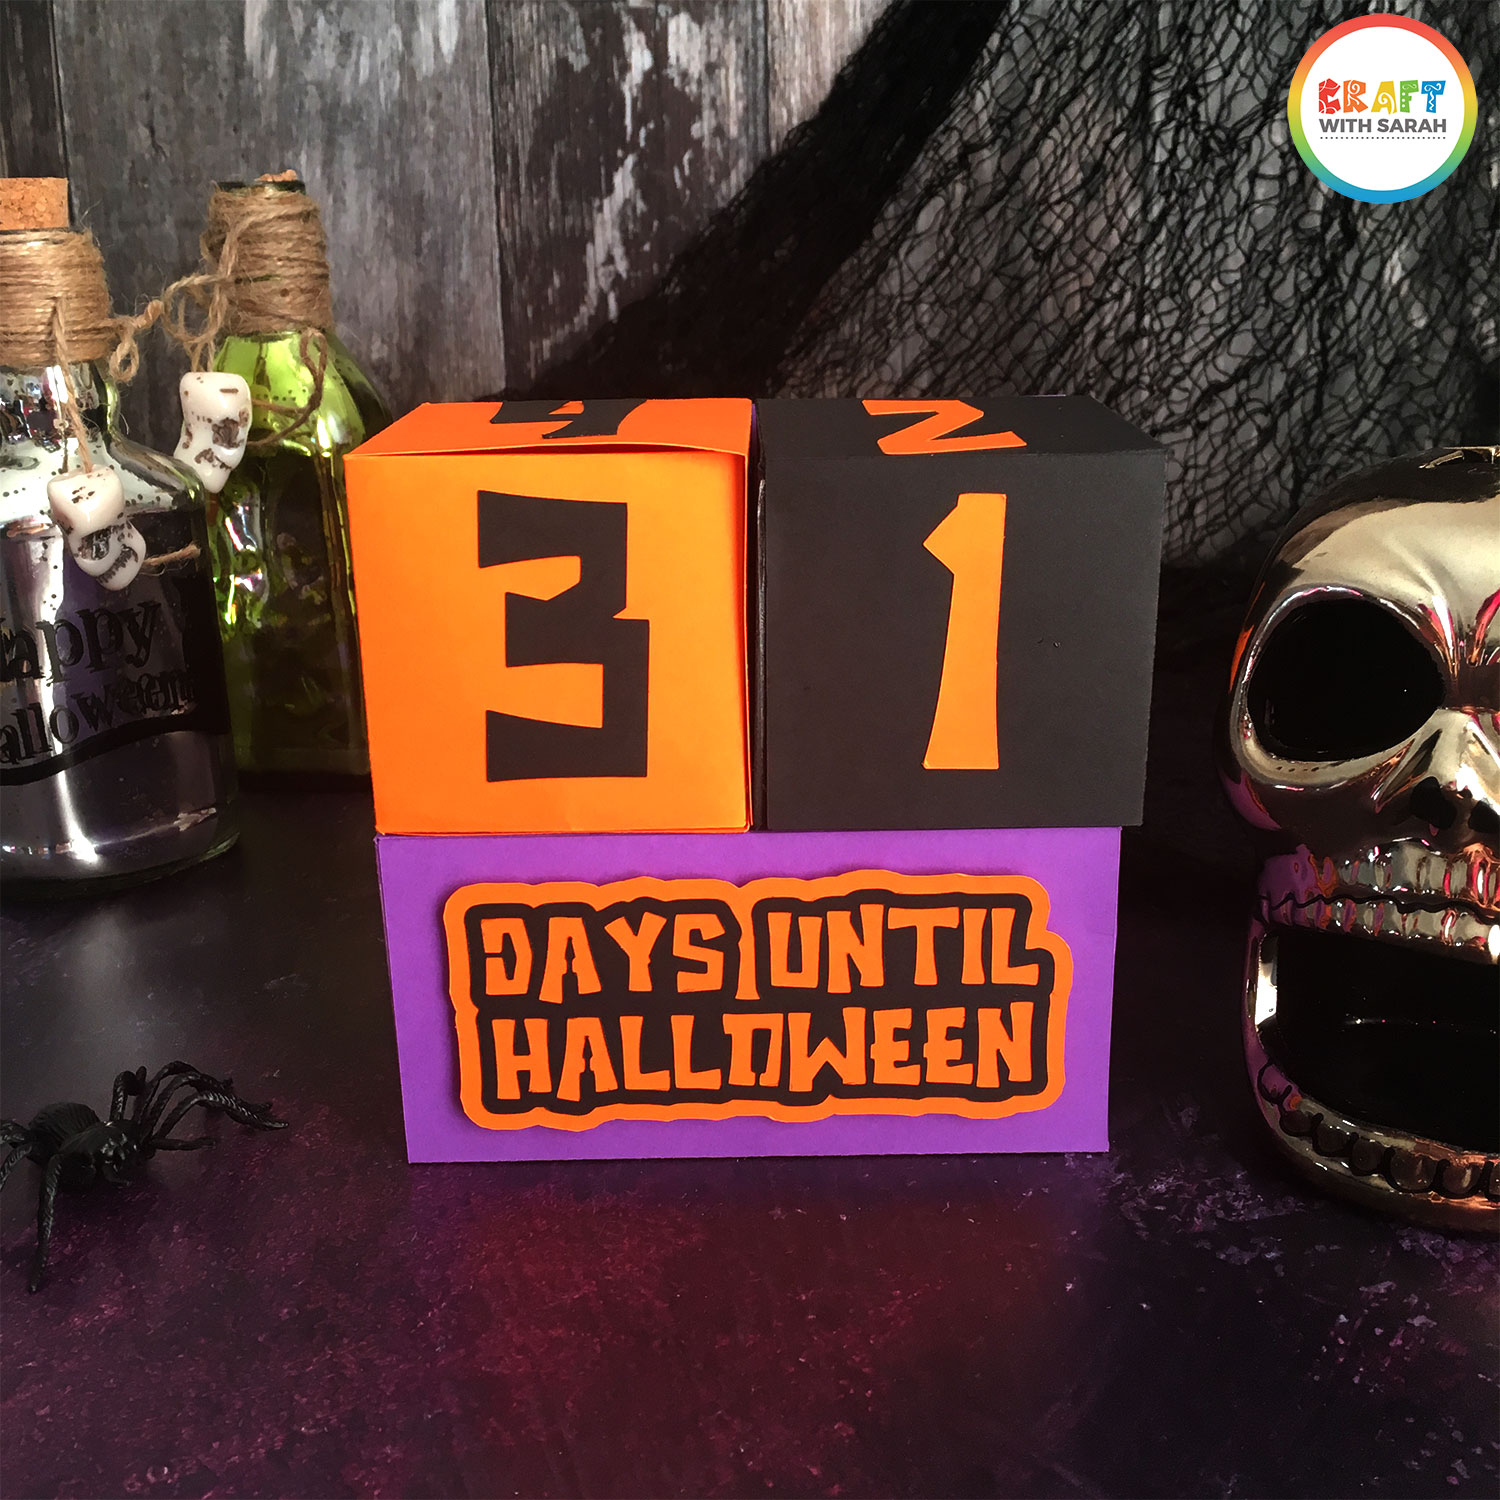
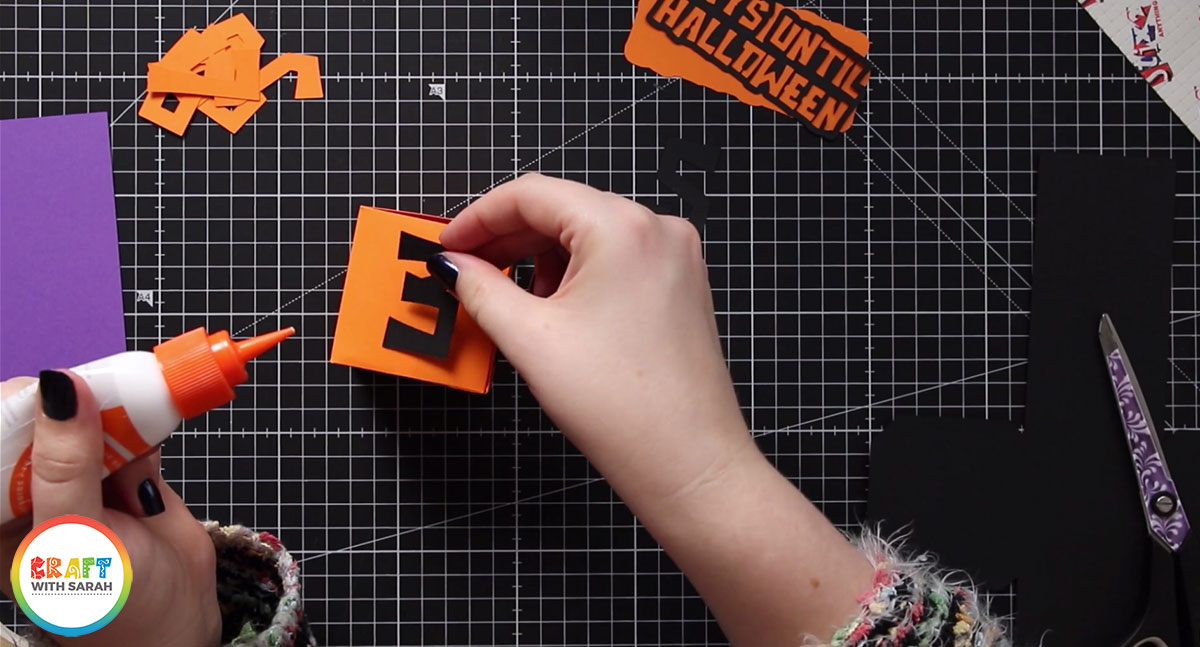
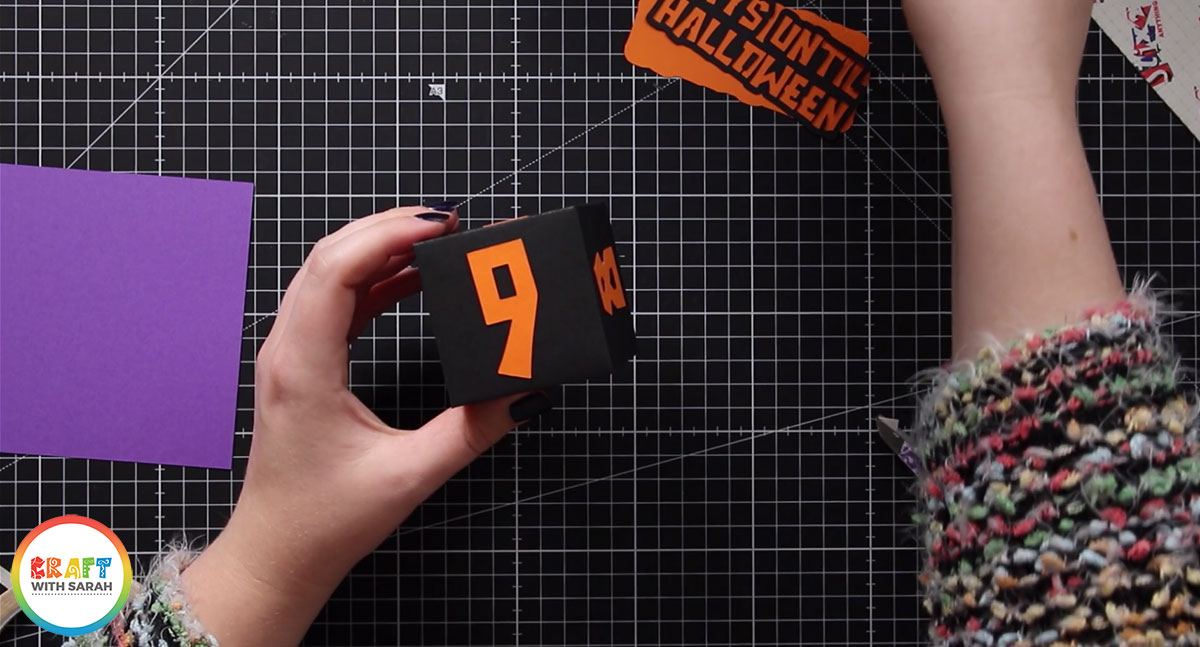
Once the cube is stuck together, stick the black numbers on with glue. Add one number to each side of the cube.
Step 5: Assemble the black cube
Stick the black cube together in the same way as the orange one.
Attach the orange numbers to each side with glue.
Note: The same number doubles up as the 6 and the 9 – just turn it upside down to make the other number magically appear!
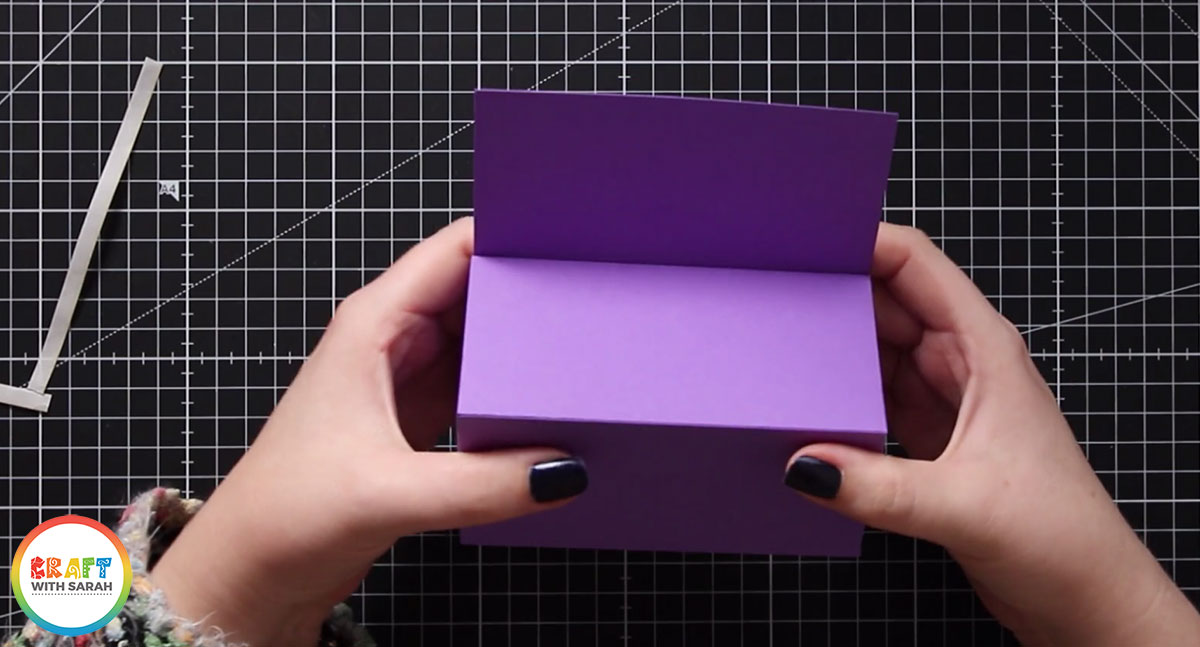
Step 6: Make the purple step to hold the cubes
Use double-sided tape to stick the purple square WITH the score line to the side of the main purple cube shown in the photo below.
Make sure that the score line on the square is VERTICAL.
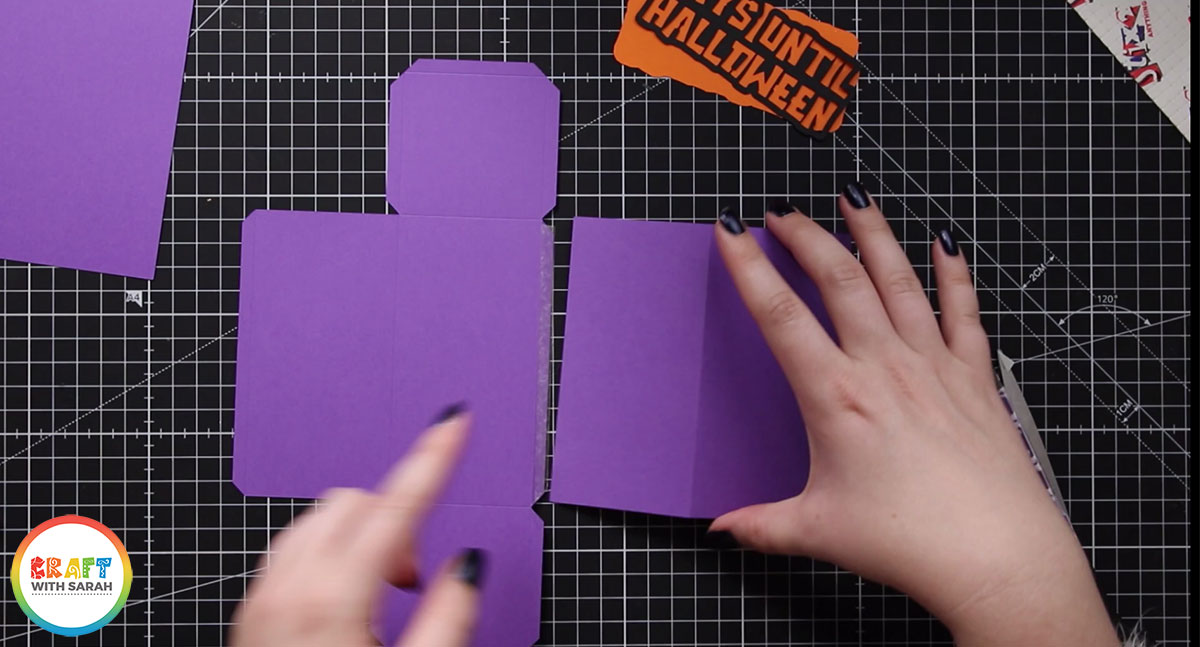
Turn the purple shape upside down and fold all the score lines inwards/towards you (just like you did for the orange/black cubes).
Add double-sided tape to all of the tabs.
Stick all of the sides together to make an oblong/rectangular box.
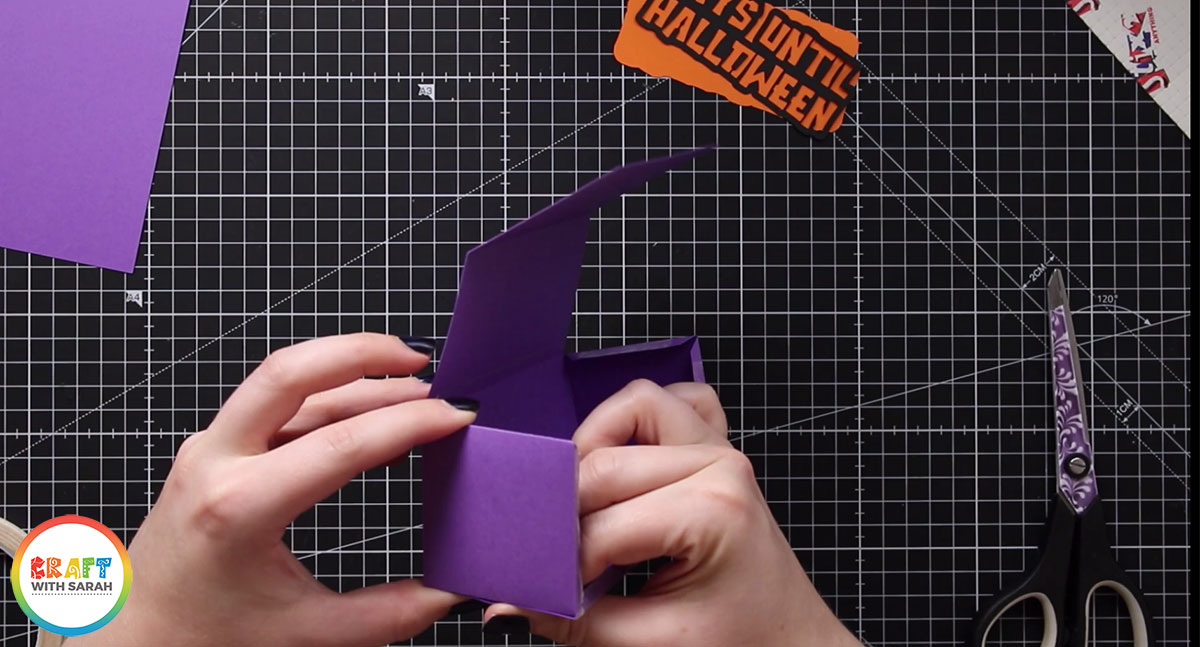
Choose one side of the purple box to the the back and add some double-sided tape. It doesn’t matter which side you choose.
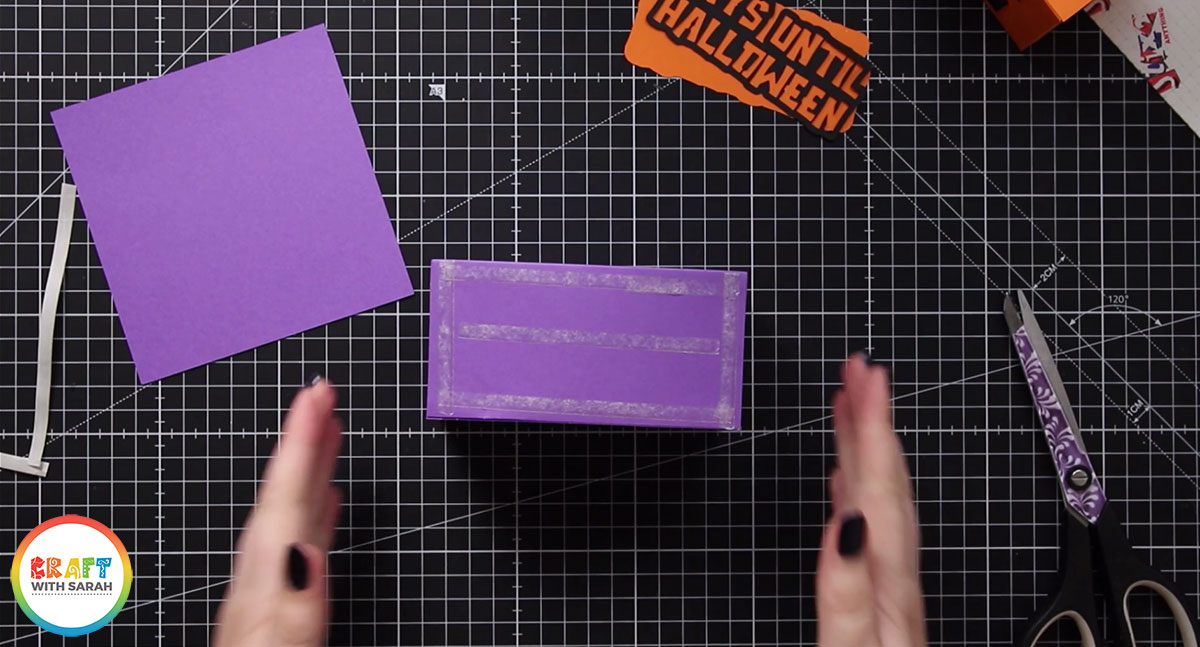
Stick the remaining purple square to the back of your box to form the “back” of the cube holder.
Step 7: Decorate the front
Add glue to the back of the “Happy Halloween” sentiment and stick it to orange shape that goes with it.
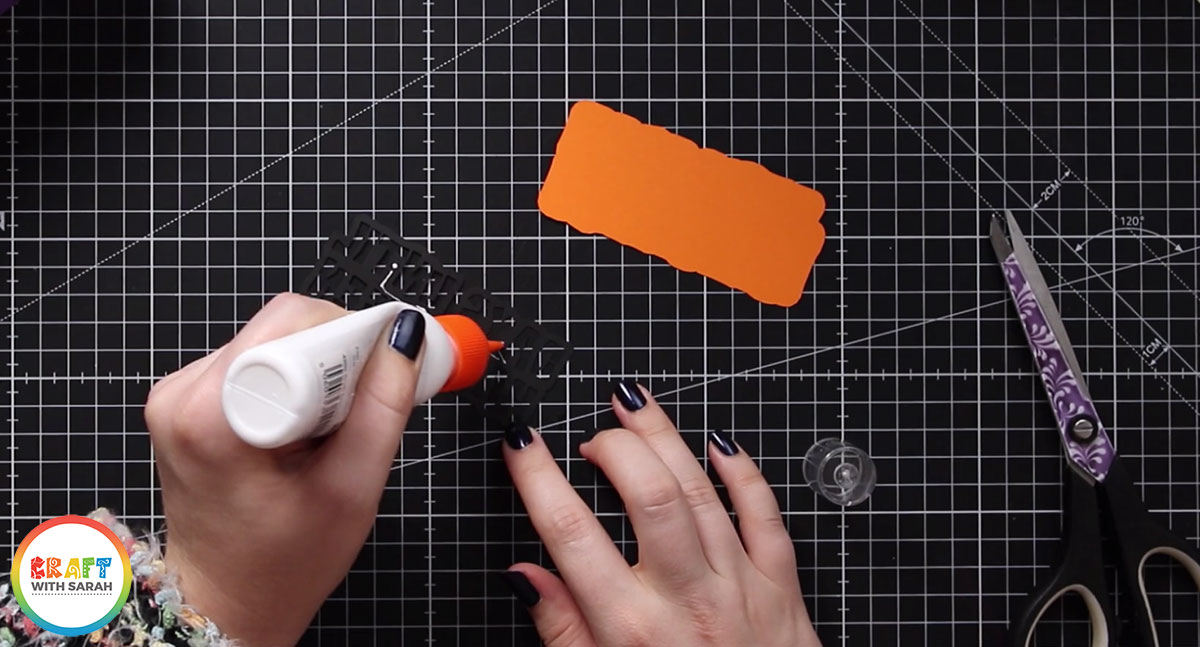
Use glue or 3D foam pads to stick the orange shape to the front of the purple box.
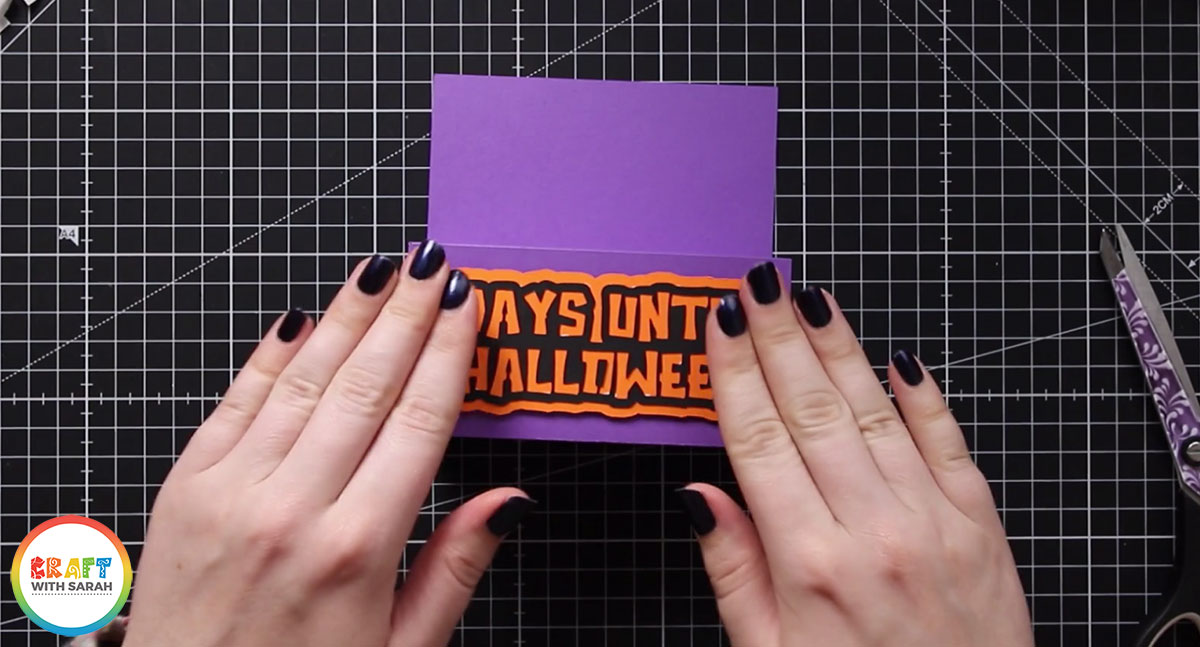
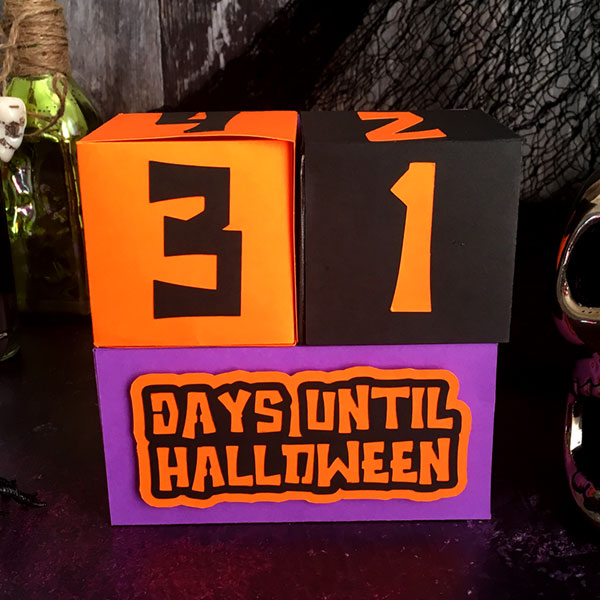
Sit back and enjoy your Halloween countdown cubes!
Woohoo – your countdown cubes are now complete!
Simply place the cubes on top and then turn them around each day to count down the days until Halloween.
I hope that you enjoy making this Cricut craft project, and that it helps you to get super excited for Halloween!
Happy crafting,
Sarah x