
How to Print and Cut on a Cricut
Learn how to print then cut with your Cricut in this easy tutorial.
If you’ve never tried print & cut on your Cricut machine, you’re missing out!
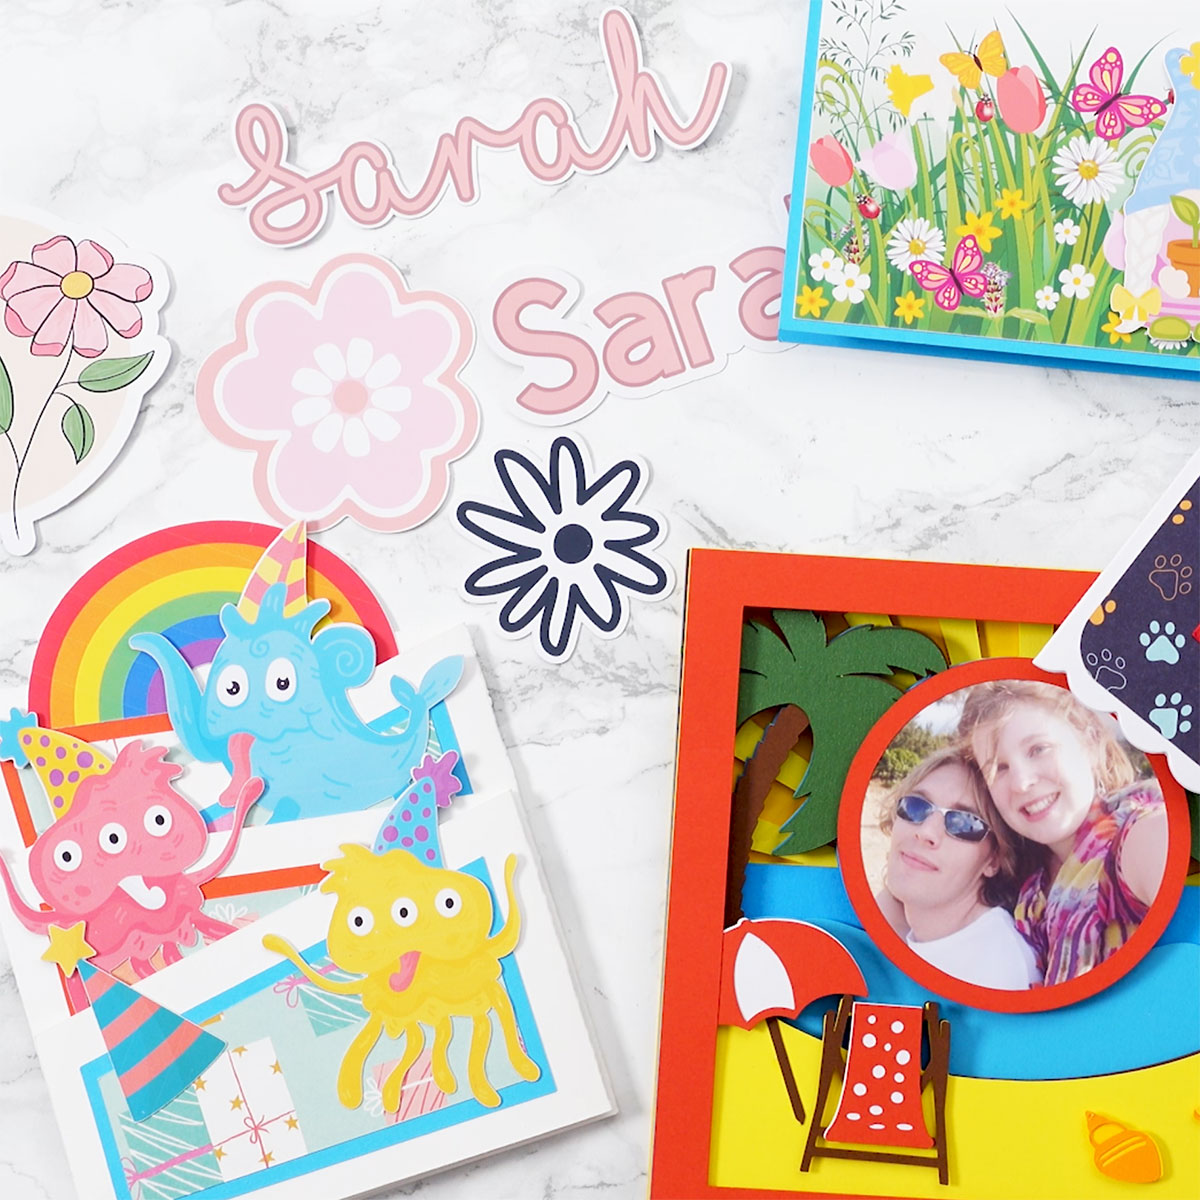
I LOVE making cards and other crafts using print and cut as it’s a great way to add detail and depth to your handmade projects whilst keeping the perfectly smooth cutouts that you know and love about your Cricut.
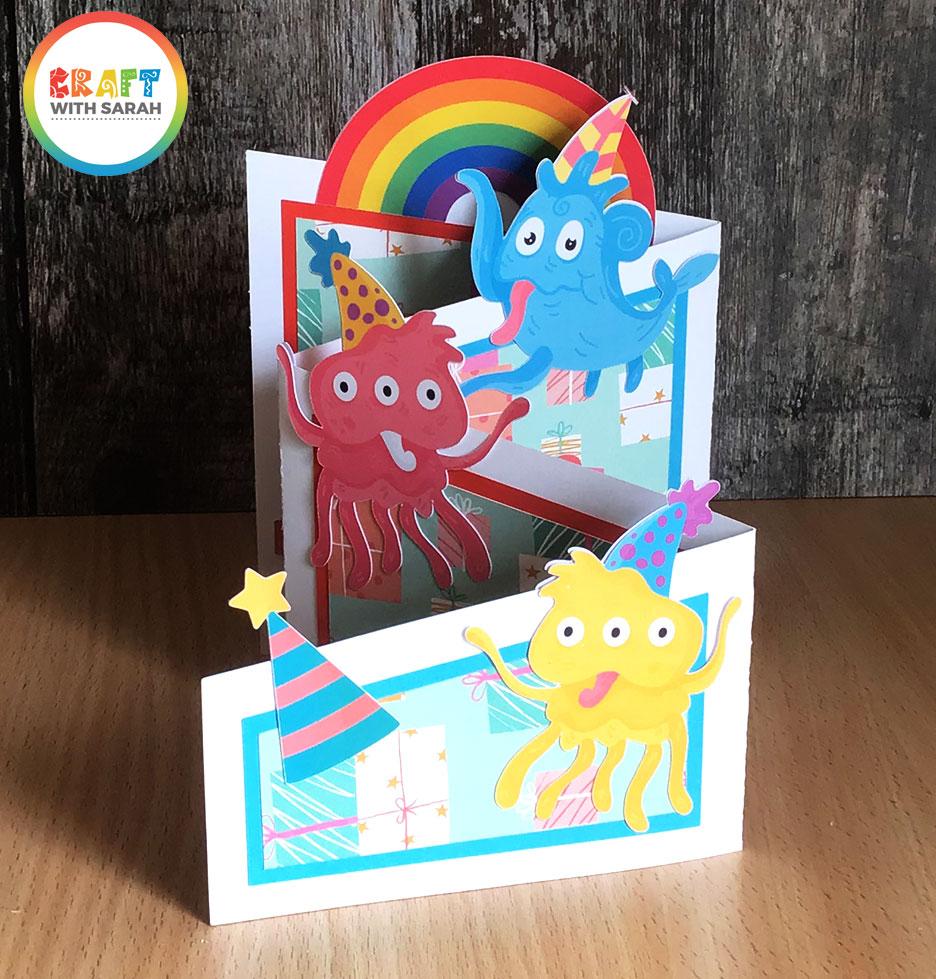
Here’s a card that I made using print & cut. All the cute little monsters were printed on my home printer onto glossy photo paper, then I fed the sheet of paper into my Cricut machine and just like magic, it cut them all out for me perfectly!
If you haven’t used Print then Cut before or maybe you can’t quite remember how it works, follow along as I show you how to make sure your images are fit for Print then Cut, change your printer settings for the best quality print and get everything cut perfectly, ready to use on your next project.
Once you get the hang of it, you’ll be wanting to use it all the time!
What is Cricut print then cut?
Cricut print then cut is an awesome feature of Design Space and Cricut machines.
It lets you print something out on your normal home printer and then load it into your Cricut and it will cut it out for you – how cool is that?
In this tutorial, you’ll learn…
- how to choose print then cut images in Design Space and Cricut Access
- how to turn “regular” images into print then cut images
- how to size your print and cut images correctly
- how to print and cut with Cricut
- what ‘bleed’ means and why you should use it
- AND how to get the BEST quality prints from your printer
How to print and cut on a Cricut machine
Watch the video below to find out how to print then cut images on your Cricut.
Keep scrolling for a written tutorial.
Cricut print then cut instructions
Here’s how to print beautiful images, photos and stickers and get your Cricut to cut them out for you!
Part 1) Formatting images for Print then Cut
You can use Print then Cut for all sorts of images including your own photographs.
To search for suitable images within the Cricut Access Subscription, start a new project in Design Space and go into Images over on the left.
Search for whatever images you would like to use. We can edit them later to make sure they are ready to be used for Print then Cut.
To find images specifically created for Print then Cut, go down the left side until you reach Operation Type. Change it to Print then Cut and that will filter your images to ones that are only available for Print then Cut.
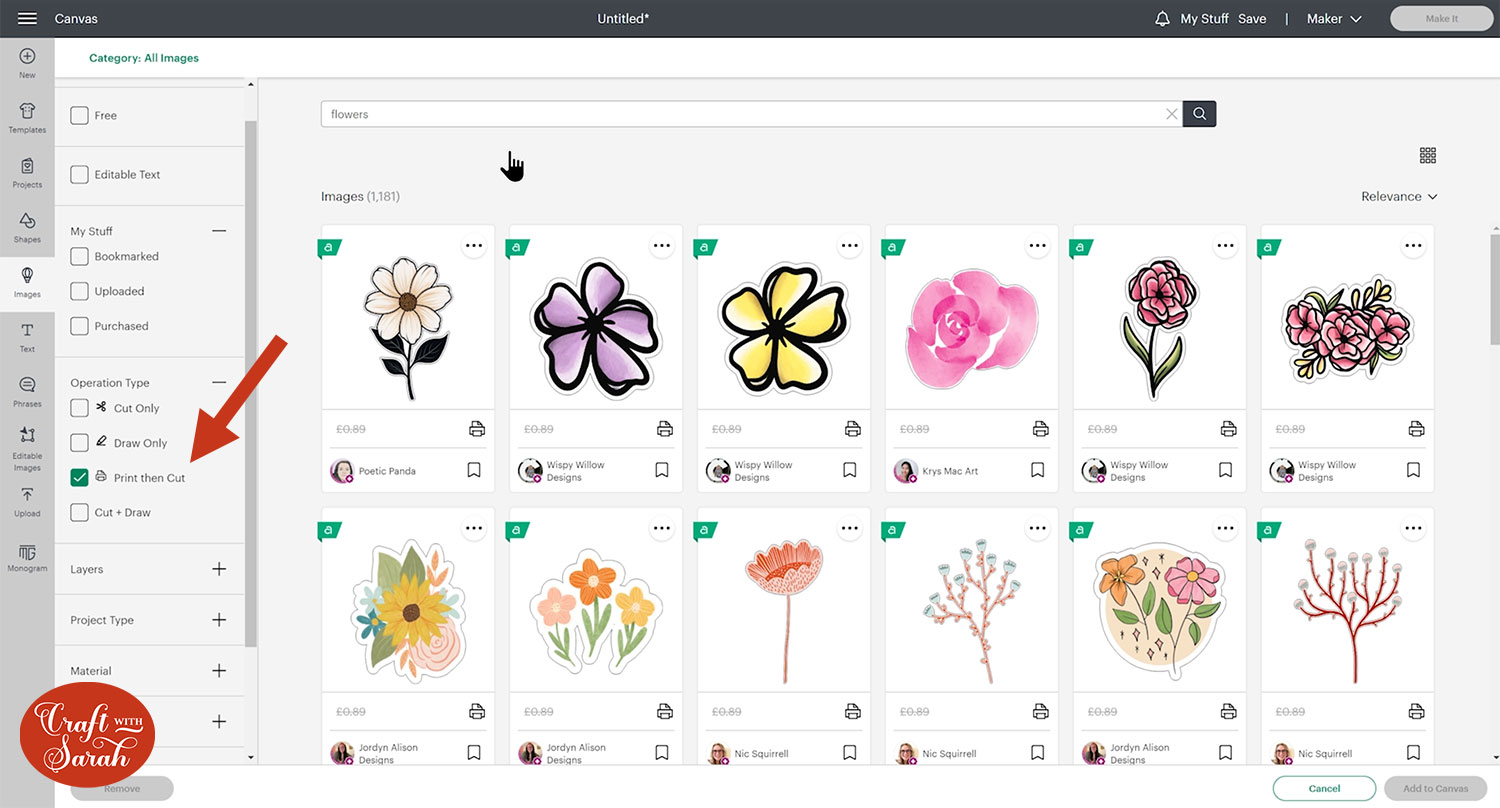
You will notice that lots of them have a white outline on them which is the bit that the Cricut will cut out so that all of the photo is seen.
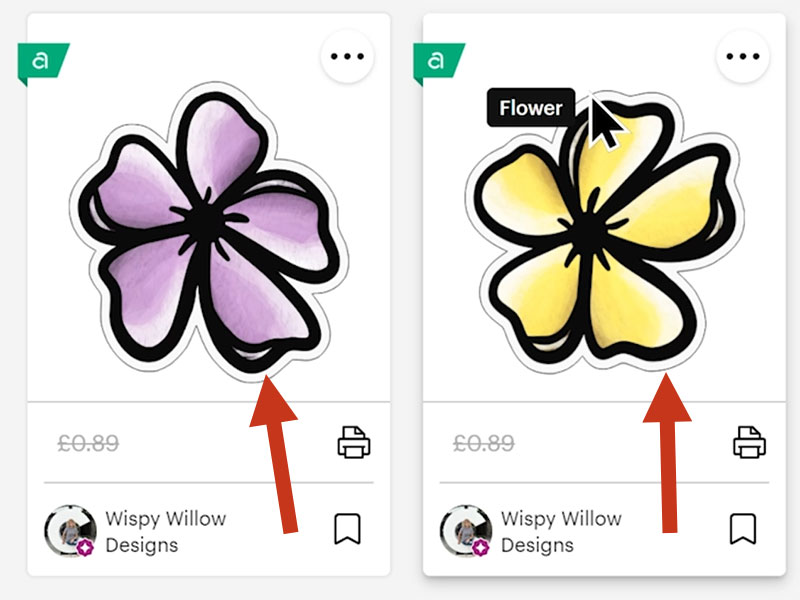
I chose both Print then Cut images and standard ones to show you how you can use both.
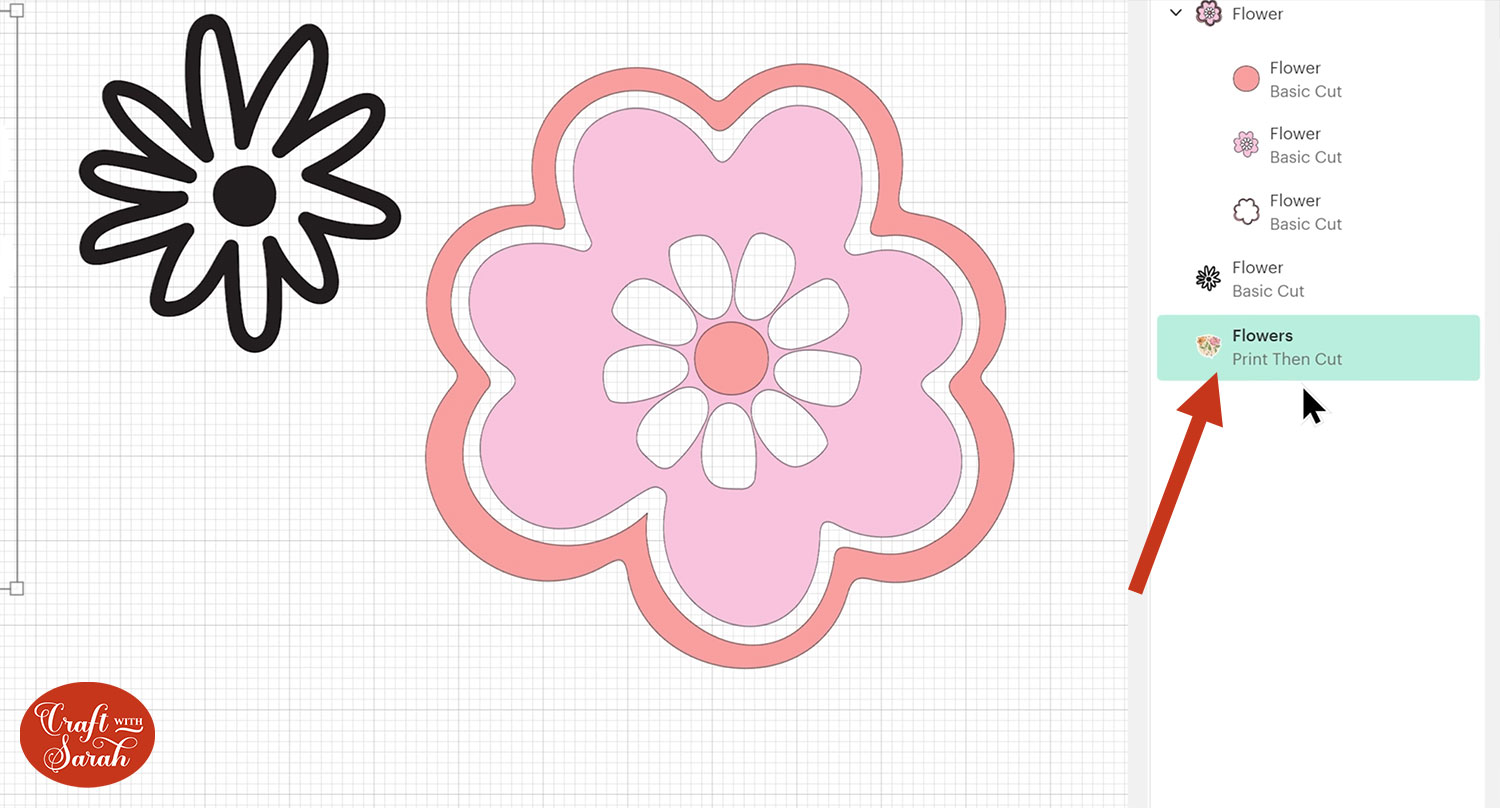
You can tell that an image is a Print then Cut image by its name in the Layers panel but also in the Operations drop down where it will say Print then Cut.
You can also tell because it has got lots of shading and intricate colours in the design which it wouldn’t be possible to cut from your different colours of cardstock. This type of effect is only possible when printing.
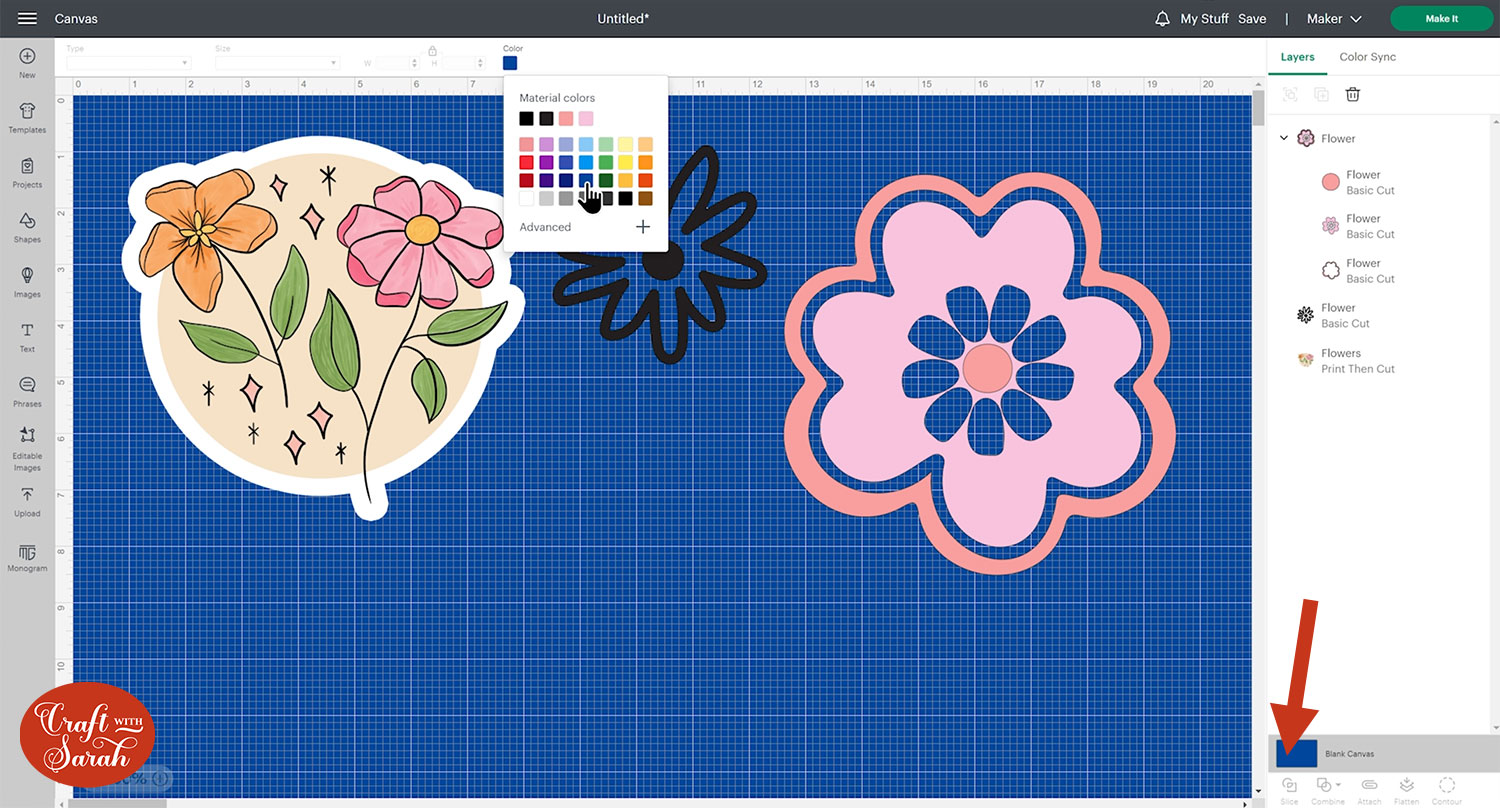
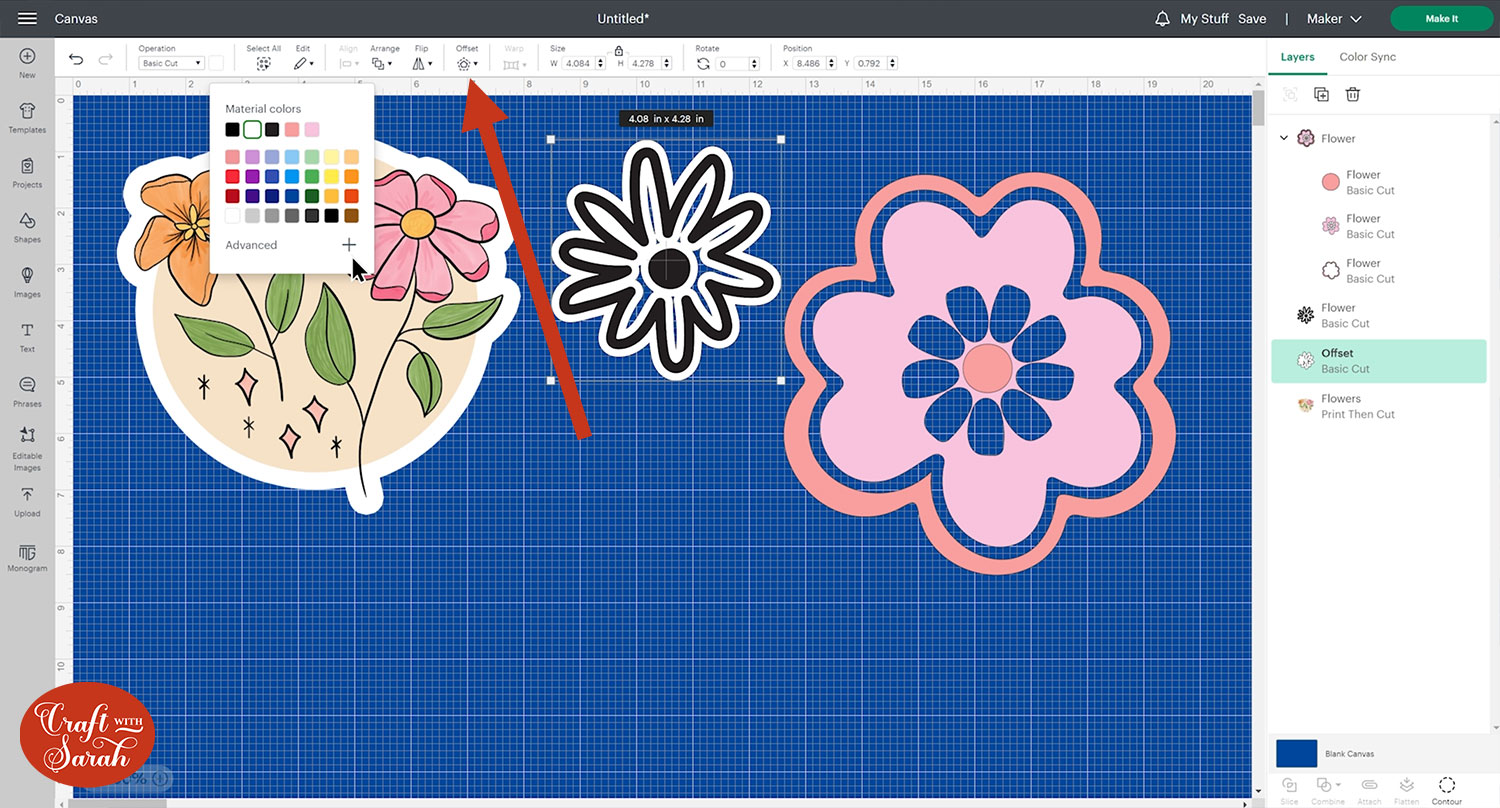
You may need to change the colour of your canvas so that you can see the outlines of your images better. To do this, click “Blank Canvas” at the bottom of the layers panel and you can change the colour in the box that appear on the top of the screen.
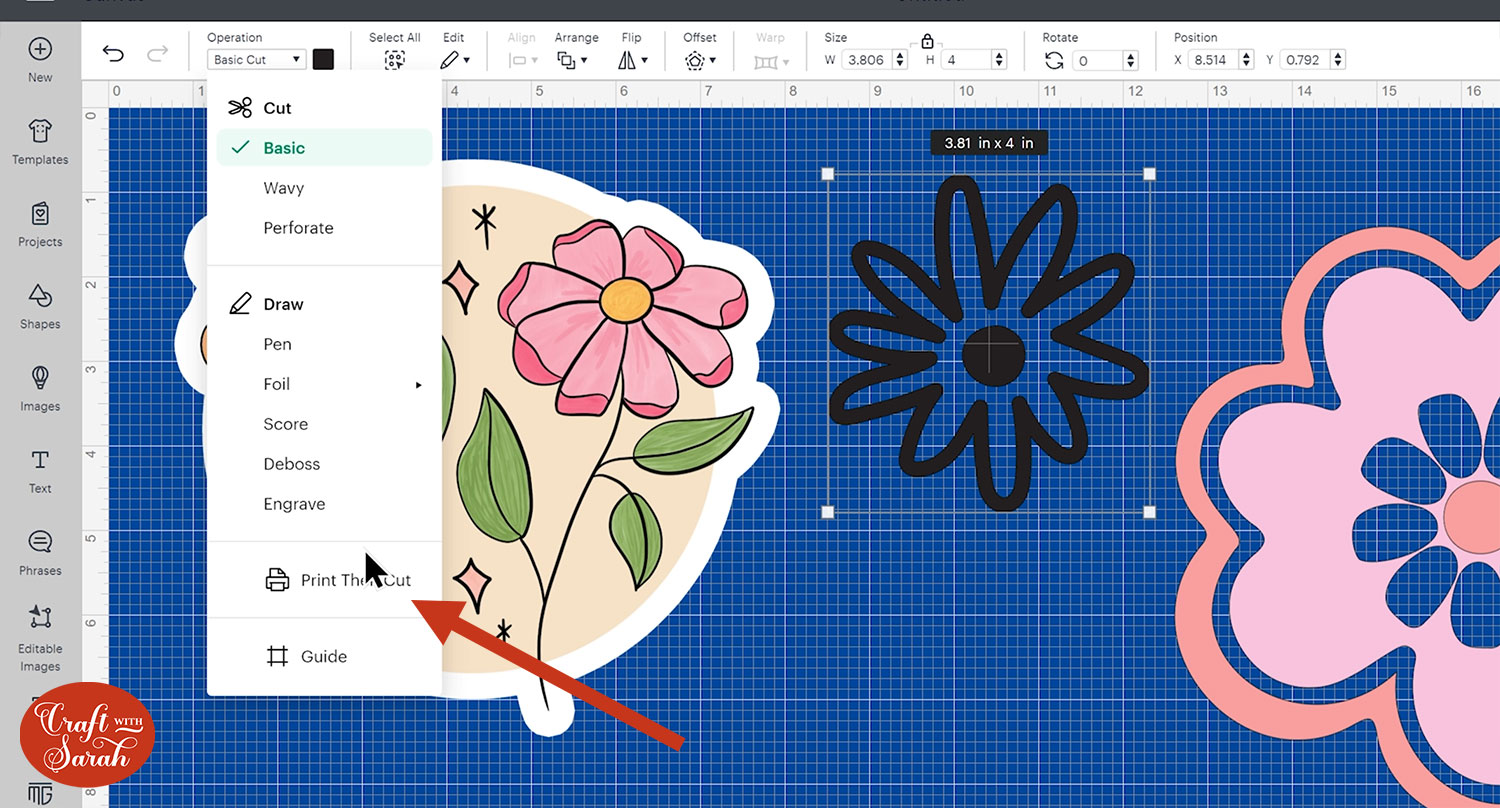
To turn an image into a Print then Cut image, select it and click Flatten at the bottom of the layers panel. If the image is only one layer then the Flatten button won’t be clickable. Instead, select the image and change it to a Print then Cut image using the Operations dropdown menu.
For some images there will be a few more steps to make sure they are ready for cutting. You can see the blue colour and the grid lines of my Canvas through the holes in the black flower which means the Cricut will cut all these bits out of my printed image.
To correct this, select the flower, go into Offset and choose an offset and make it white.
To get rid of the gaps in the Offset layer, go into Contour and then select “Hide All Contours”.
Select the original flower and the Offset layer and “Flatten” them together.
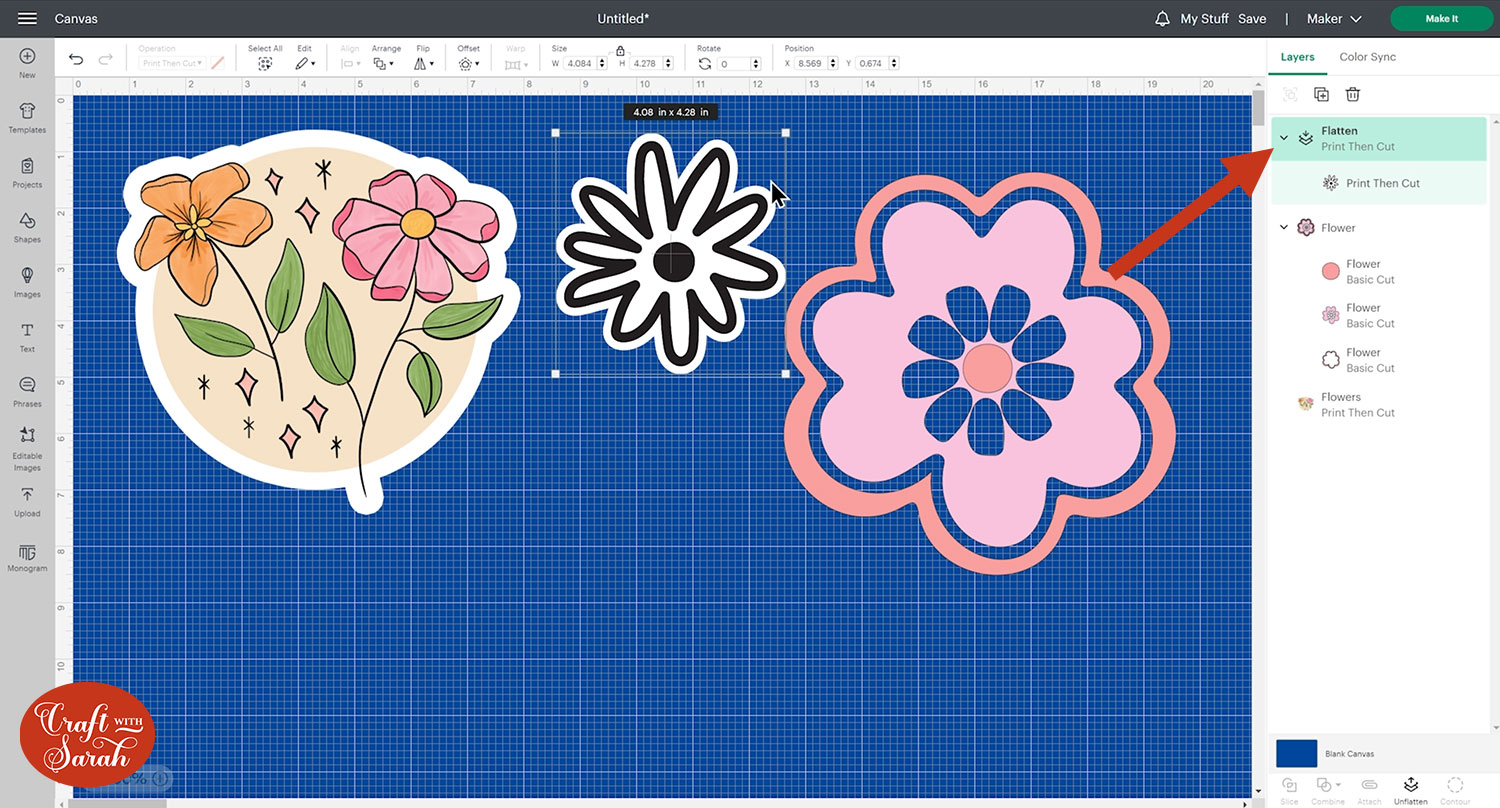
Now when the Cricut cuts the flower, it will only cut around the edge of the white offset, not each individual petal detail inside the black.
Moving on to the next flower, you will see it has the same problem. Turning it to Print then Cut will cut all of the bits where you can see blue of the canvas and we don’t want that.
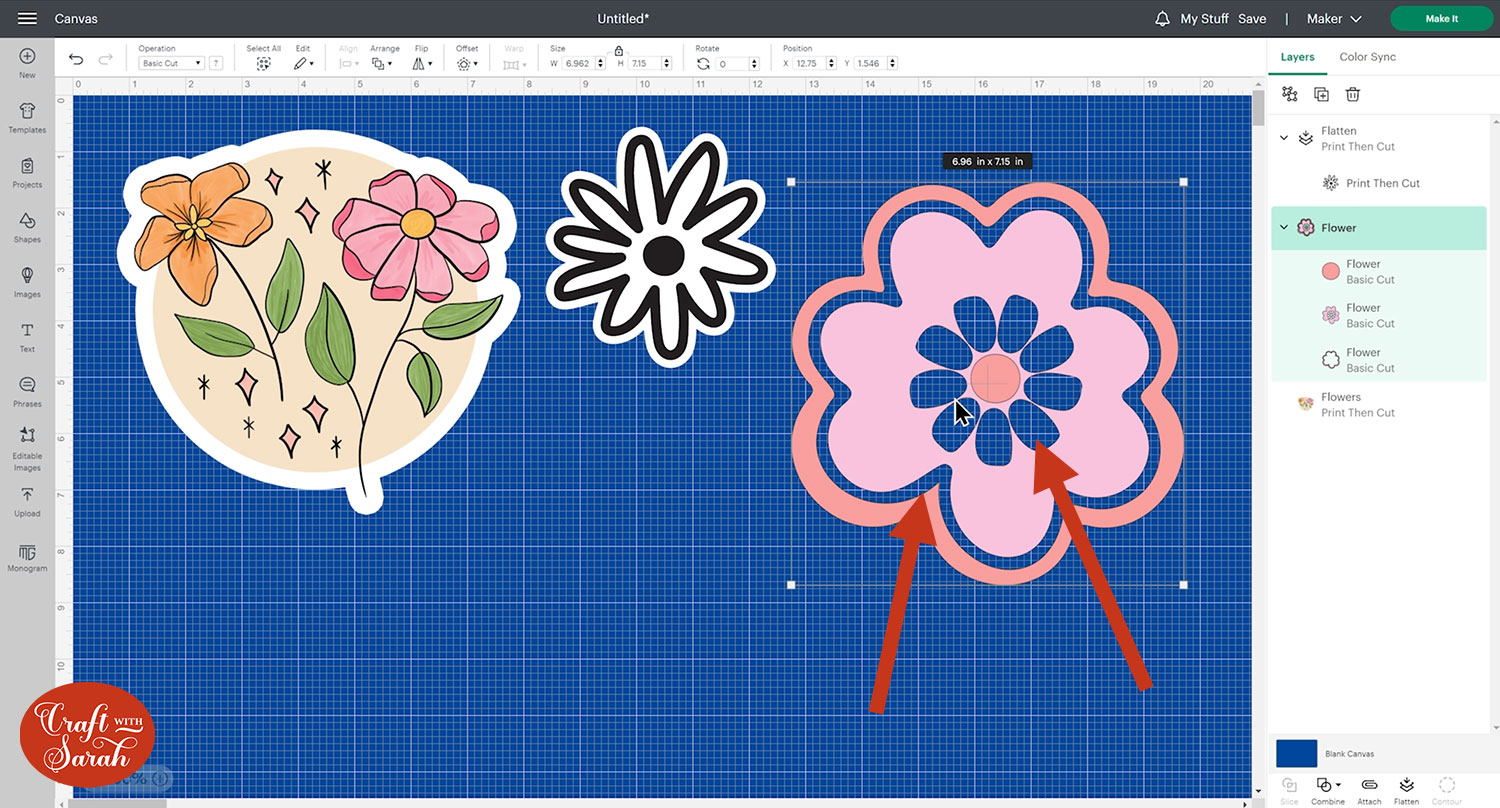
Go to the bottom layer and press Offset. Give it an offset and press Apply.
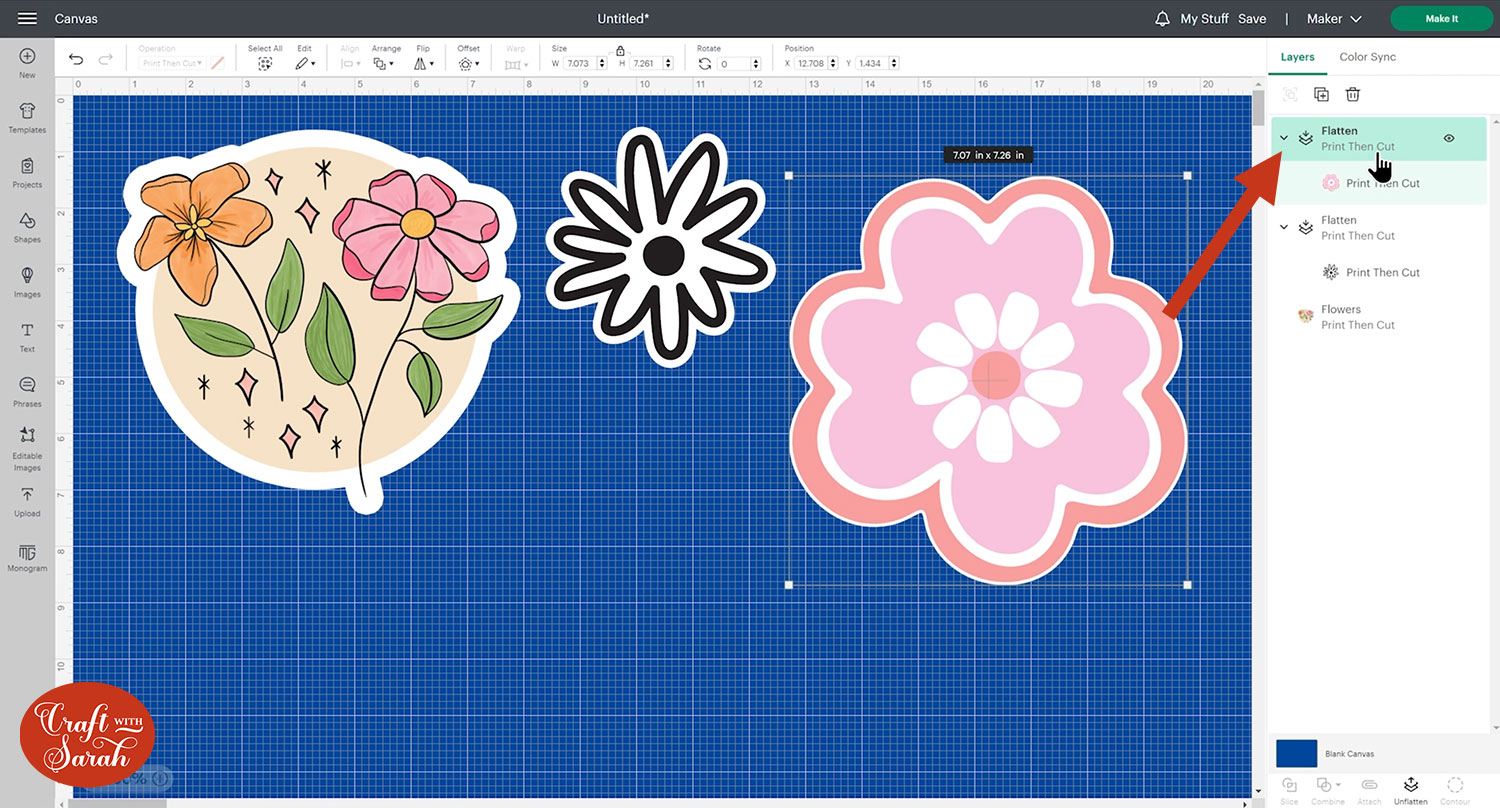
Go into Contour, Hide All Contours and change it to white.
Select both layers and press Flatten.
Now, you have a perfect sticker outline!
Part 2) How to print then cut text on a Cricut
You can use the same technique to turn text into a Print then Cut image too. There are two ways to do this.
I selected a font where I know all the letters are touching and one where they aren’t.
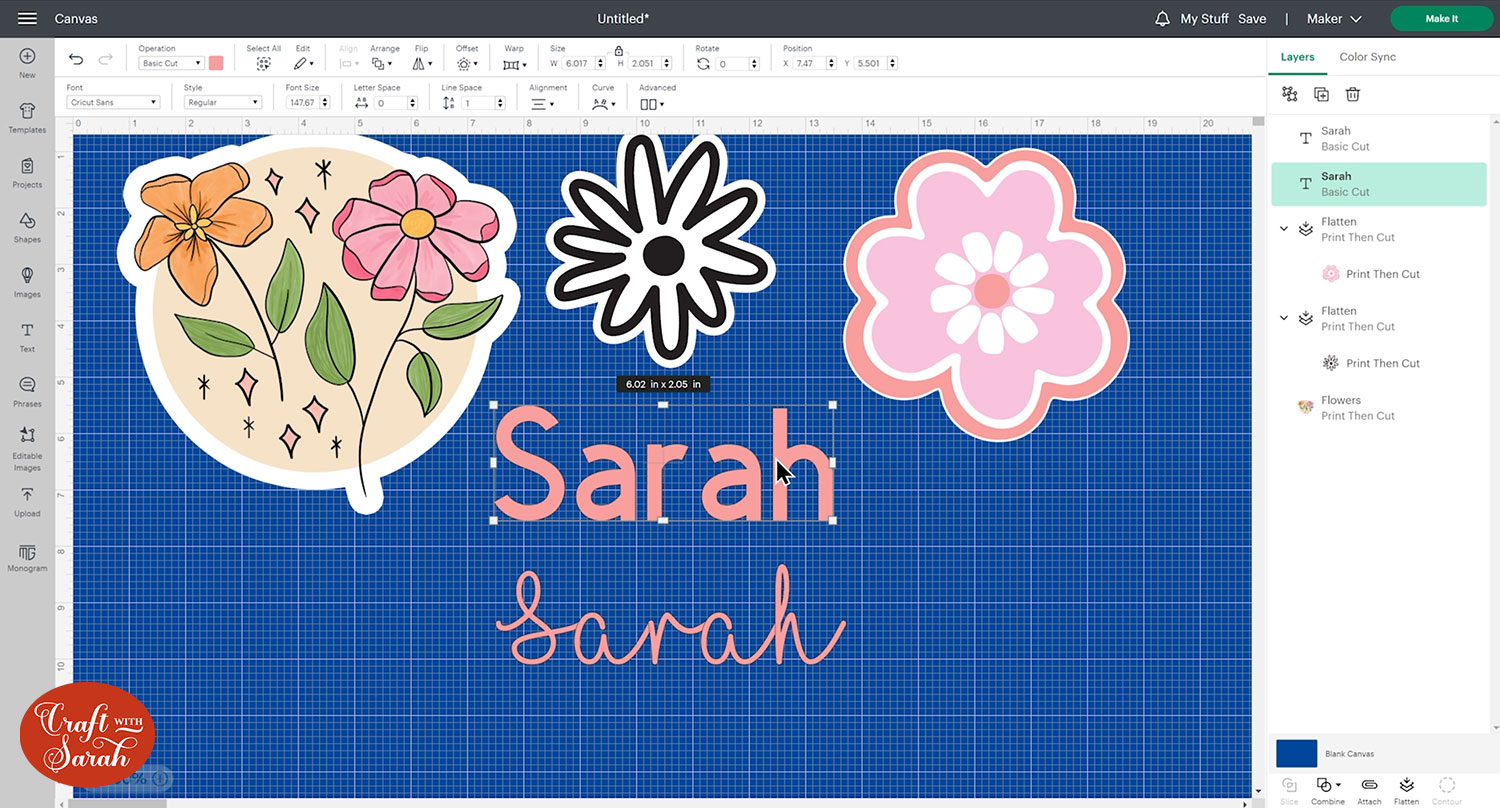
Without the letters touching, it will cut out each individual letter.
The other one looks rather plain which might leave you wondering why you didn’t just cut it from vinyl or cardstock. We can play around with different offsets to make it more interesting!
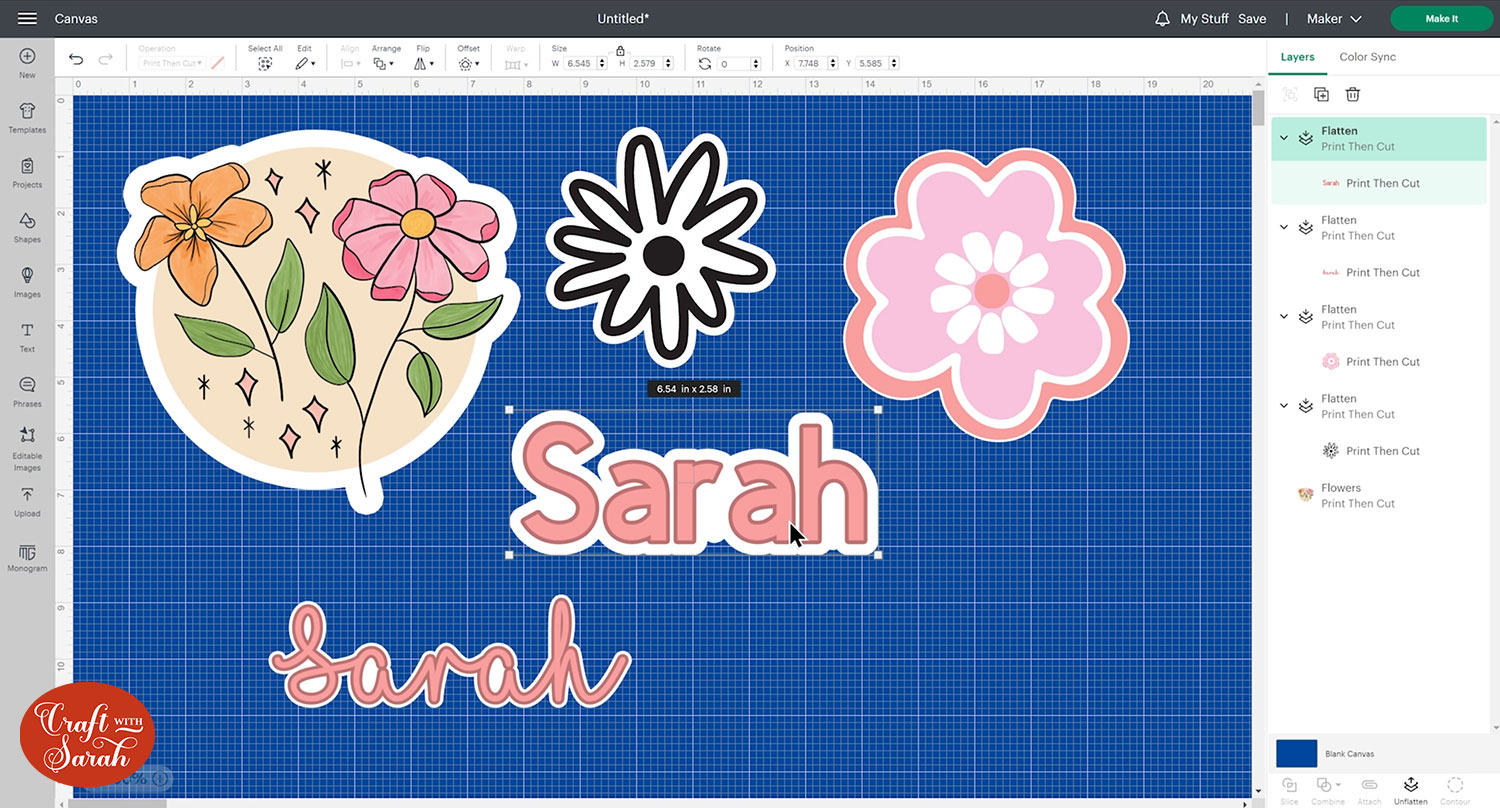
Select the text and add add two Offsets and play around with the colours.
Use Contour to fill in the gaps on the largest Offset.
Flatten your text and then you have a multicoloured sticker ready to be printed.
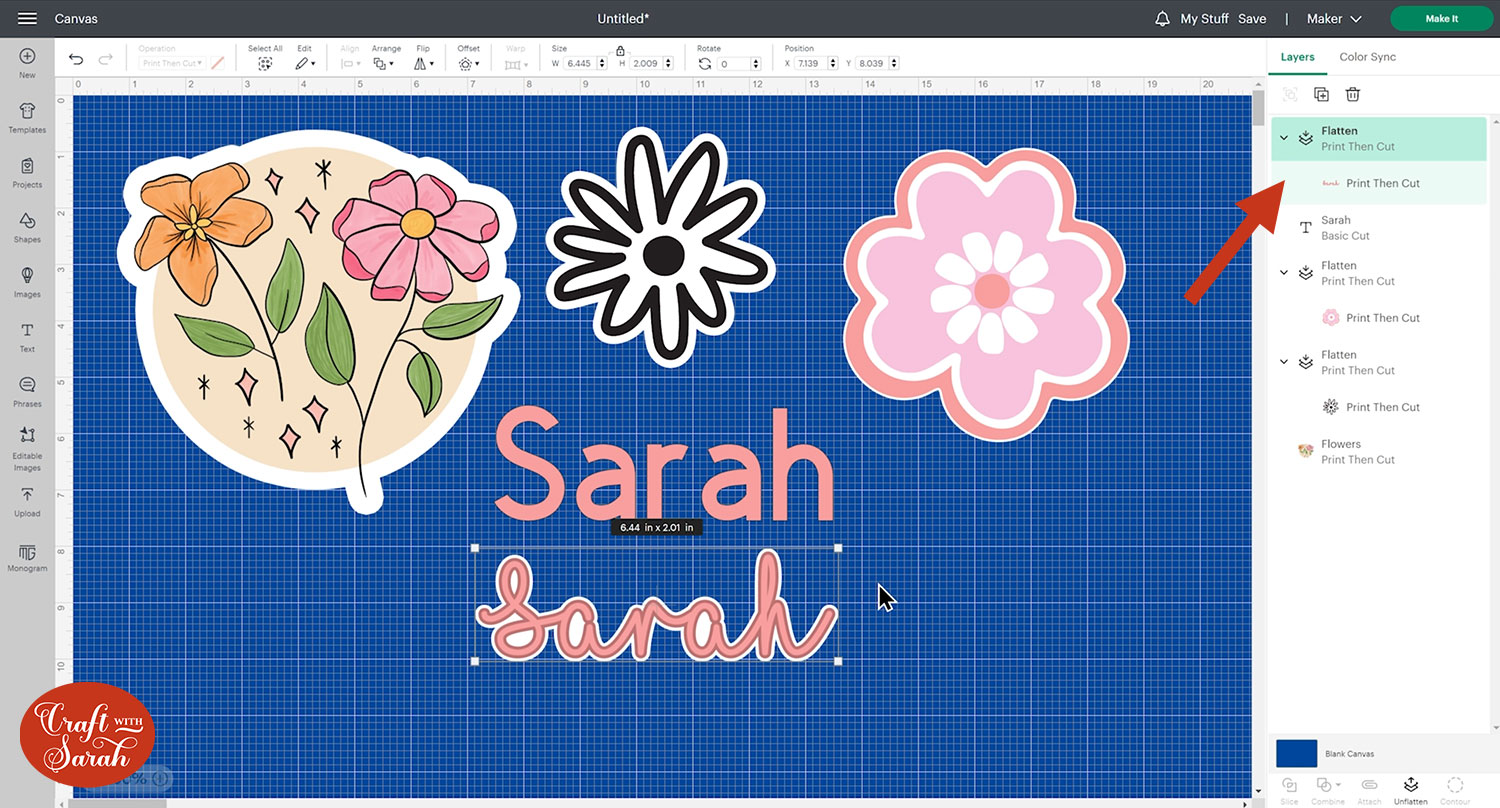
You can do similar with fonts that don’t have joined-up letters, but you may need to make the Offsets bigger so join everything together.
Part 3) Print then cut sizes
When sizing your Print then Cut images, you may find that a little red exclamation mark appears in your Layers panel.
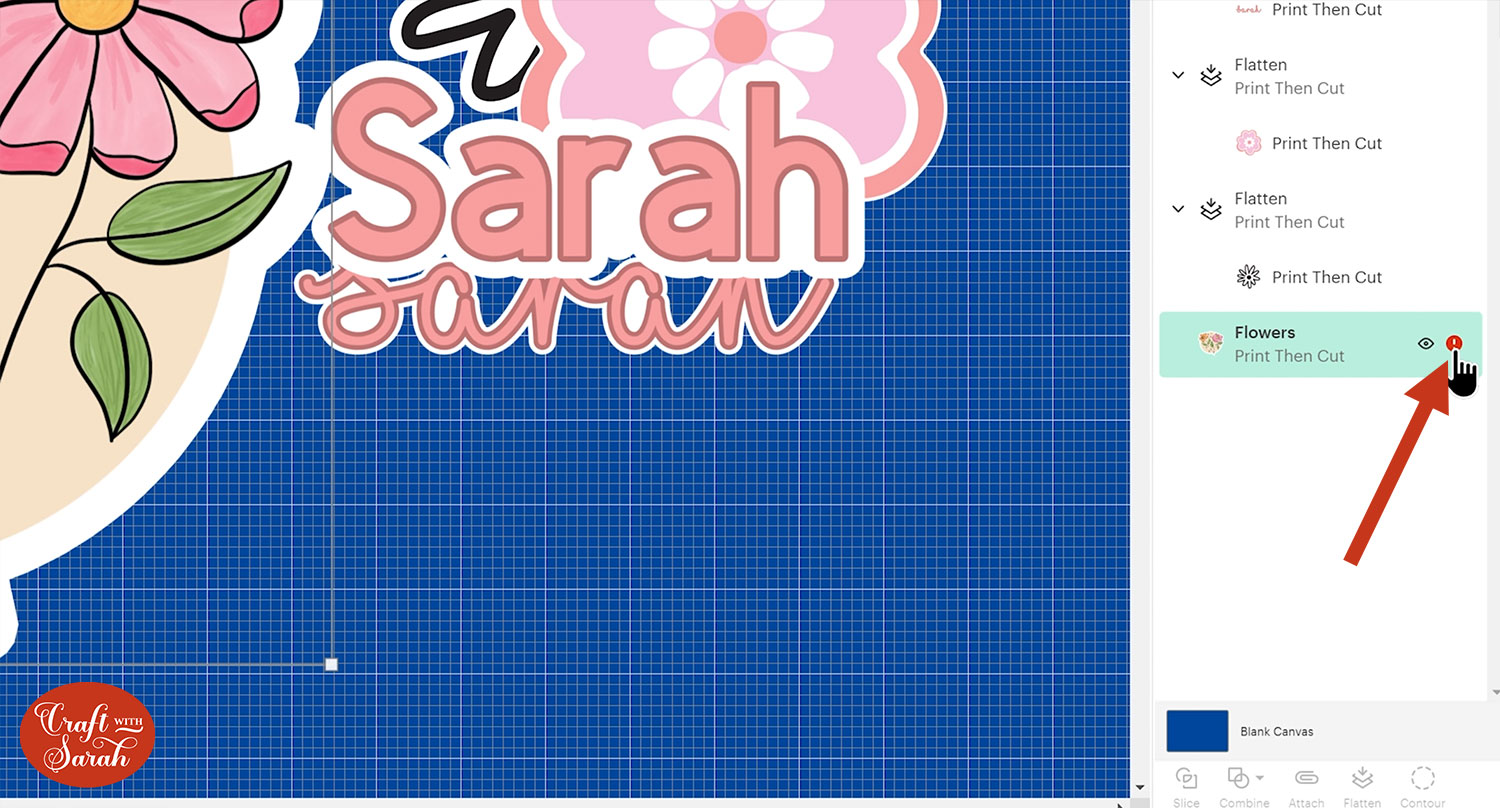
This is informing you that the image is too large for your current paper selection.
You have two options: “Auto-Resize Image” (this will make it smaller so that it fits on the paper) or “Change Paper Size” (this may not be suitable if you have a standard size home printer).
Part 4) How to print then cut
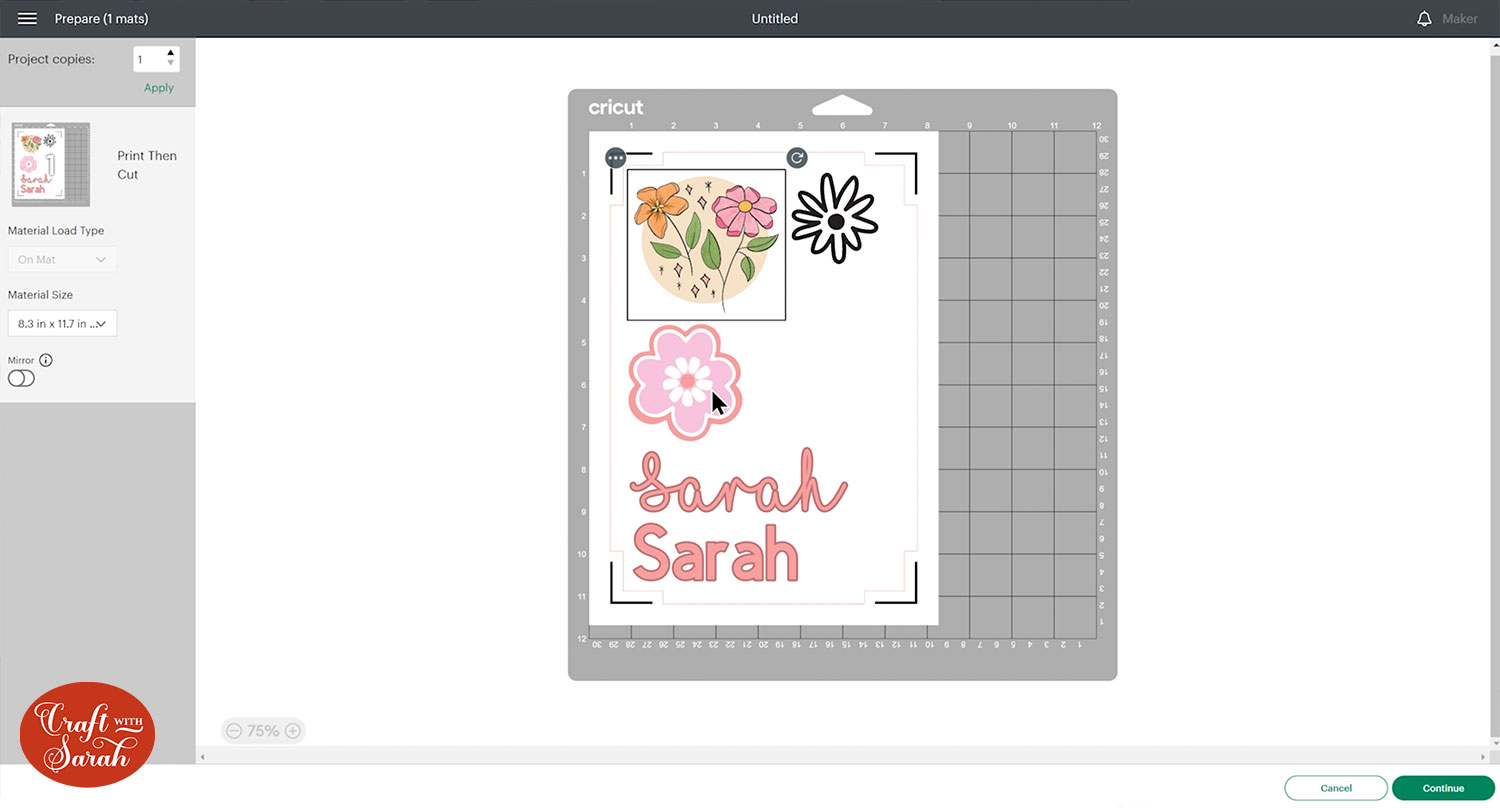
Once you’re ready, click Make It and you will see that your project will be set to Print then cut. This will be clear as you will see the black lines on the corners so that your Cricut will know where to cut.
You can click-and-drag to move things about, but take care not to overlap your images on the mat. You might not see where the image finishes as the offset is white, along with the paper on the mat and on screen.
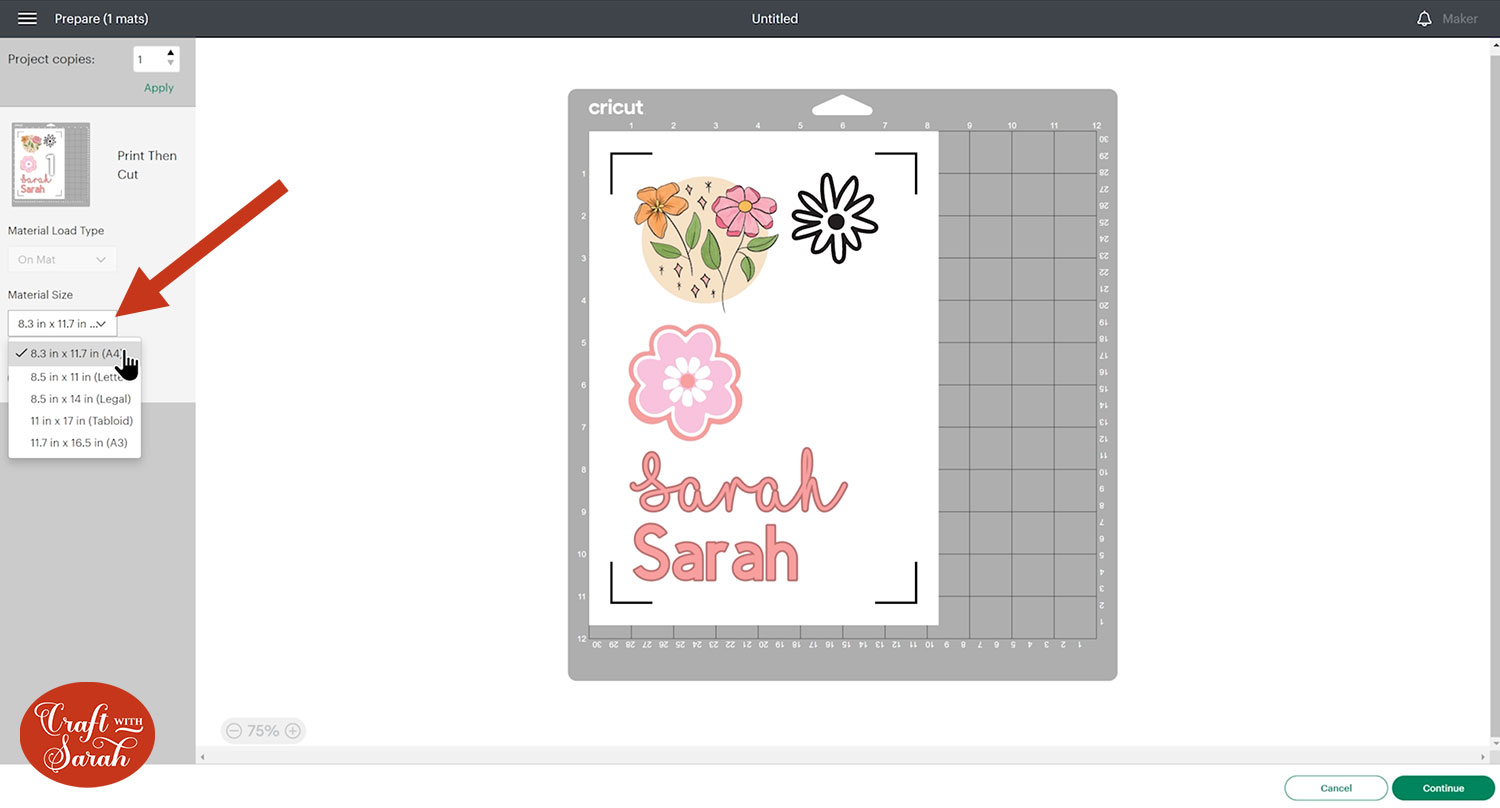
Select your paper size. For home printers and standard photo paper, this is likely to be A4 or US Letter, depending on your country of residence.
Press Continue and click Send to Printer.
There are a few settings which will really help you to get a good quality print.
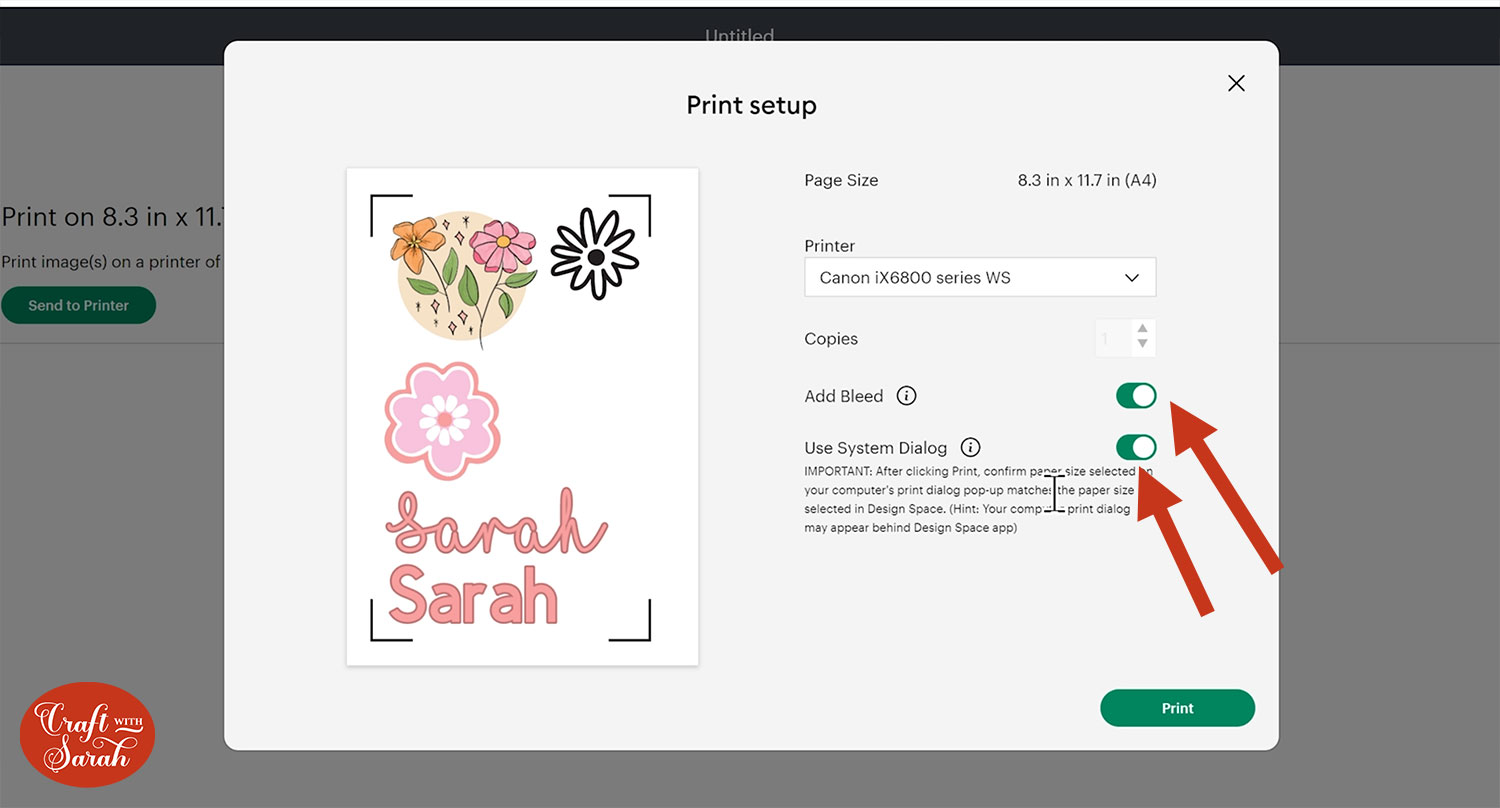
The first of these is to make sure “Add Bleed” is turned on so that if the Cricut cuts slightly off, you won’t see the white of the paper – there will still be colour.
For this tutorial it won’t make a difference as the offset images that the Cricut will be cutting along are white anyway.
Make sure that “Use System Dialog” is toggled on too, so that you can access printer settings for a better quality print.
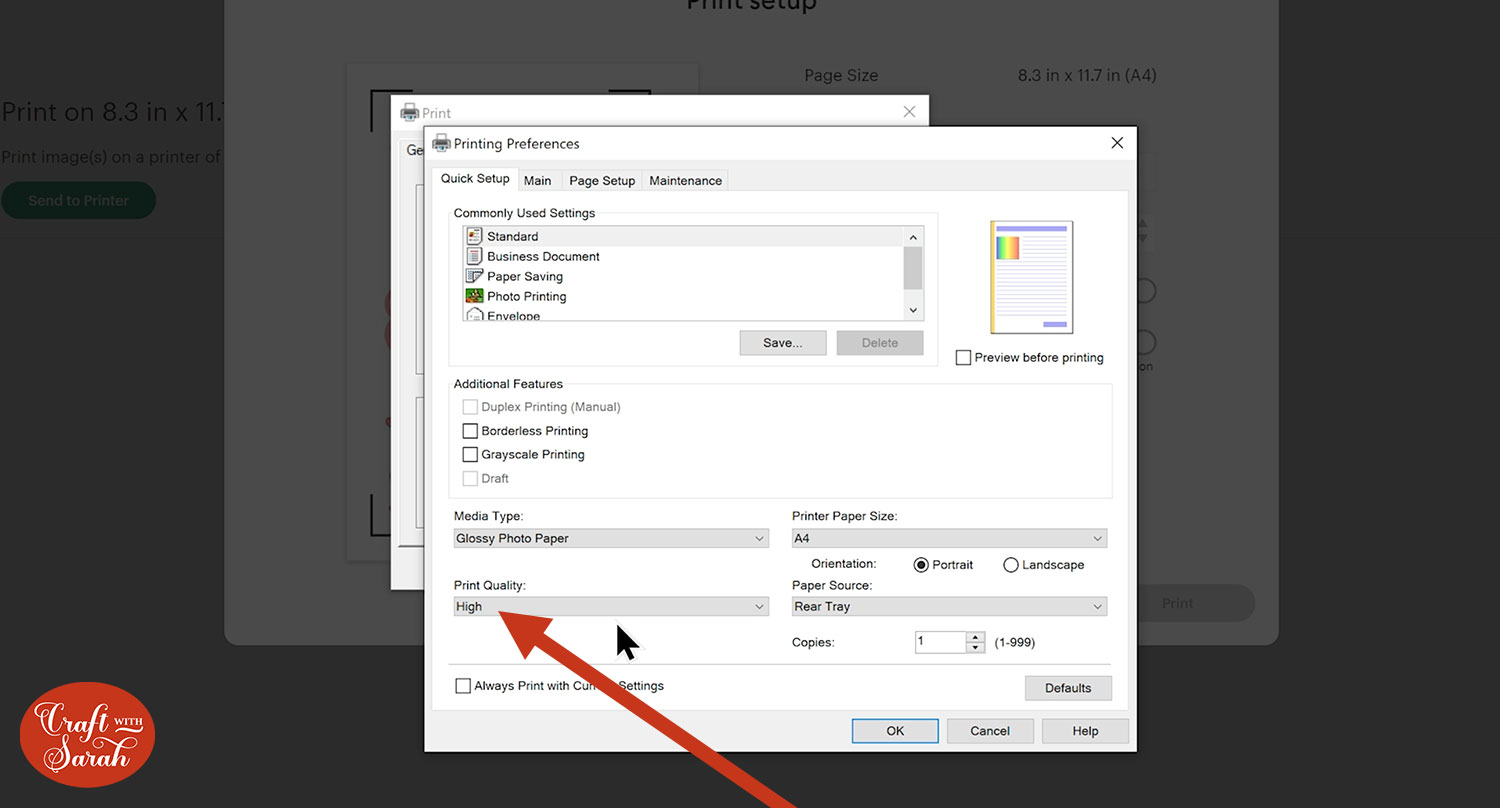
Press print and up should come your printer settings. These will look different for each printer but look for media type and select the paper type that matches the paper you’re using.
For me this was glossy photo paper. If you can’t find your paper type, select something similar.
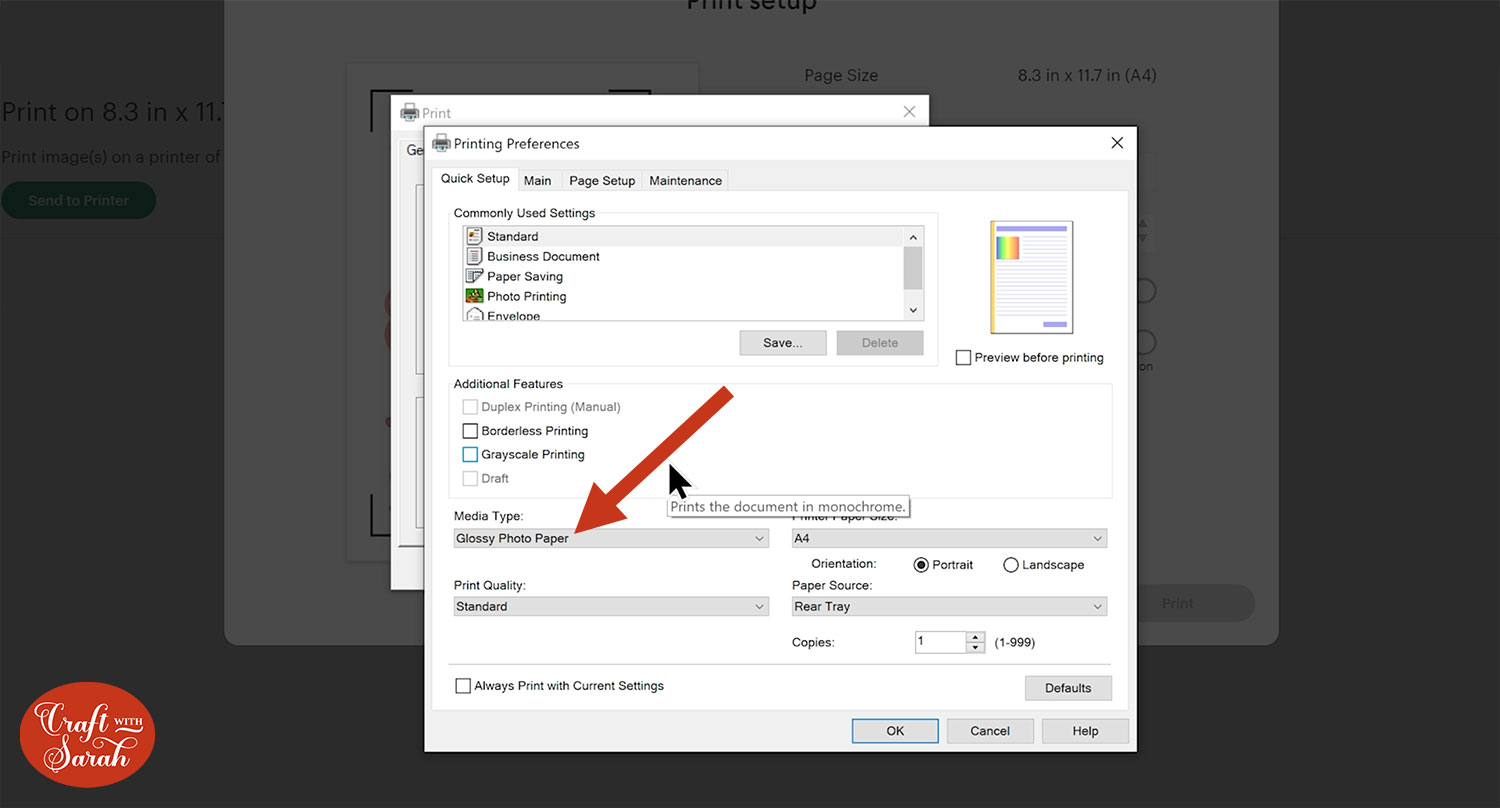
The most important thing to look for is print quality. Look for a setting to allow a high quality print which may be “high” or “best”.
If you’re struggling with printing and getting horizontal lines across the print, this is probably because you’re not printing on that high quality setting.
Go ahead and print out your project.
Part 5) Print then cut calibration
You might find when you are trying to print a project in Design Space that it asks you to calibrate your cutting machine (especially if you’ve never done Print then Cut before or if your Design Space has recently done an update).
Calibration is really important, so if you get that message, make sure you follow the process and the step-by-step instructions.
If you ever find that your Cricut isn’t quite cutting your Print then Cut images correctly, you’ll most likely find that it needs to be calibrated and that should fix the problem.
Part 6) Cut out the designs
Place your printed sheet onto a light grip cutting mat.
Use a brayer tool to make sure it’s stuck down really well.

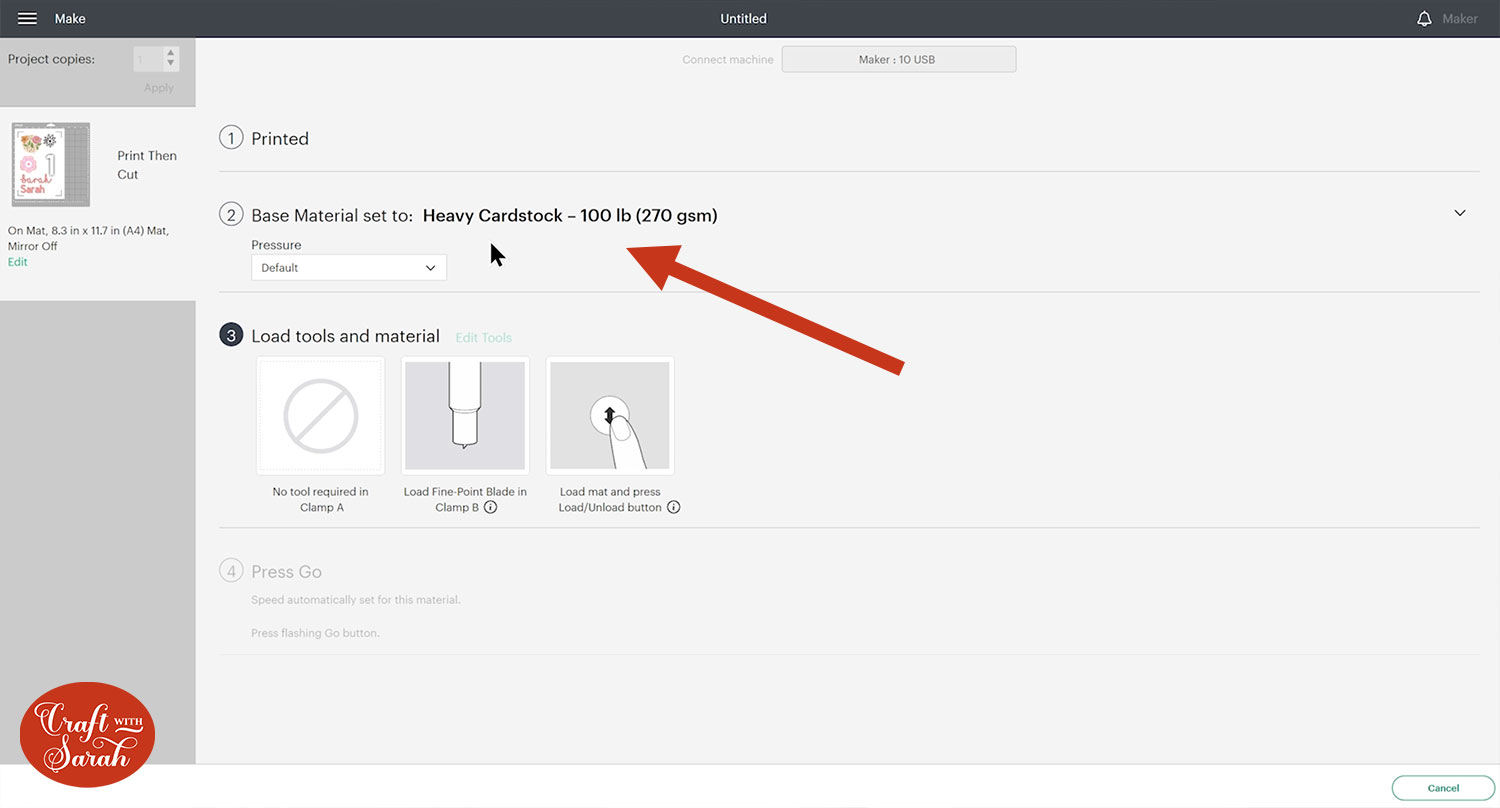
After printing you will see that Design Space has automatically moved you on and you will be able to select your base material for cutting.
For the type of photo paper that I am using, I like to use the Heavy Cardstock setting.
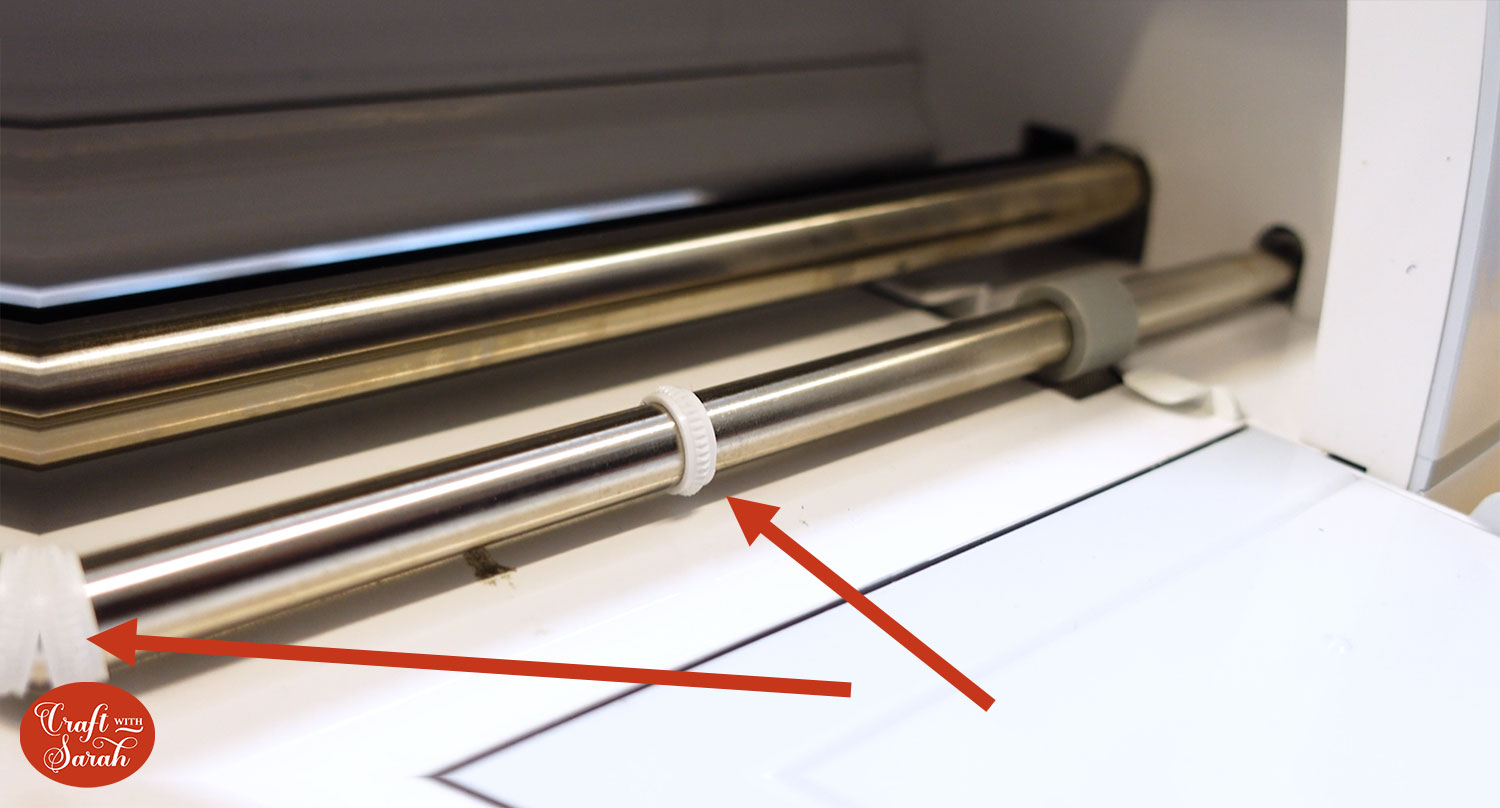
Slide the star wheels on the roller in your Cricut to the side so that they don’t leave lines/marks over your printed images. Remember to slide these back across after the cut as they help the Cricut to load in the mats.
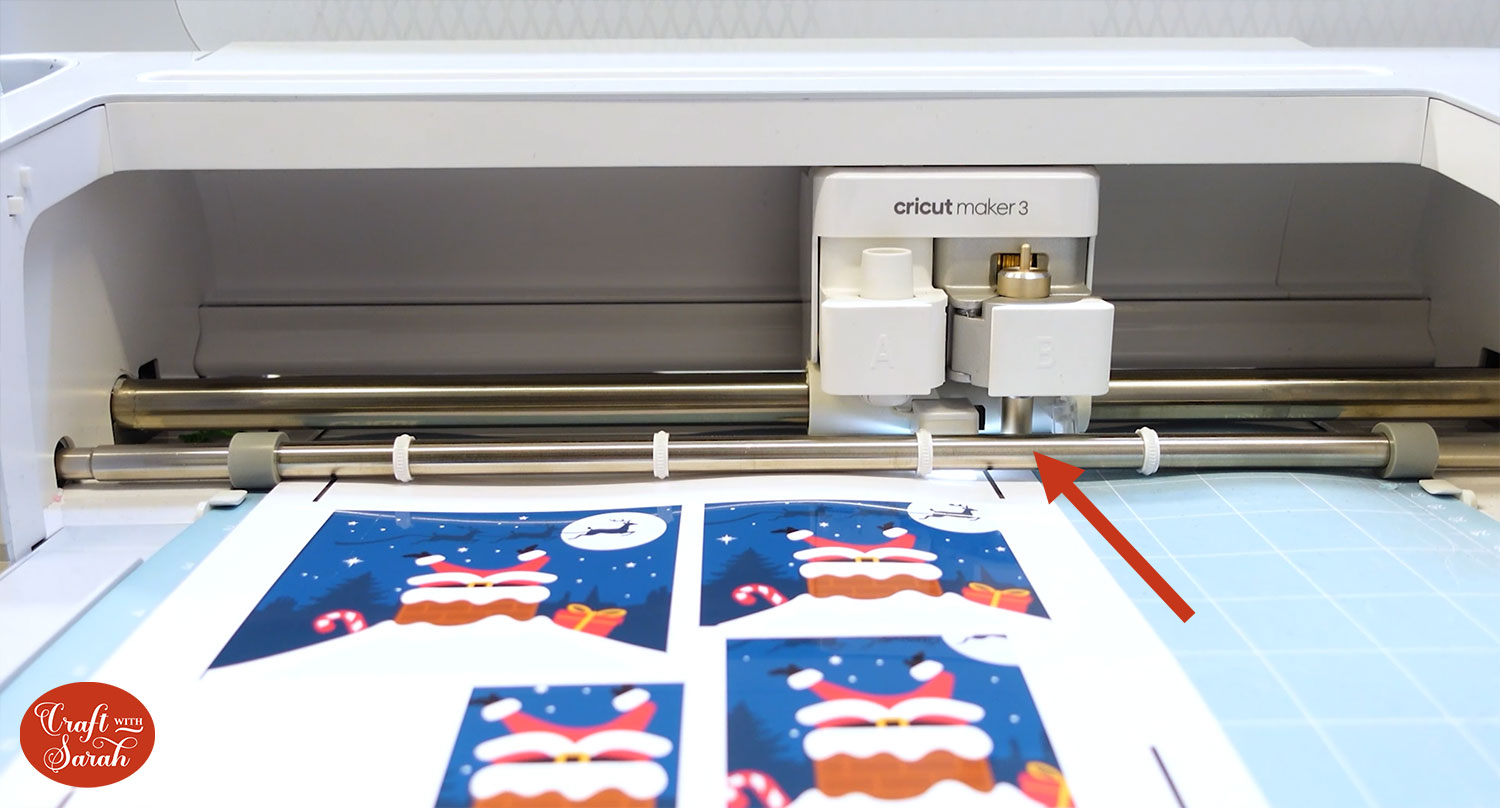
Simply load your printed sheet in and press the Go button.
A light will come on your Cricut machine which will be looking for the registration marks so that it knows where to cut. This part may take a few minutes.
Once the cut is finished, take your images off the mat.
And now your Print then Cut project is finished!
How do I Print Then Cut in Design Space?
I hope you enjoyed this tutorial on how to print and cut on a Cricut machine.
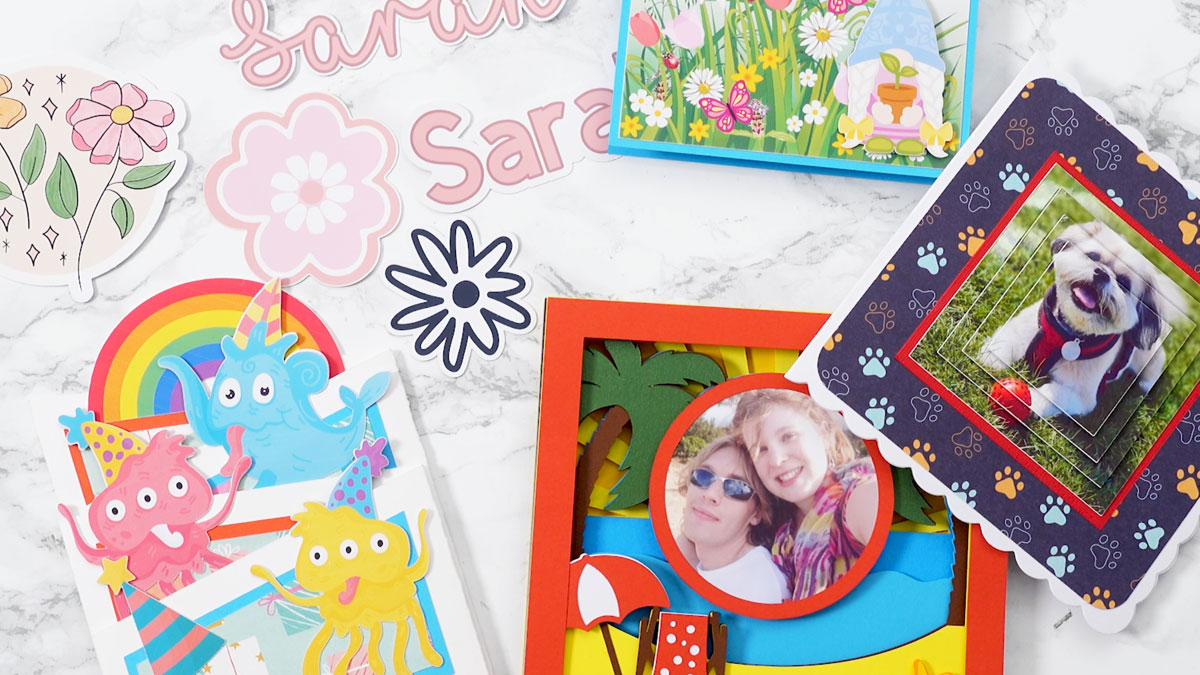
I love all the possibilities that come with using Print then Cut. It’s great for cards, shadow boxes and scrapbook pages.
If you’ve caught the Print then Cut bug, here are some projects to try out:
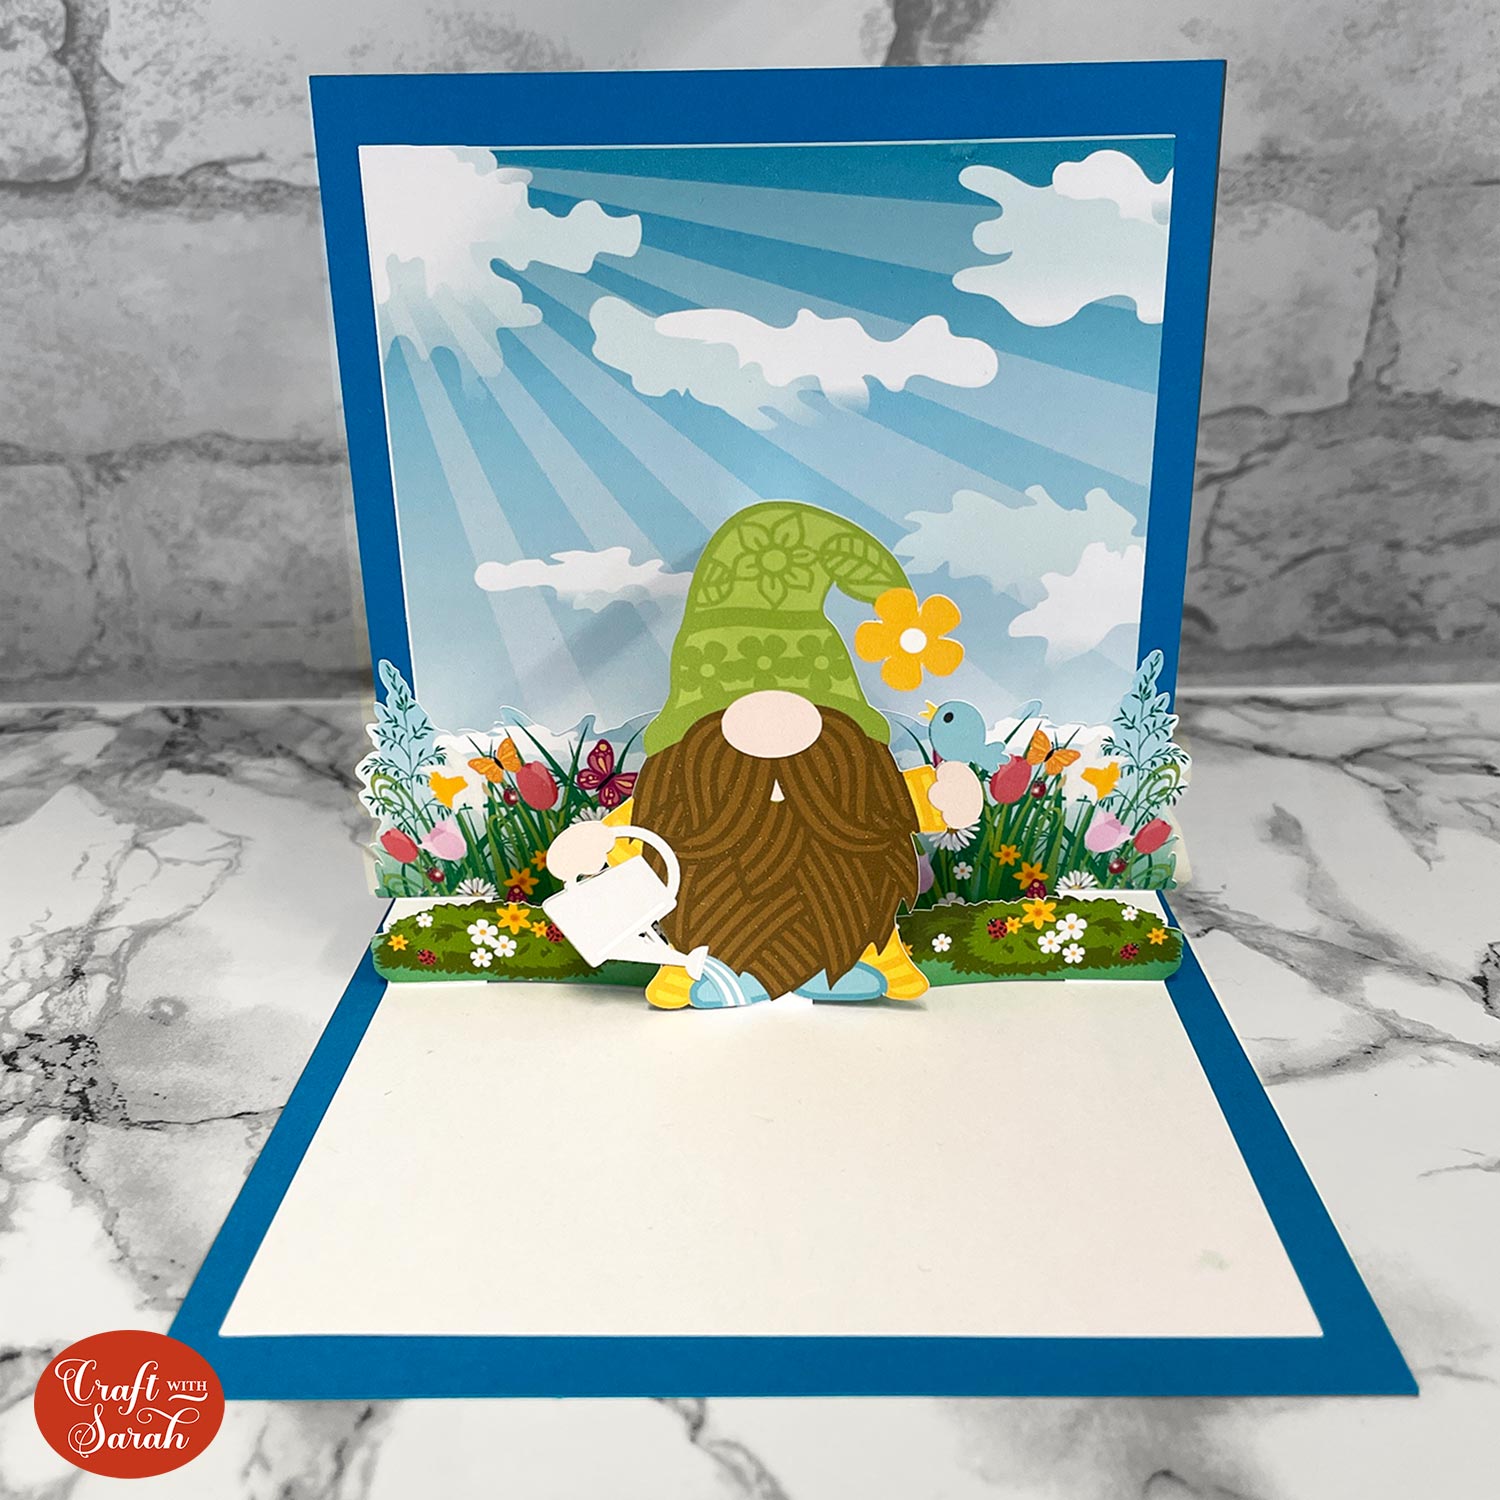
- Gnome popout card
- Pyramid card toppers
- Rainbow bridge pet memory frame with photo
- Eclipse cards
- Family Portrait artwork
- Digital Stamps
- Digital papers and backgrounds
- Cascade accordion cards
Happy crafting,
Sarah x