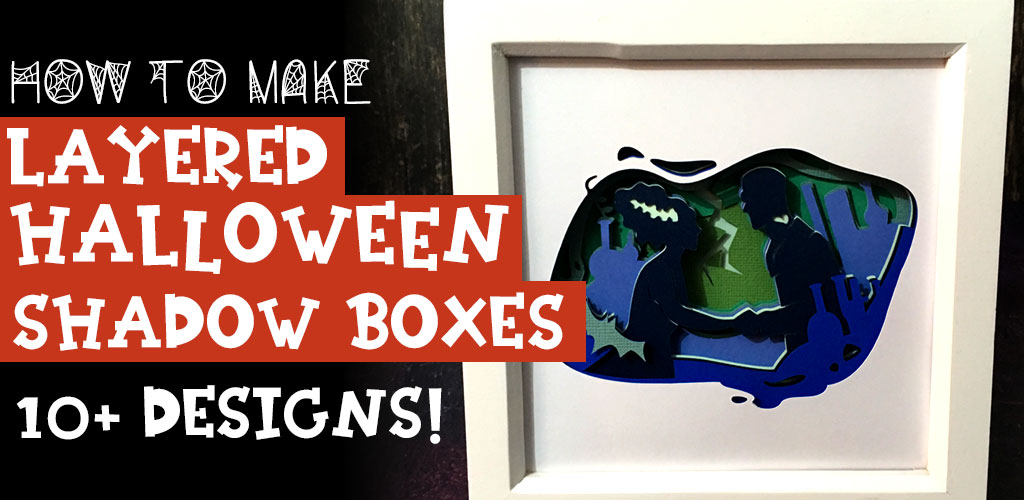
Make Layered Halloween Shadow Boxes with a Cricut
Make awesome dimensional shadow boxes for Halloween with your Cricut Machine and Cricut Access images.
Cricut Access has LOADS of these layered shadow box designs for choose from.
Keep reading to find out where to find layered shadow box designs in Cricut Access, and how to edit them in Design Space to ensure a perfect fit inside your box frame!
Please note that some of the links included in this article are affiliate links, which means that if you click through and make a purchase I may receive a commission (at no additional cost to you). You can read my full disclosure at the bottom of the page.
Video tutorial for Halloween layered box frames
Watch this video to find out where to find these Halloween designs in Cricut Design Space, and how to cut and assemble them.
A full written tutorial is available further down on this page.
Halloween Shadow Boxes with Cricut Access
I wanted to include a written tutorial for this project as I know that many of my readers prefer this to watching a video, however if you are new to Design Space then I’d recommend watching the video because you’ll be able to see exactly how I use the Design Space software, in real-time.
Step 1) Choose your image
Open a new file in Design Space and click the “Images” button down the left side.
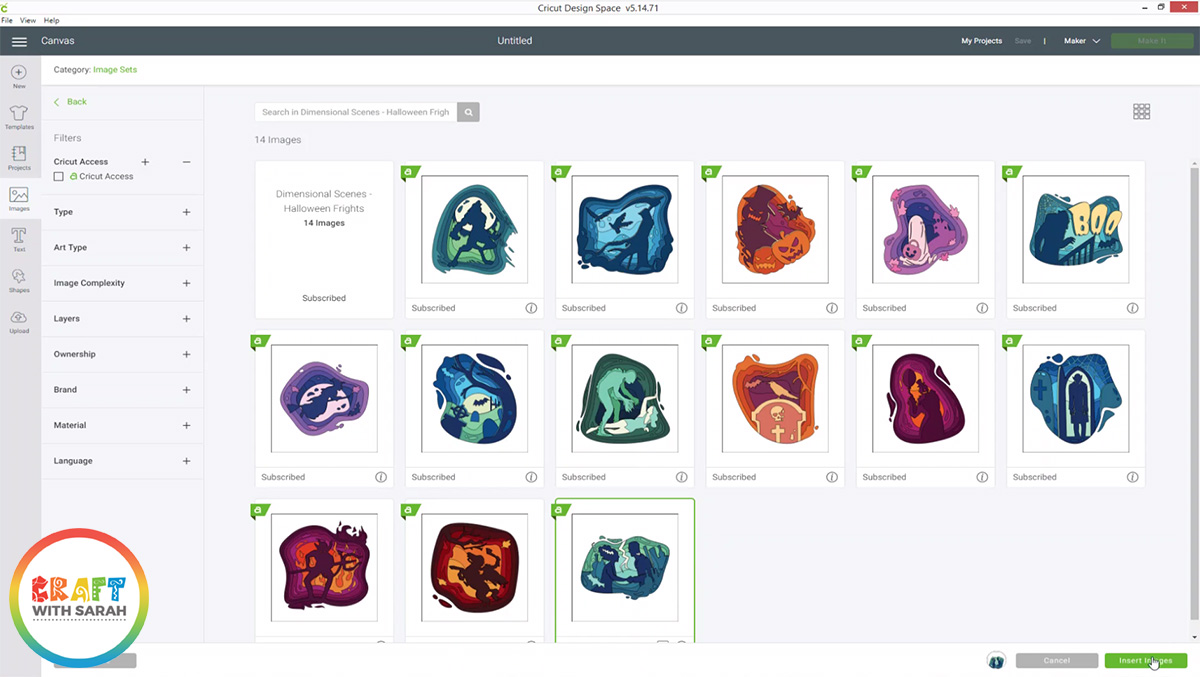
On the screen that appears, look under the column called “Highlighted Categories” and then click “Image Sets”.
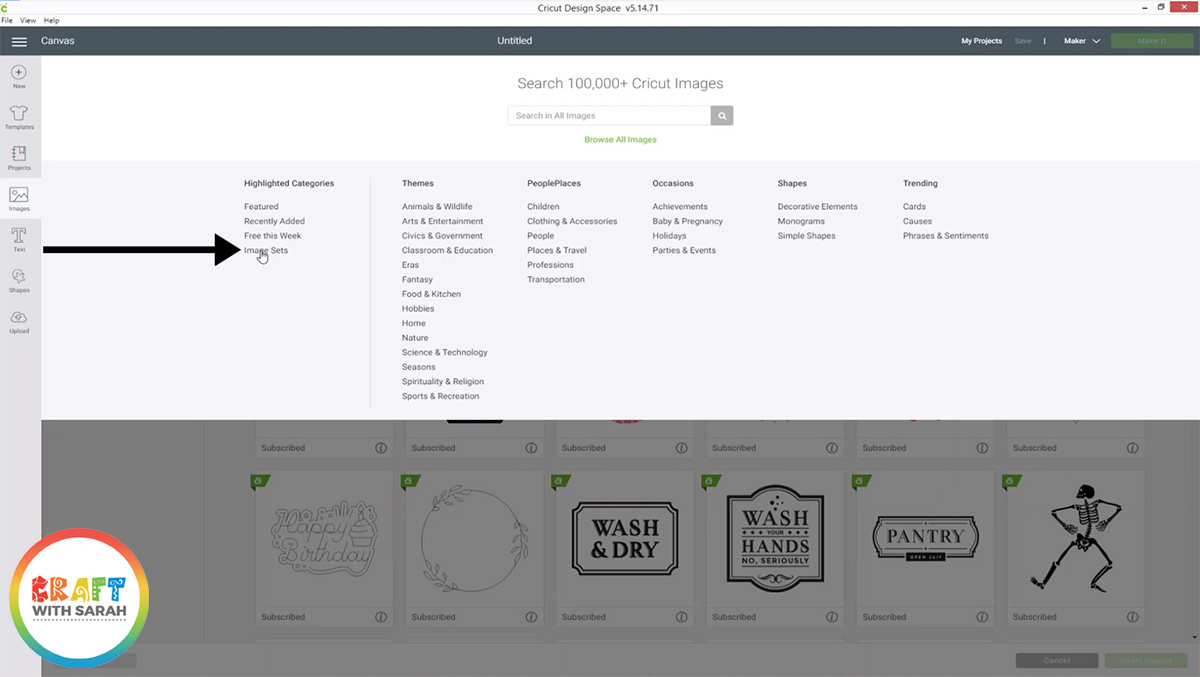
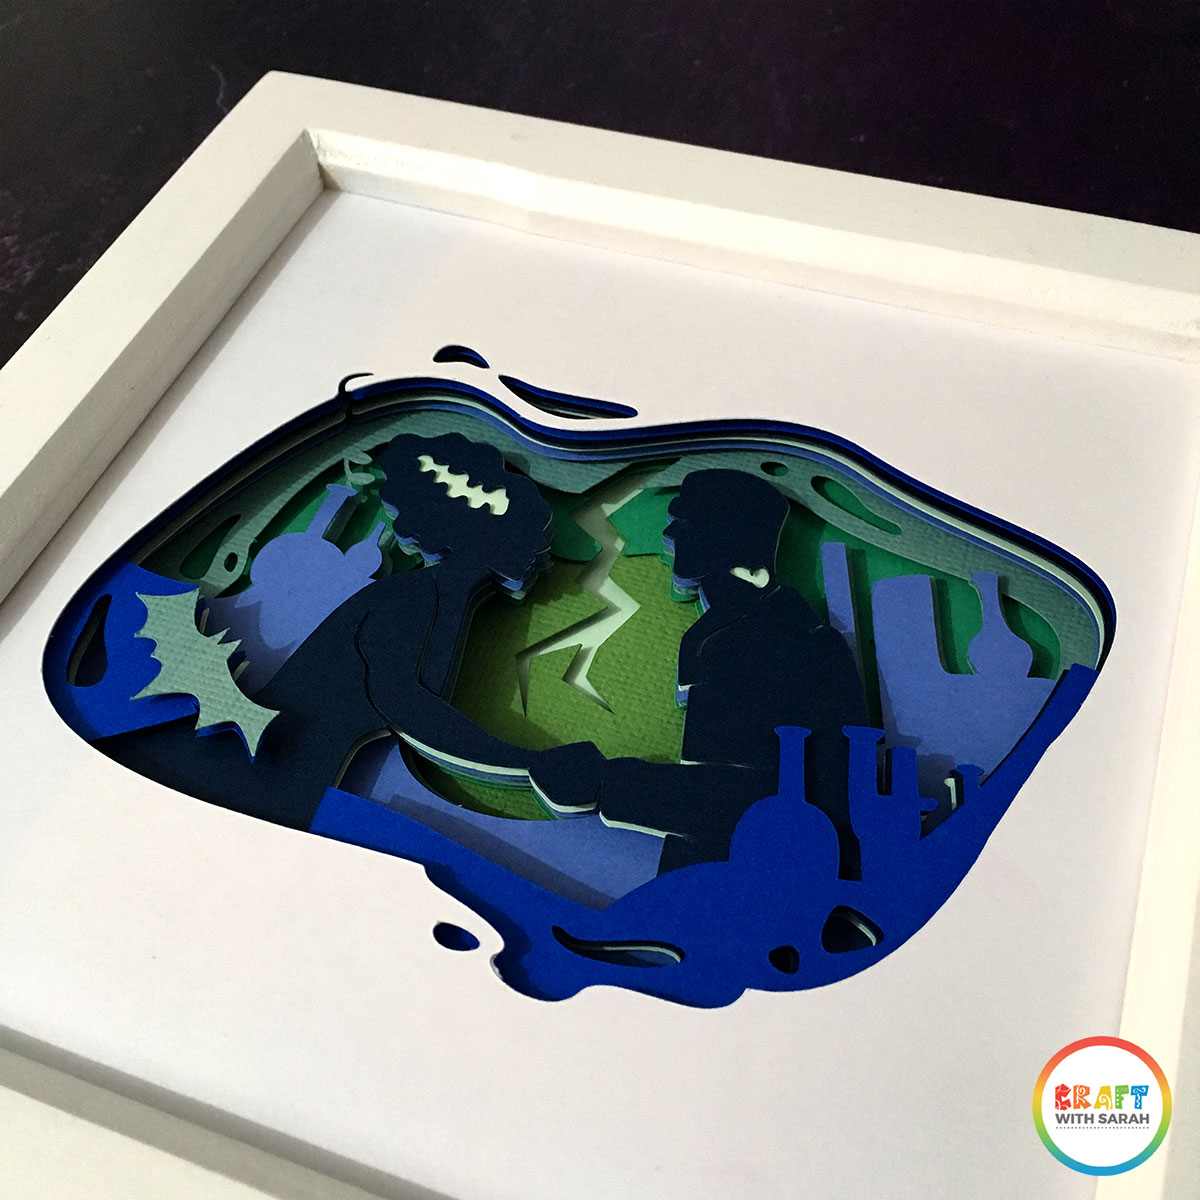
Type “Halloween Scene” into the search box and then click on the set called “Dimensional Scenes – Halloween Frights”.

Click on this box to see all the designs. Choose the one you want to cut and click on it, then click the green “Insert Images” button.
Step 2) Resize to fit your frame
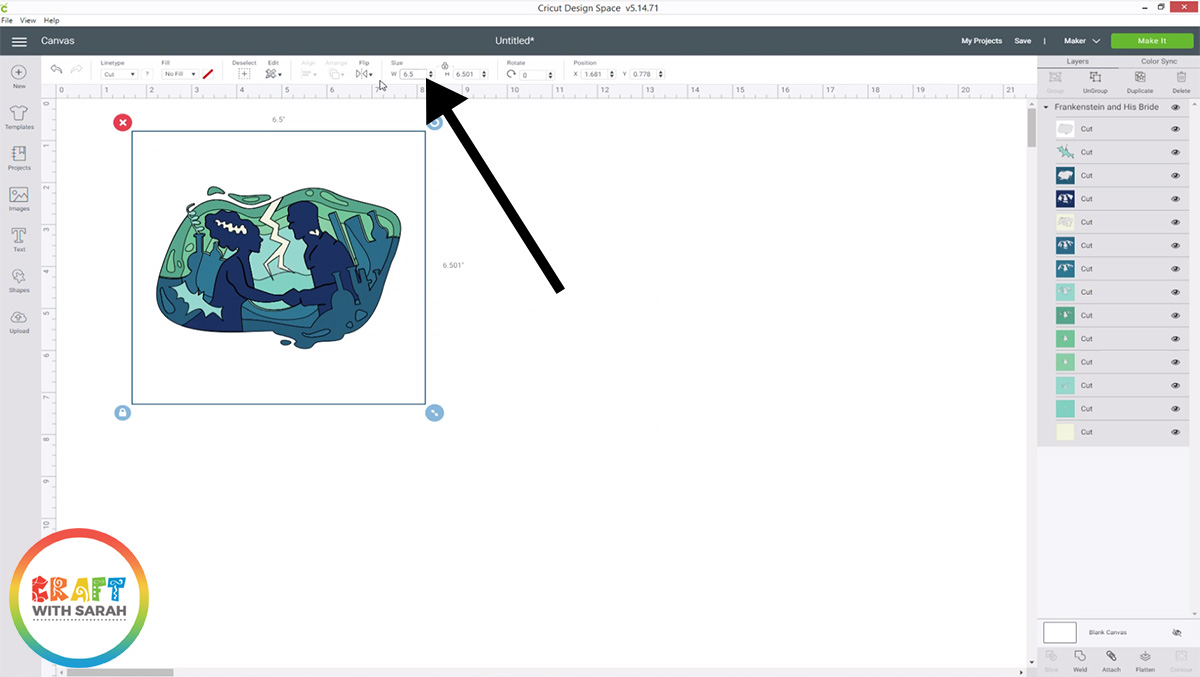
Measure the inside of your shadow box frame to determine the size of the hole in the back.
I find it easiest to remove the wooden spacer/insert from the frame and measure that from one side to the other.
Once you know the size, click on your design and then change the width/height to the measurement you just took.
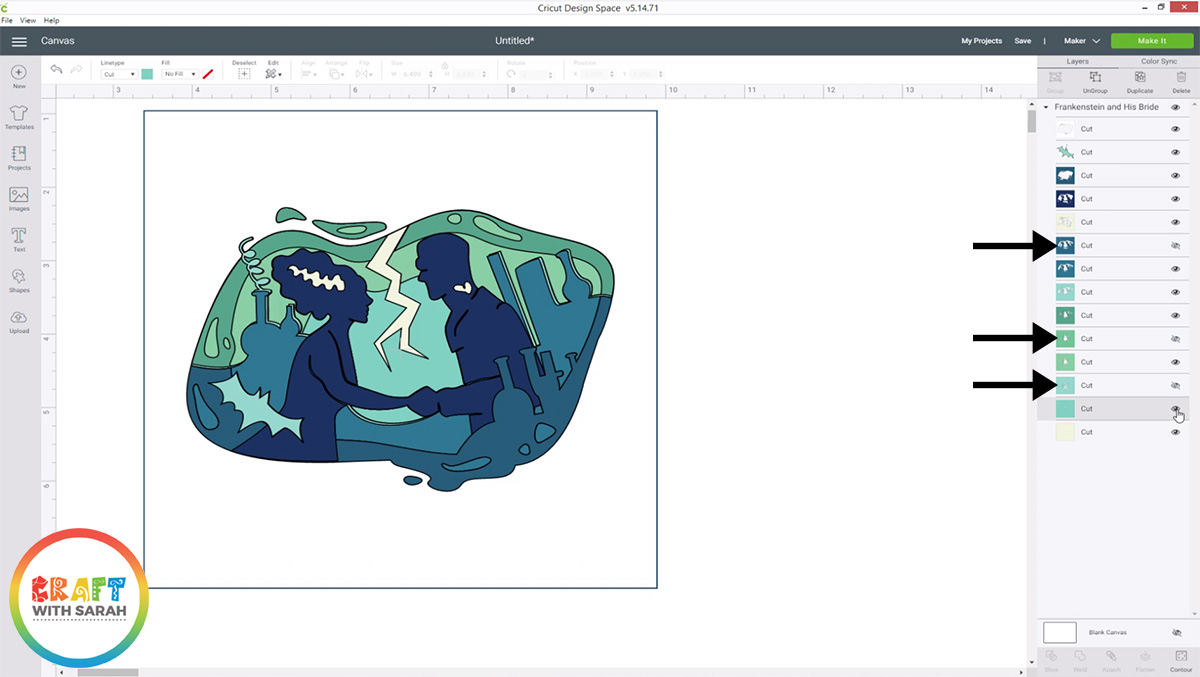
Step 3) Hide layers you don’t want to cut
These designs all contain LOADS of different layers.
My foam pads are fairly thick so I was worried that cutting so many layers would mean that my design wouldn’t fit in the shadow box I wanted to use.
If you feel the same, and would like to use less layers, slowly go through each one in the layers panel and click the “eye” icon next to every layer to see what that particular layer is adding to the design.
Some layers will only add minimal effect, and you can turn these off (by clicking the “eye” icon to hide it) and not include them in your design.
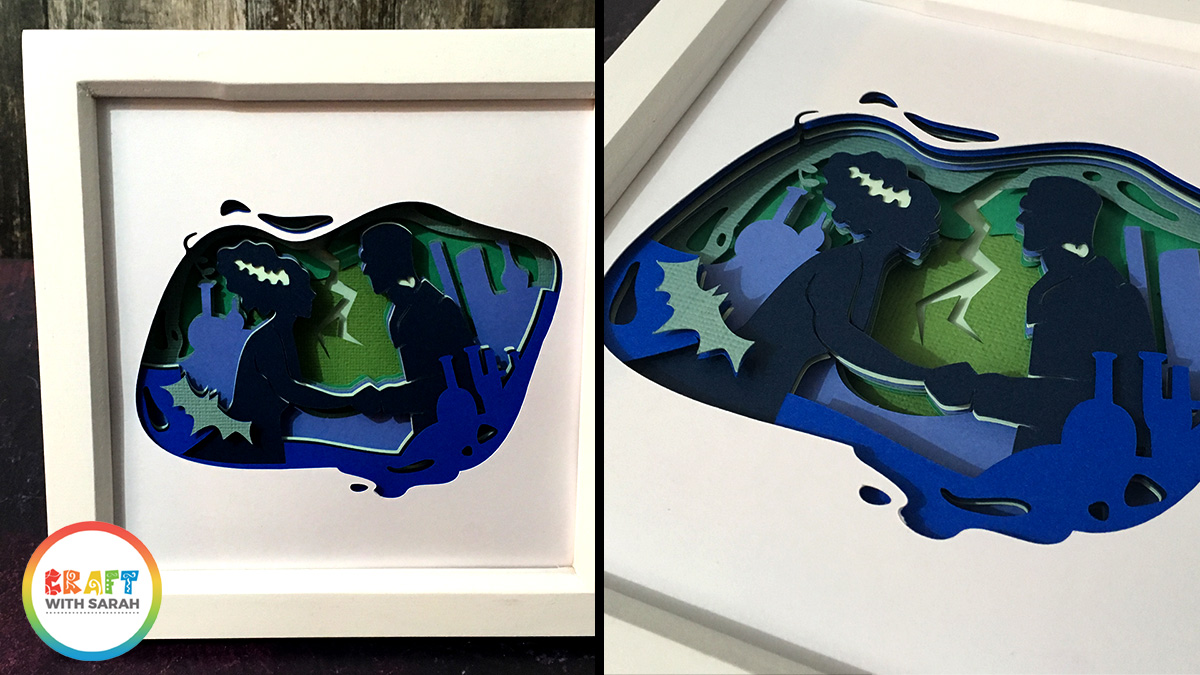
Here are the layers that I turned off for the Frankenstein and Bride of Frankenstein design:
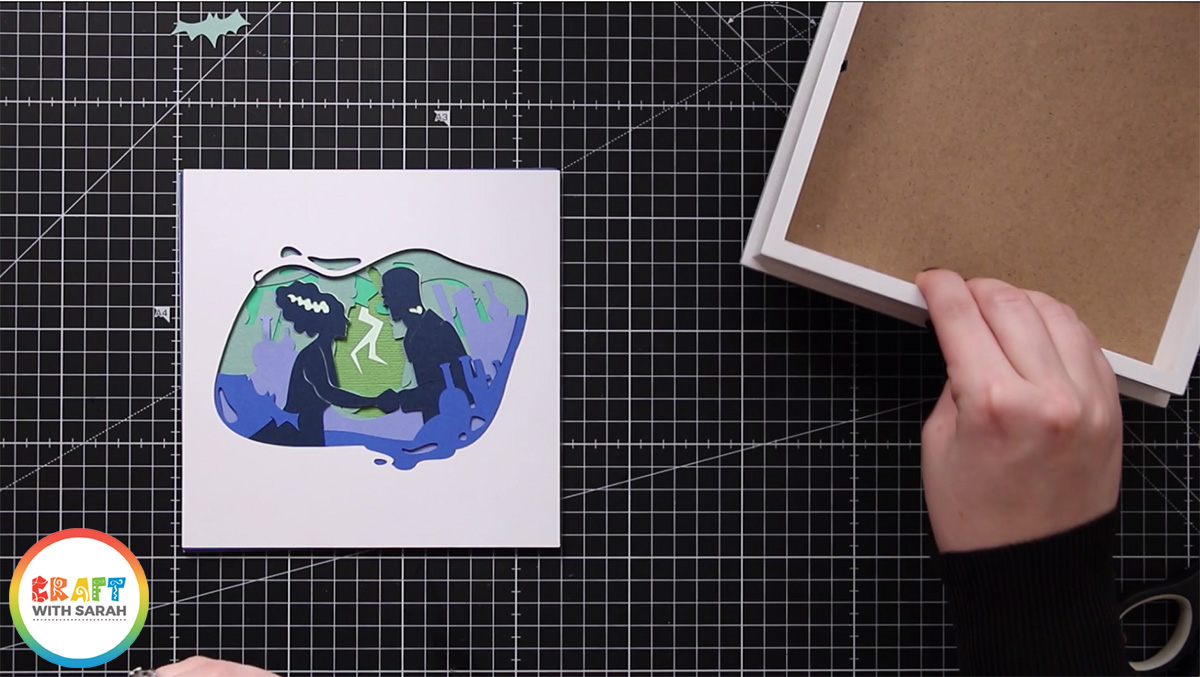
Step 4) Cut out all of the layers
Click “Make It” and then follow the steps to cut out the shadow box design from your cardstock.
Once it’s all cut, place the layers one-on-top of the other according to the order they appear on the main Design Space screen.
It’s so much easier to stick the layers together if you have them in the right order to begin with!
(Note – can you spot the layer I have the wrong way around in my photo – whoops! Don’t worry, I fixed this before I stuck it all together!)
Step 5) Stick the layers together
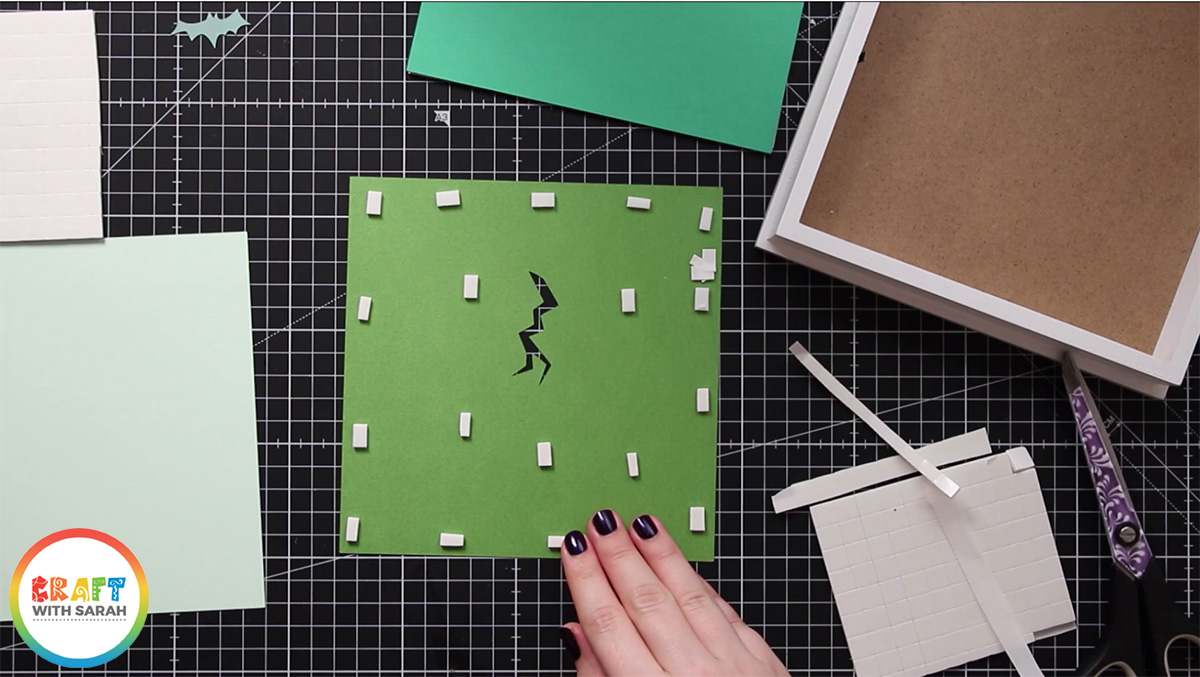
Starting with the bottom two layers, add 3D foam pads to the back of each layer and stick them together.
Be really careful to line up the edges of the squares accurately when sticking the layers together, otherwise it might not fit in your frame.
Add some foam pads in the middle of the card pieces to give it stability and to stop the middles sagging under the weight of the other layers.
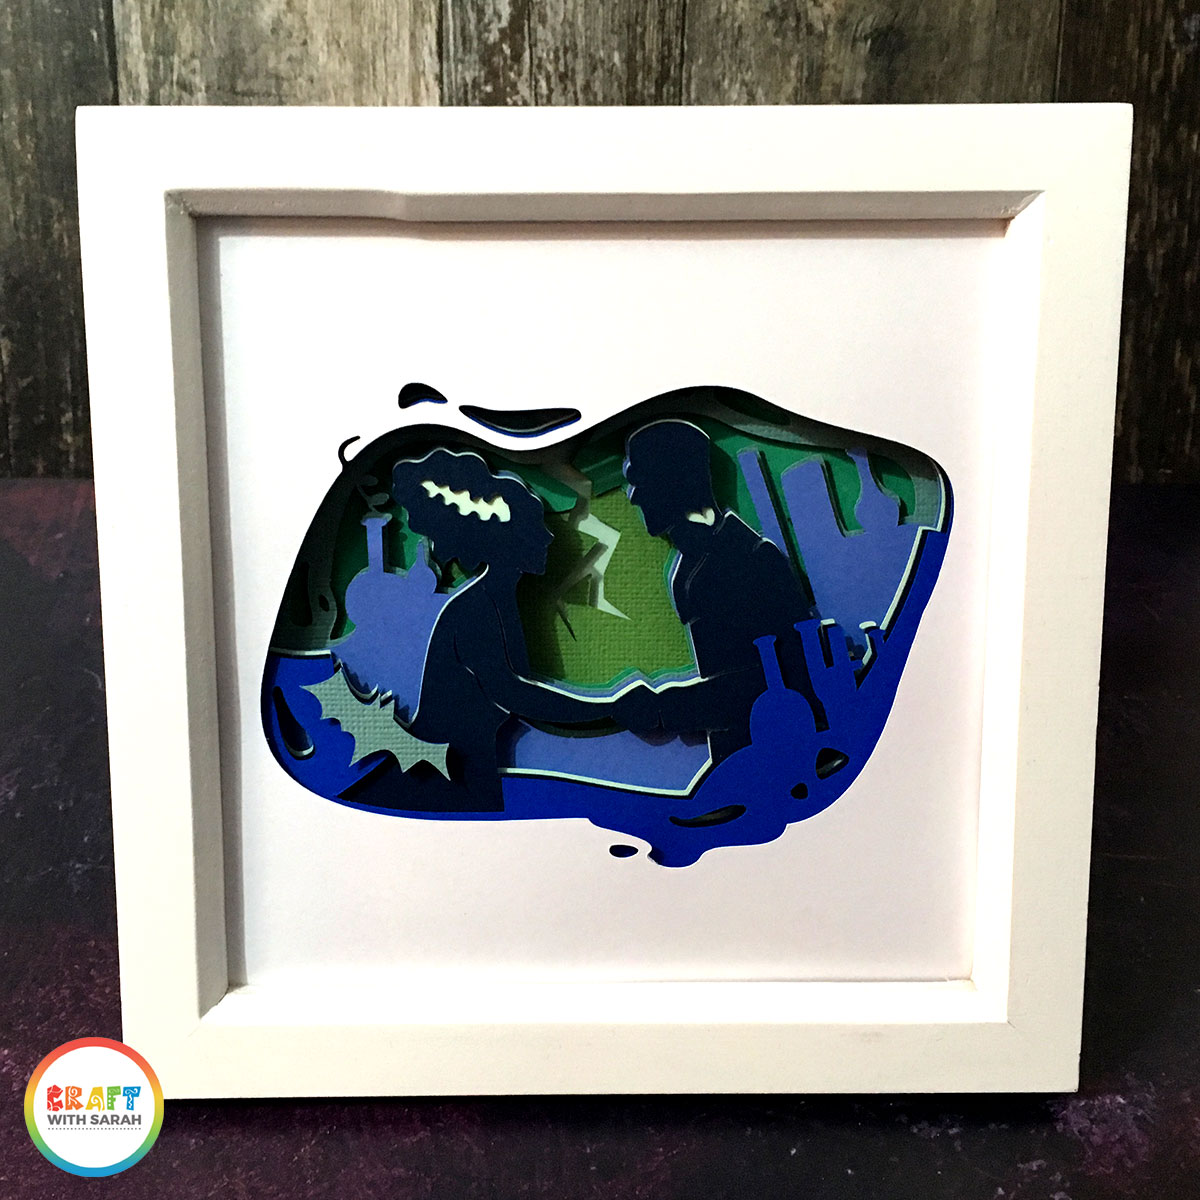
Step 6) Add into the frame
Once you’ve stuck all the layers together, it’s time to add your layered Halloween cardstock design into the shadow box!
Remove the back of the frame and the spacer. You don’t need the spacer for this project.
Simple place your design into the shadow box and then put the back of the frame on and fold down the metal tabs to seal it.
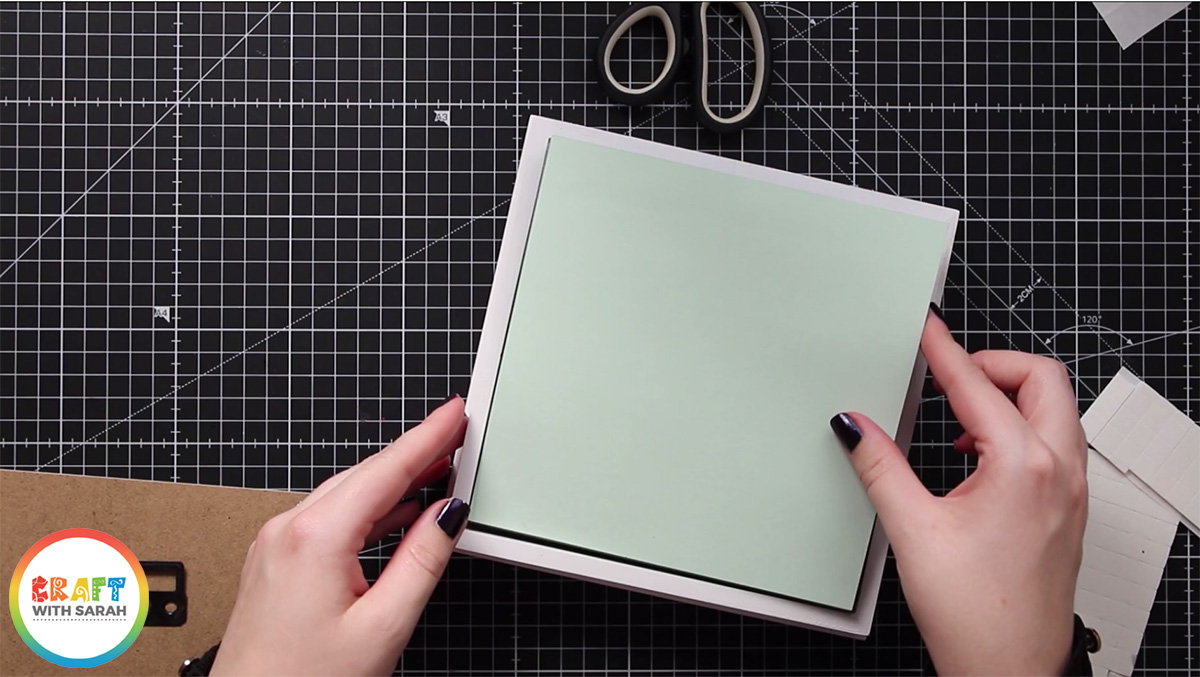
Don’t panic if your paper layers “stick out” the top of the frame before you add the back on. When you push down the metal tabs it will “squish” your foam pads together to make it all fit inside the frame.
I hope you enjoyed this tutorial on how to find layered images in Cricut Access/Design Space and how to make a DIY Halloween shadow box using your Cricut machine.
Happy crafting,
Sarah x