
DIY Faux Arabesque Ornaments made with Cardstock

Make DIY faux arabesque ornaments for your Christmas tree, made entirely from cardstock! These are a great alternative to the hugely popular shaped ceramic tiles.
This craft project is one I have been dreaming about all year. You might remember last year that arabesque tiles were a huge trend in the Cricut community. They are shaped ceramic tiles that were purchased from home depot shops and then decorated with vinyl and used as Christmas decorations.
I really wanted to make them last year, but I couldn’t find any suitable tiles. Also, I was a bit worried that fragile ornaments on a tree with my crazy little dogs wouldn’t be the best idea!
I could just imagine them running into the tree (as they often do!) and those ornaments just coming off and shattering, especially as they’d be really heavy. Also, I saw quite a few posts in Facebook groups that said it was hard to add hangers to the back of these ceramic ornaments.
So I thought, this year, what can I do so that I can have those arabesque shapes on my Christmas tree but without any of the hassle of those ceramic shapes? I got it – make them from cardstock! So that’s exactly what we’re going to be doing – creating arabesque ornaments from cardstock!
This project is part of 2021's Christmas Craft Countdown.
Why make arabesque tiles from cardstock?
Here are some benefits of making these shaped ornaments from cardstock instead of ceramic tiles:
- They are cheaper to make as you don’t need to buy the tiles
- They are much lighter so they won’t pull on the branches of your tree
- They are easier to hang as they have a hole at the top to thread ribbon through
- We can double-side them so they look beautiful from the front and the back!
Let’s find out how to make them!
How to make DIY faux arabesque ornaments
Watch the video below to see how to make the aux arabesque ornaments. Keep scrolling for a written tutorial.
Materials list to make cardstock tree decorations
Here is a list of the materials that I used to make this project:
Please note that some of the links included in this article are affiliate links, which means that if you click through and make a purchase I may receive a commission (at no additional cost to you). You can read my full disclosure at the bottom of the page.
- Cricut Maker
- Light blue Cricut cutting mat
- Coloured Card (I used 160gsm-240gsm weight of card)
- Collall All Purpose Glue
- Needle Tip Applicator Bottle
- 3D foam pads
- Ribbon to hang the decorations
Layered Christmas tree ornaments: Assembly instructions
Here’s how to make your very own cardstock Christmas tree decorations using a Cricut machine!
Step 1) Download the file & unzip the downloaded folder
Use the box below to download the cutting files for this project. Please note that this is not a free file.
It is part of the Christmas Craft Countdown which is a collection of 20 exclusive Christmas themed craft projects.
This design is part of the 2021 Christmas Craft Countdown.

If you have already purchased the Christmas Craft Countdown,
please login to your account.
Before you upload the SVGs to Design Space, you need to unzip the download folder that they come in.
- How to unzip a folder on Windows computer
- How to unzip a folder on a Mac
- How to unzip a folder on an iPad/iPhone
- How to unzip a folder on an Android device
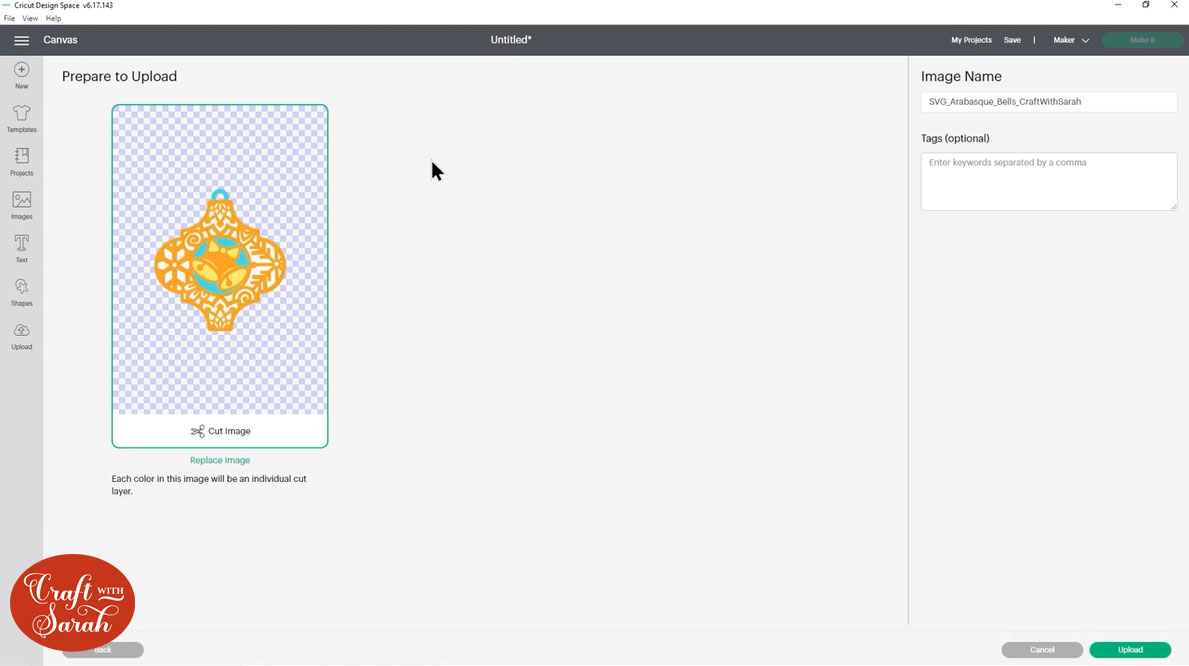
Step 2) Upload the SVG file into Design Space
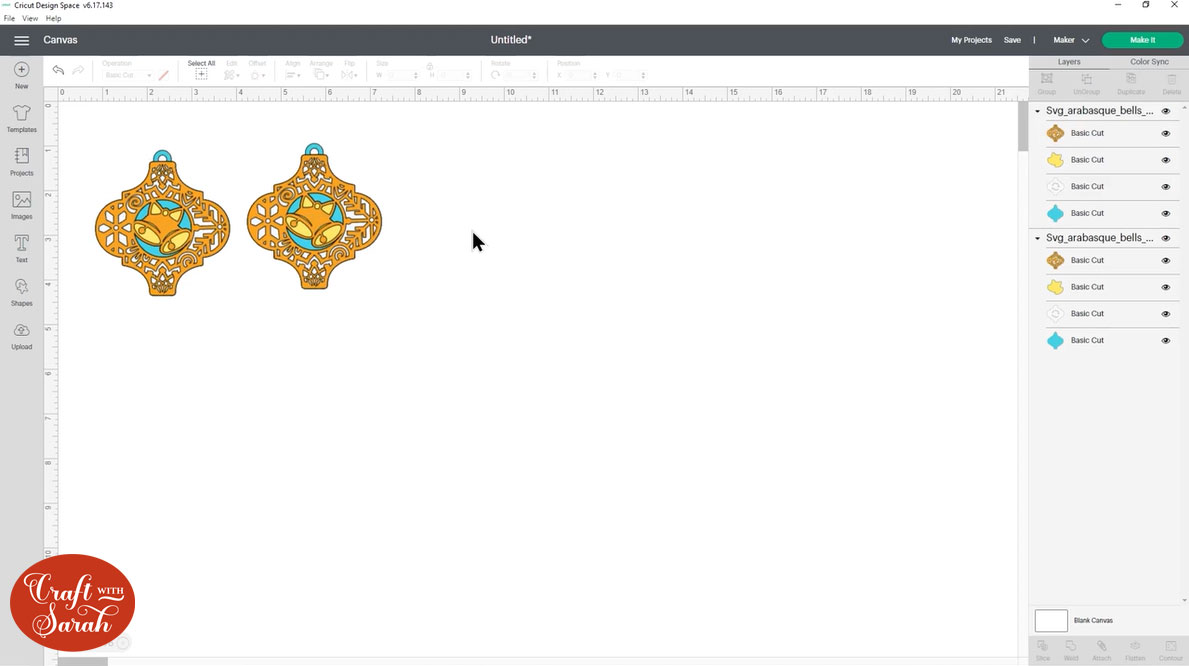
Open up Cricut Design Space and choose the ornament(s) that you would like to make.
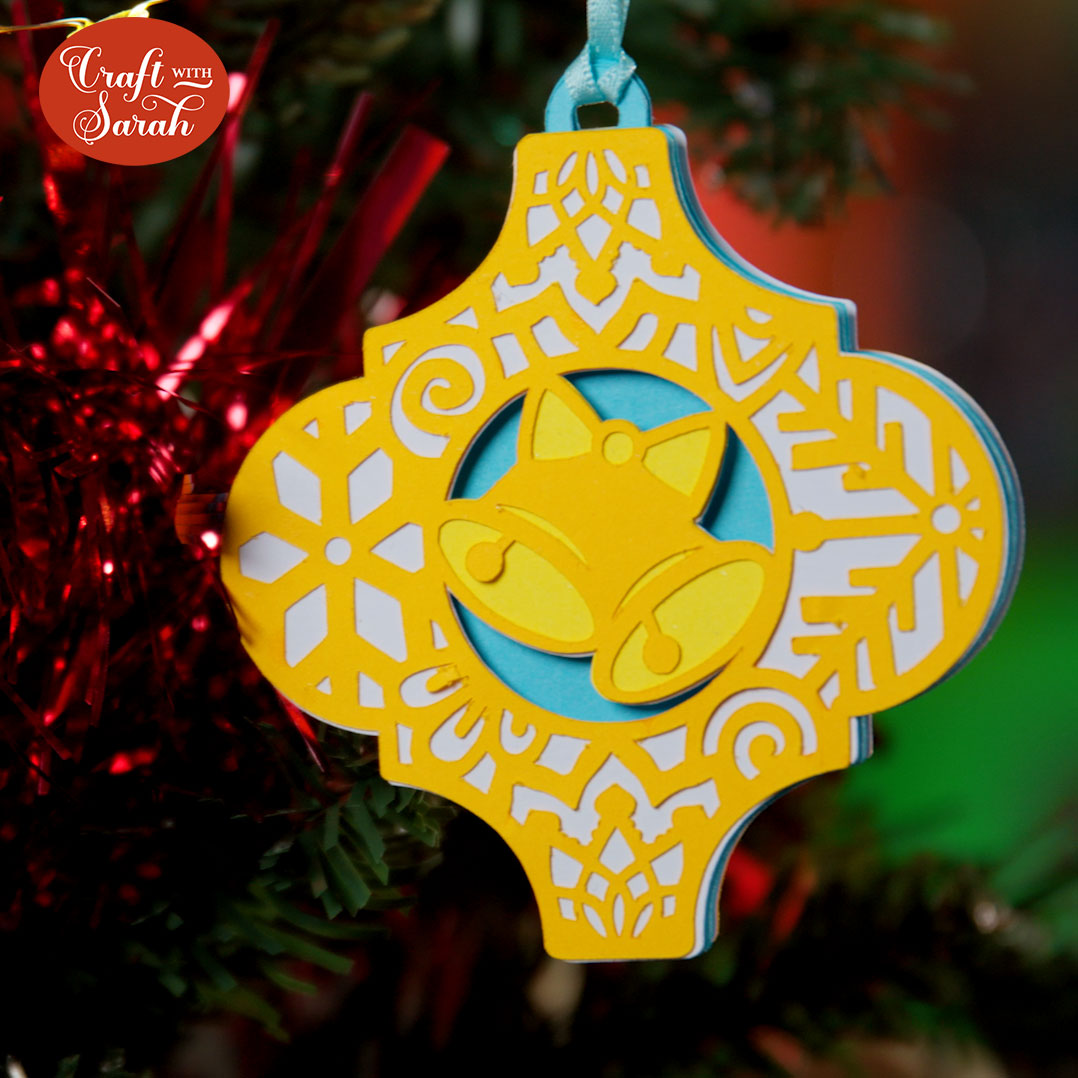
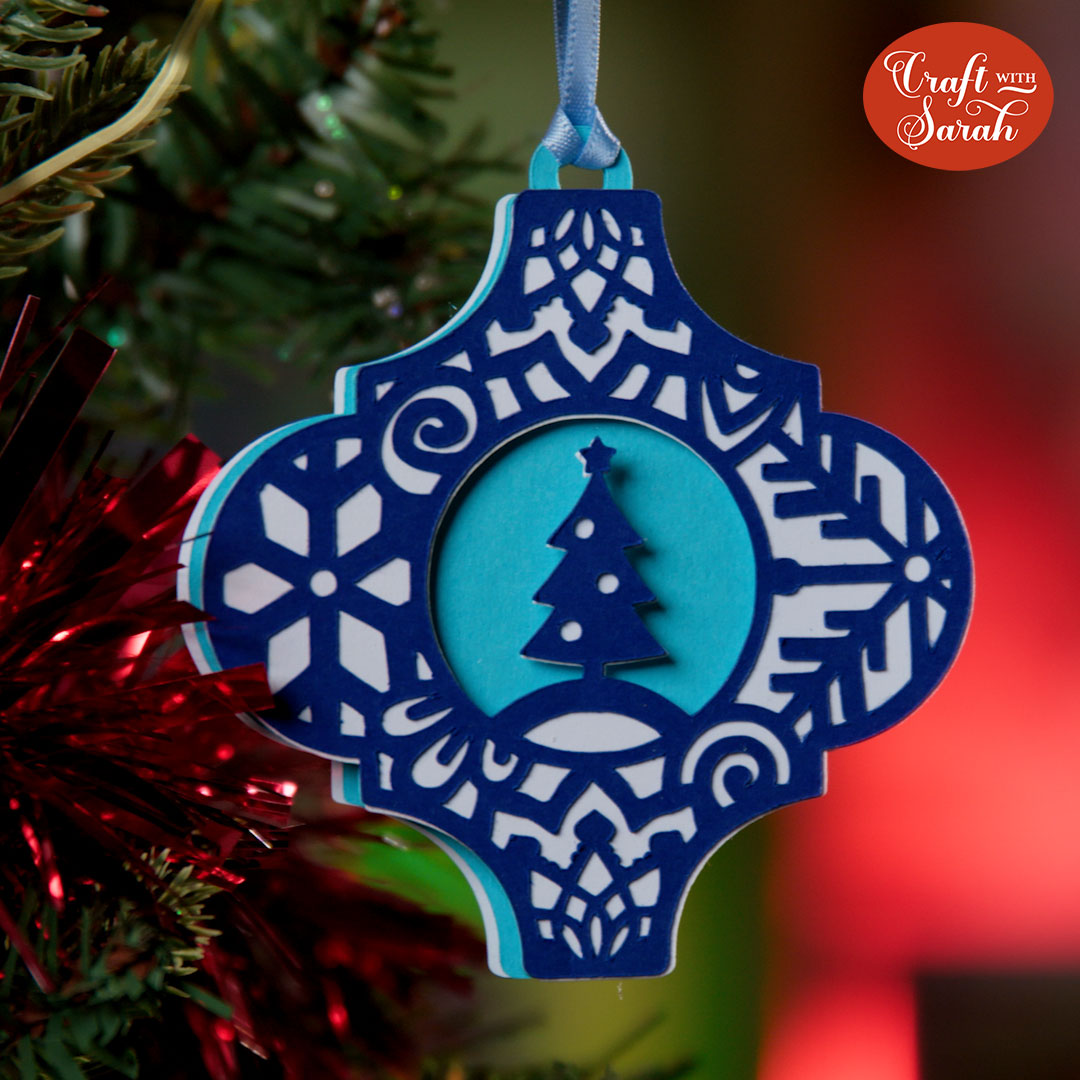
There are three different designs to choose from: a Christmas tree, bells and holly leaves.
Make sure you upload the files which starts SVG_ in the filename!!
This is how it should look after you have uploaded the files:
After uploading, the designs will show in your “Recently Uploaded Images”. Click on them and then press “Add to Canvas” to put them onto your Project.
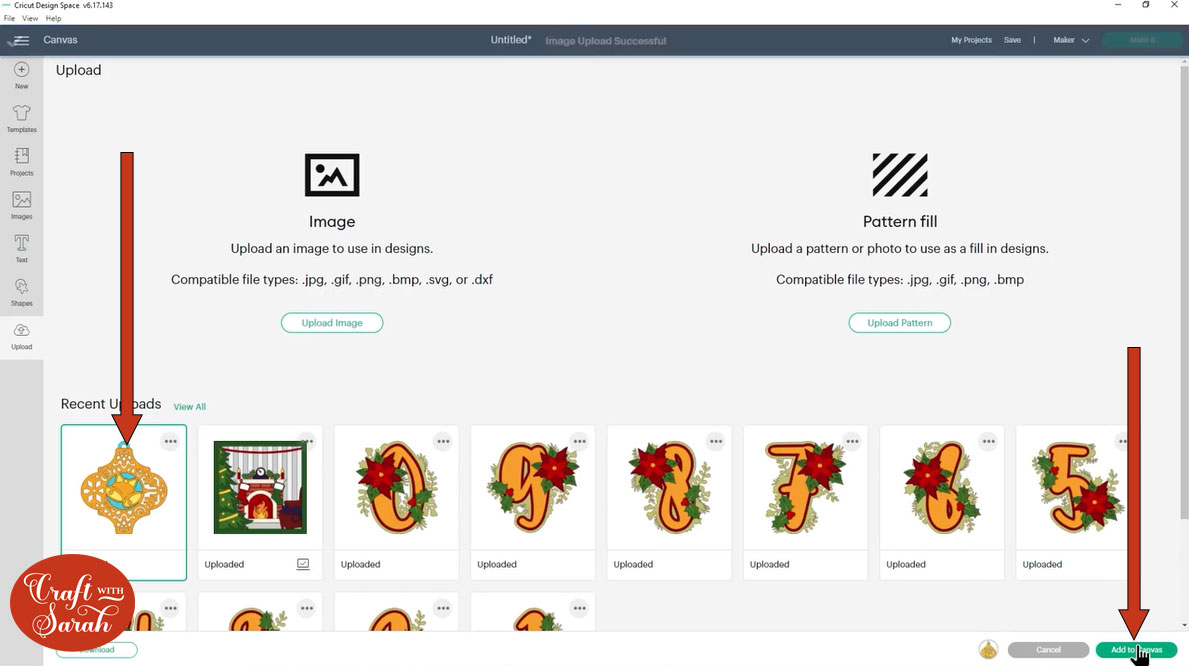
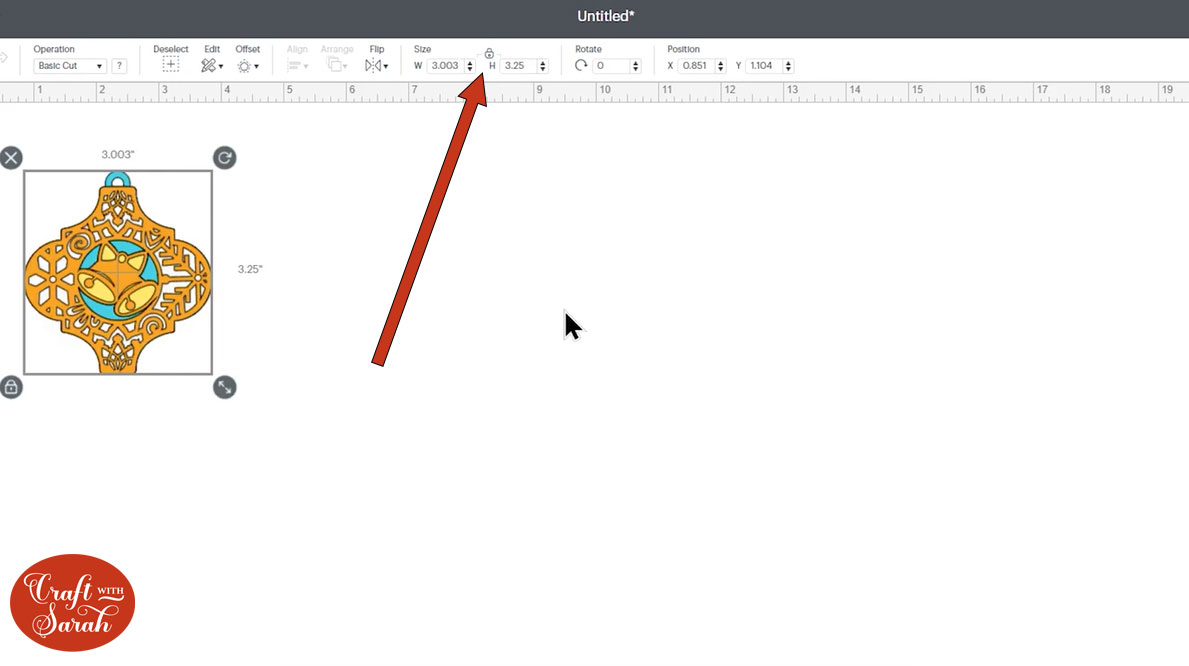
Click the design on your canvas and use the width/height boxes near the top of the screen to make it the size that you want to cut it.
I made my ornaments 3.25 inches tall.
Step 3) Duplicate the design
If you want to make a double-sided ornament with a picture on the front and the back then you need to Duplicate the design before you cut it.
Click the design and then press “Duplicate” to make a copy.

Click “Make it” on the top-right of the screen and cut out all the layers from cardstock.
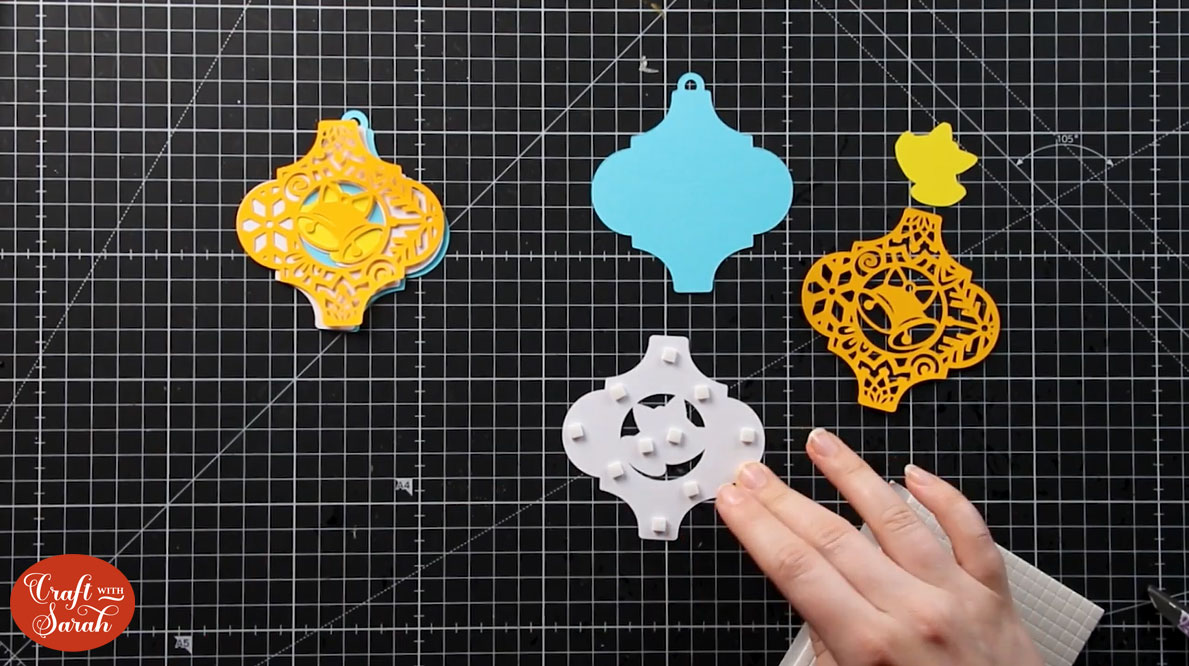
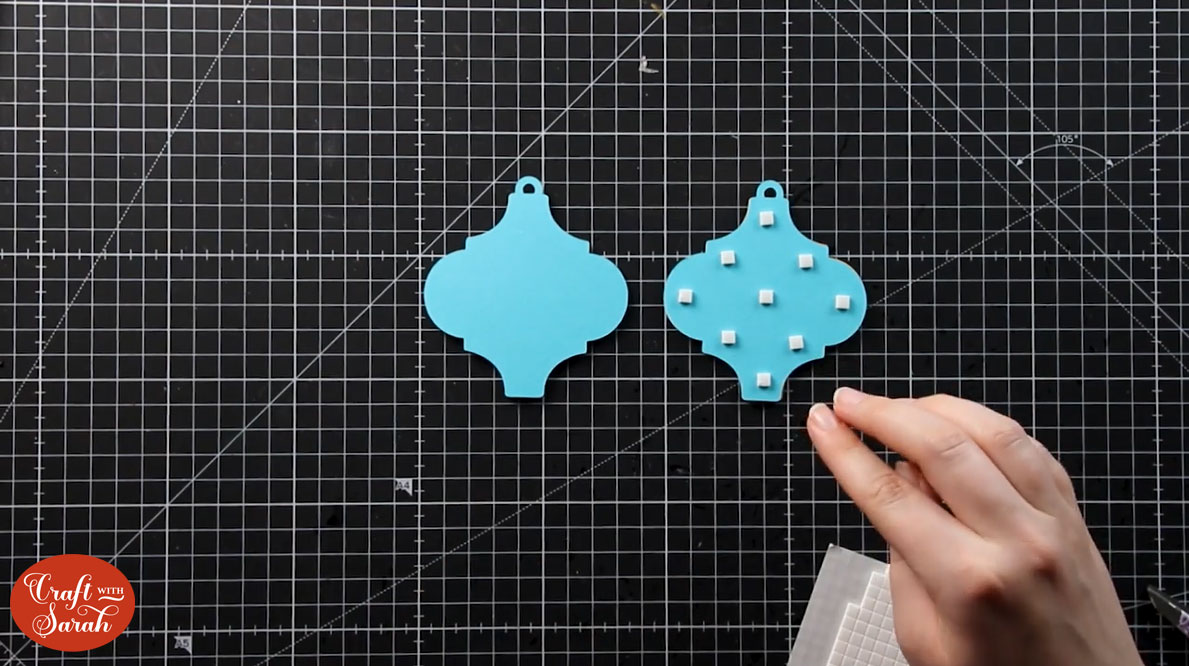
Step 4) Stick the ornament layers together
Use 3D foam pads and glue to stick the layers together. I used foam pads to stick the more “solid” shaped layer onto the base piece and glue for the small decorative pieces and the intricate top layer of the design.
When adding the foam pads, make sure you add some in the middle of the pieces of card so it give stability to the middles. If you don’t add any foam pads in the middles then it can “sag” under the weight of the other layers which doesn’t look as good.
My favourite glue to use on papercraft projects is Collall All Purpose Glue.
It’s SO good because it doesn’t “warp” or bend the cardstock like some glues do. You can use as much of it as you want and the card stays perfect – and it dries perfectly clear too!
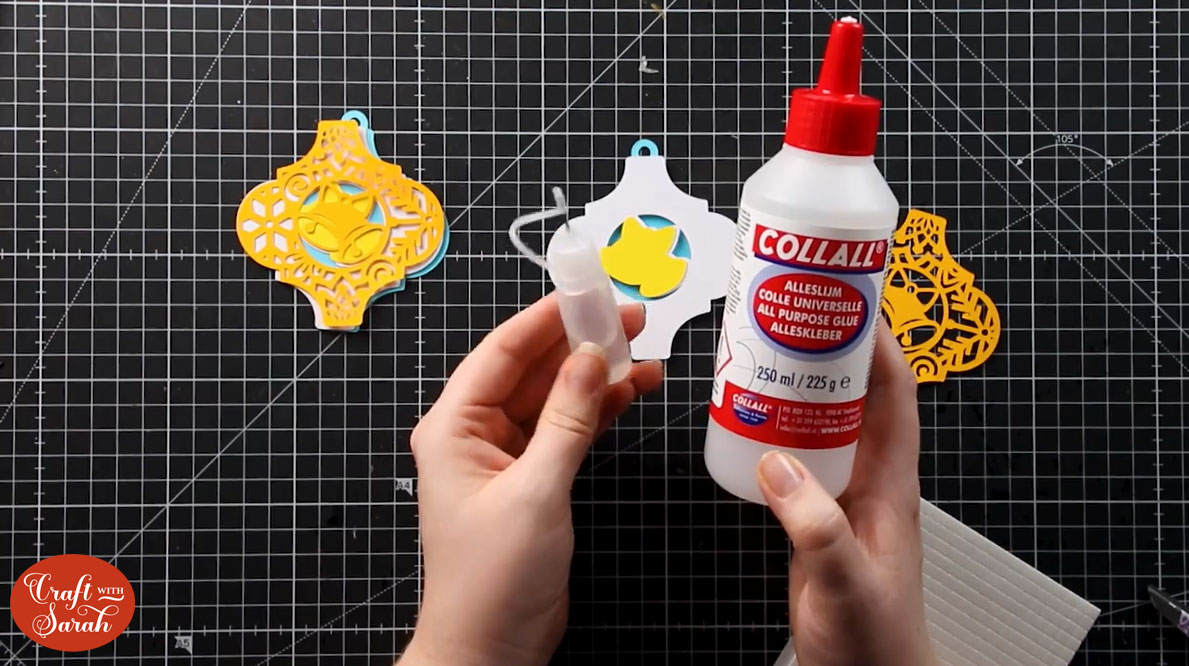
To make it even easier to apply glue to layered card projects, I highly recommend getting some of these needle tip applicator bottles to put the glue into.
The nozzles are REALLY tiny which makes them perfect for putting glue in the pieces of cardstock that make up the ornaments.
To make your arabesque ornaments double-sided, make up both copies of the design then stick them back-to-back using either glue or foam pads.
I prefer using foam pads as it gives some extra depth to the ornament.
Step 5) Thread ribbon through the hole
Thread a piece of ribbon through the hole in the top of the ornament and use that to tie it to your Christmas tree.
I hope that you enjoy these layered faux arabesque ornaments!
This project is part of 2021's Christmas Craft Countdown.
Happy crafting,
Sarah x