
DIY Dog Treat Jar with Vinyl | How to Personalize Jars for Christmas
Make a personalized dog treat jar with vinyl that’s sure to brighten up any pooch’s Christmas!
Welcome to Day 6 of the Christmas Craft Countdown 2021 where I’m releasing a new Christmas craft project every day for 20 days.
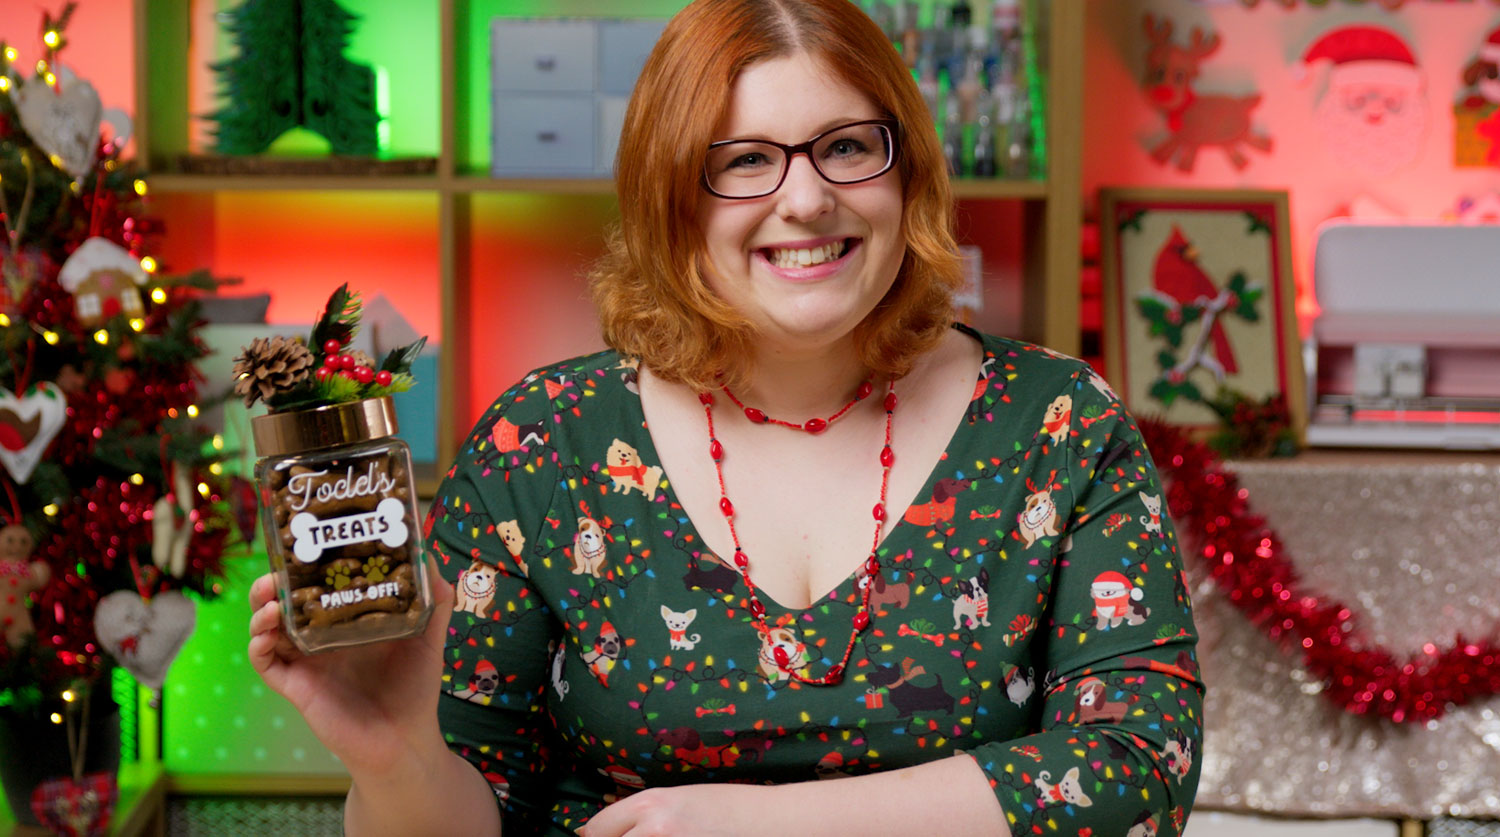
Today we’re taking a little break from papercraft projects and instead we’re going to be making a dog treat jar with some adhesive vinyl.
We’ll personalize the front of the jar with the dog’s name and then decorate each side of the jar with a collection of paw prints and bones.
This project is part of 2021's Christmas Craft Countdown.
DIY dog treat jar video tutorial
Watch the video below to see how to make a personalized dog treat jar. Keep scrolling for a written tutorial.
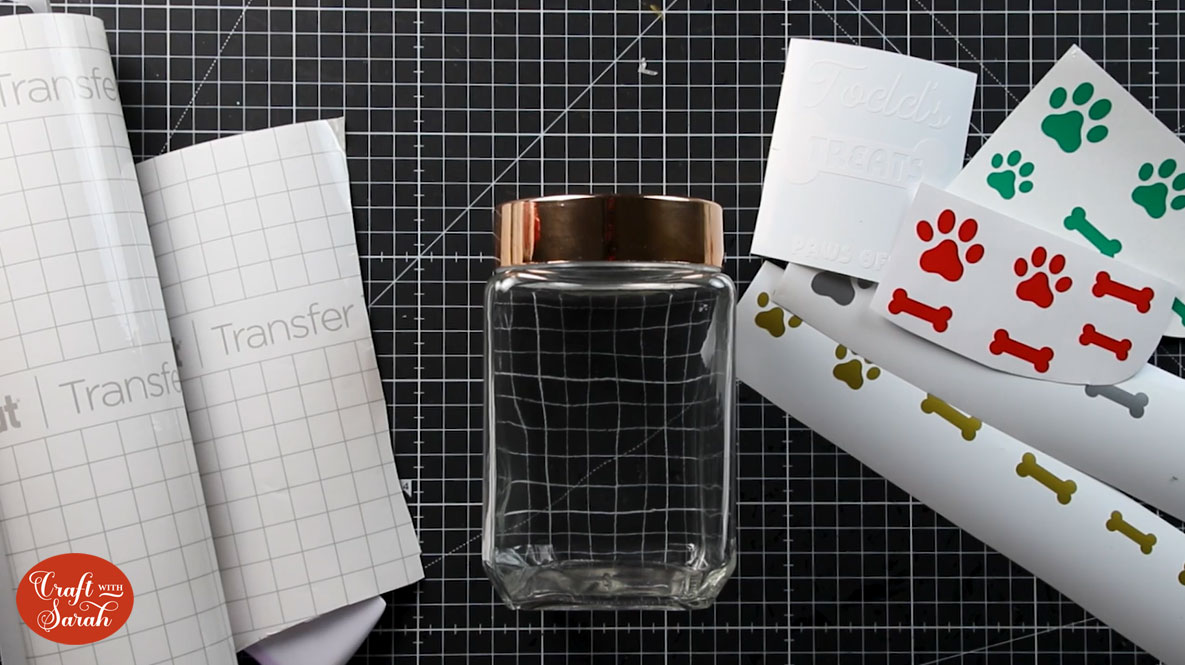
Materials list to make a personalized dog treat jar for Christmas
Here is a list of the materials that I used to make this project:
Please note that some of the links included in this article are affiliate links, which means that if you click through and make a purchase I may receive a commission (at no additional cost to you). You can read my full disclosure at the bottom of the page.
- Cricut Maker
- Light blue Cricut cutting mat
- Adhesive vinyl in various colours (removeable or permanent)
- A glass or plastic jar with a secure lid
- Something Christmassy to decorate the lid (optional)
- A glue gun (optional)
- Dog treats to fill the jar!
How to make a homemade dog treat jar for Christmas
Here’s how to make your very own DIY dog treat jar using a Cricut machine!
Step 1) Download the file & unzip the downloaded folder
Use the box below to download the cutting files for this project. Please note that this is not a free file.
It is part of the Christmas Craft Countdown which is a collection of 20 exclusive Christmas themed craft projects.
This design is part of the 2021 Christmas Craft Countdown.
If you have already purchased the Christmas Craft Countdown,
please login to your account.
Before you upload the SVG to Design Space, you need to unzip the download folder that it comes in.
- How to unzip a folder on Windows computer
- How to unzip a folder on a Mac
- How to unzip a folder on an iPad/iPhone
- How to unzip a folder on an Android device
Step 2) Upload the SVG file into Design Space
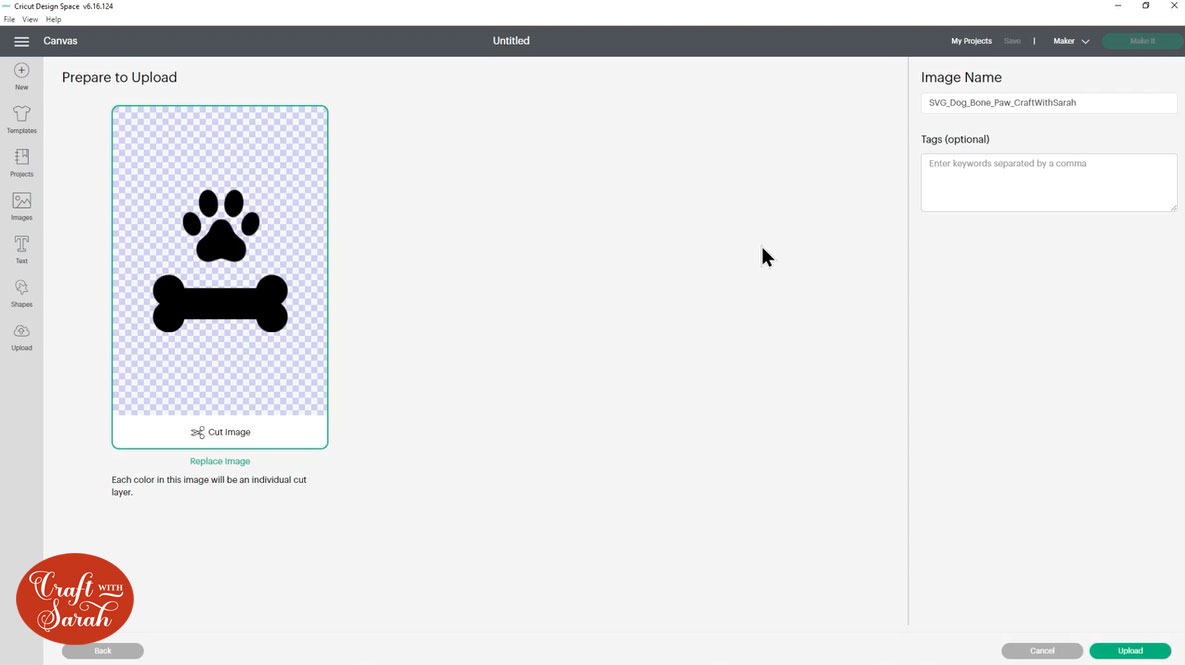
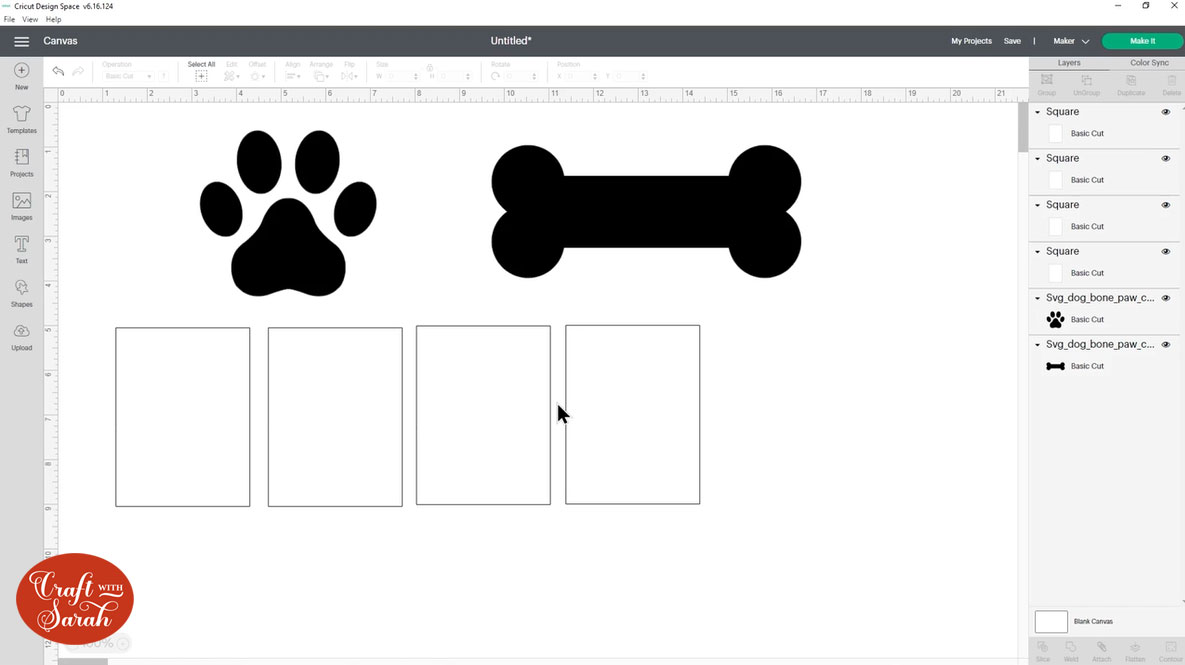
Open up Cricut Design Space and upload the file called SVG_Dog_Bone_Paw_CraftWithSarah.svg
Make sure you upload the file which starts SVG_ in the filename!!
This is how it should look after you have uploaded the file:
After uploading, the design will show in your “Recently Uploaded Images”. Click on it and then press “Add to Canvas” to put it onto your Project.
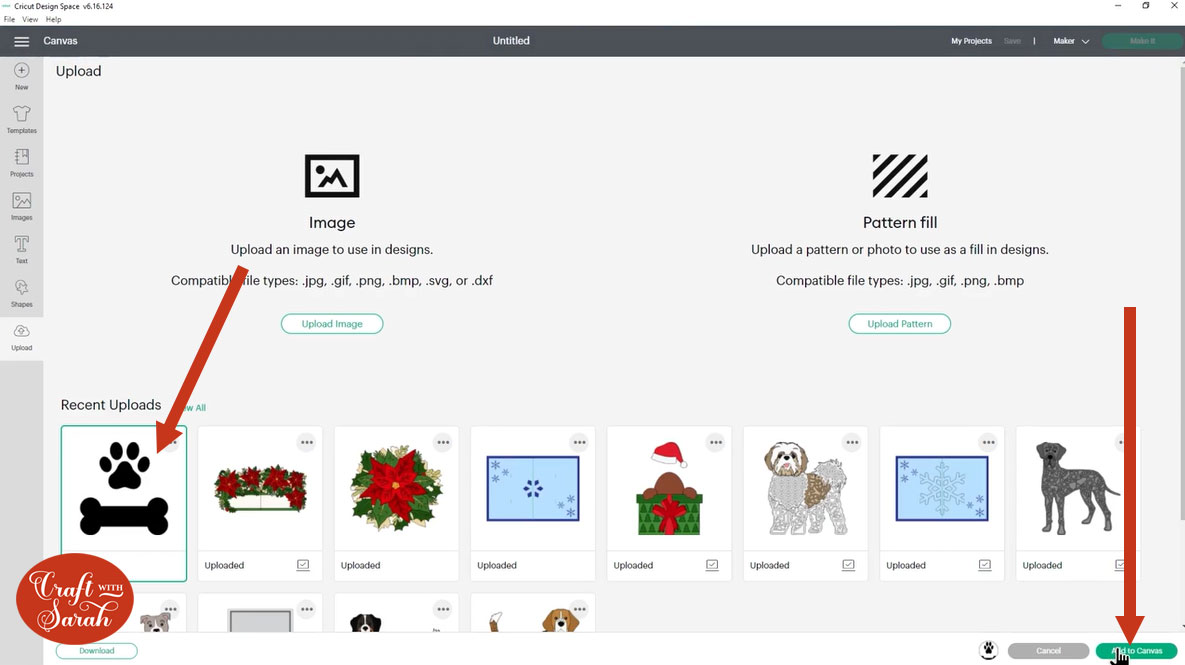
Click on the image on the screen and press “Ungroup” to separate the paw print and bone images.

Step 2) Measure your jar
There are lots of different types of jar that you could use for this project. I am using a glass jar, but you could use a plastic one instead. The only important thing is that your jar must have a lid which closes securely to keep the dog treats fresh.
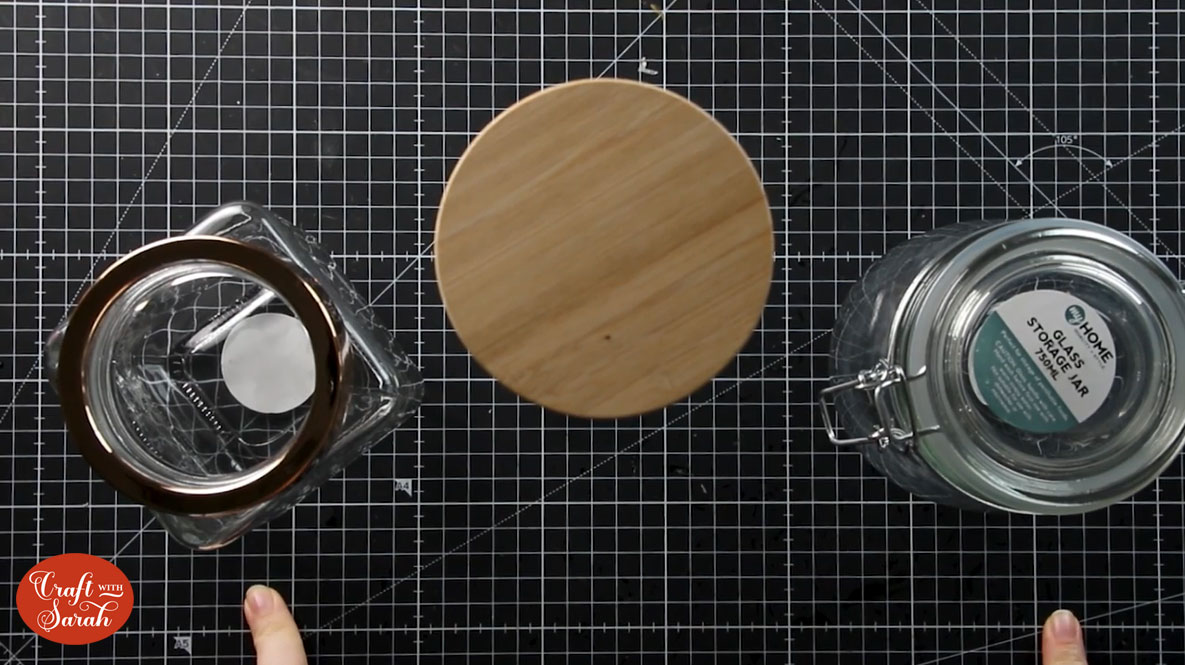
Jars with straight edges are going to be easier to stick the vinyl onto, so if you’ve got the option between a rounded one or a square edge jar, personally I prefer the square edge jars for vinyl. It just makes it so much easier to stick everything on.
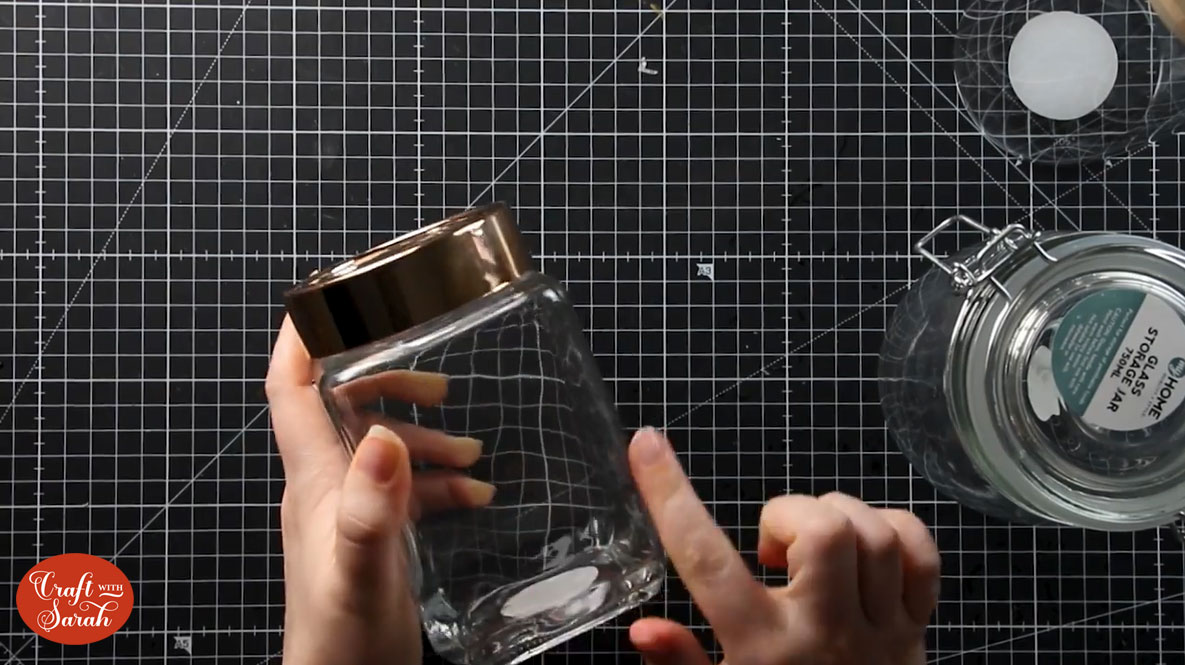
For round jars, when you’re measuring things it would be easier if you had a material ruler (like a dressmaker’s ruler) because you’ll be able to bend that around the glass rather than what I’ve got which is just a straight metal ruler.
Use your ruler to measure the sides of the glass jar.
Use the “Shapes” tool in Design Space to make a template.

As I’m using a square sided jar, I need one rectangle for each side. If you have a round jar then make one single rectangle instead that you will use to design a “wrap” for the jar.
Step 3) Decorate the sides of the jar
Make copies of the pawprint and bone images by clicking on them and pressing the “Duplicate” button.
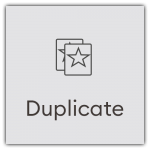
Resize them and place them around your template.
Add as many or as little as you want, and in any position that you want, but keep the front section empty as that’s where we will be adding the personalization.
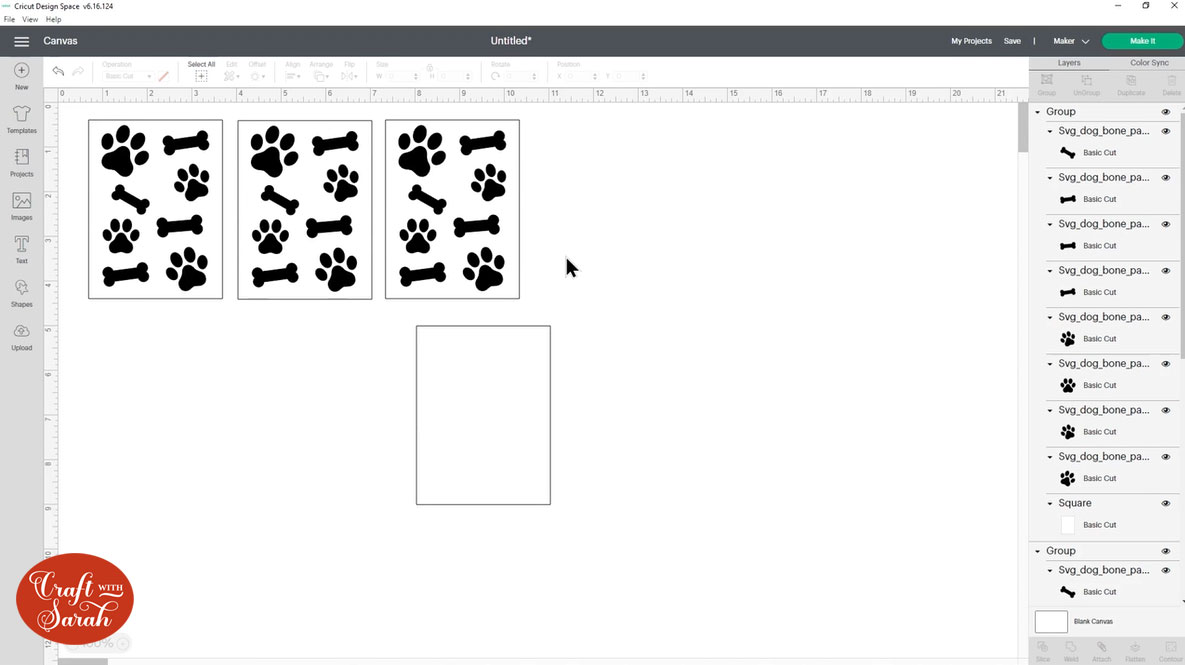
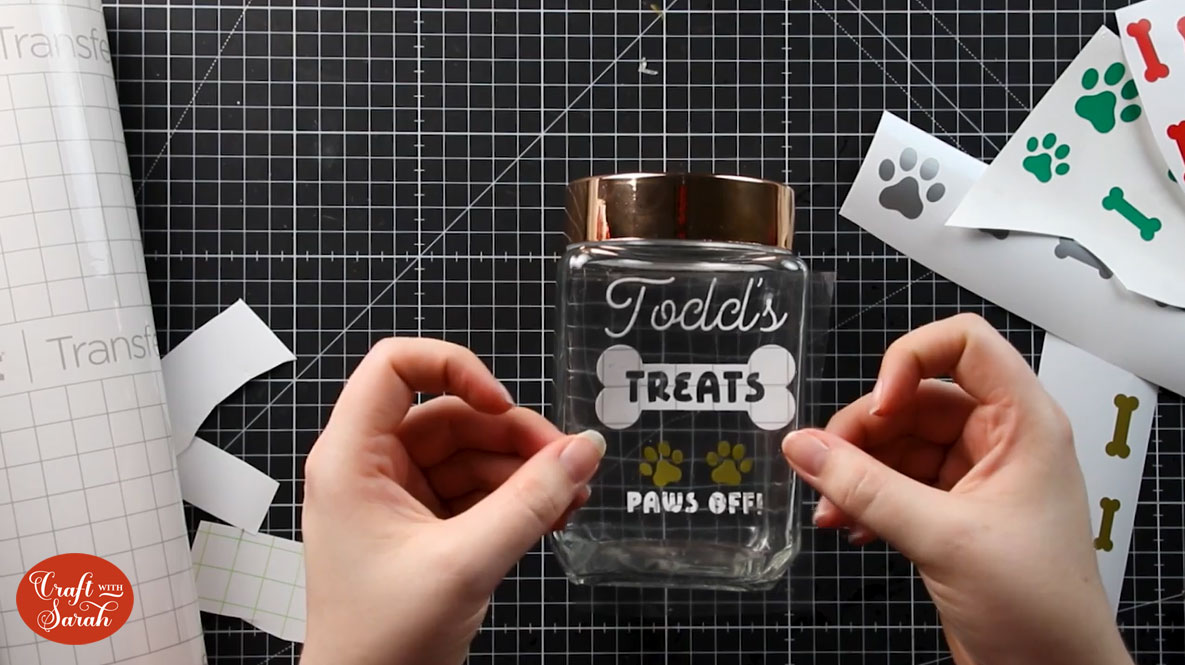
Step 4) Personalize the dog treat jar
I love to personalize gifts for friends and family, and that includes gifts that I am making for their dogs too!
Use the “Text” button to type out the name of the dog and then change it to a pretty font.

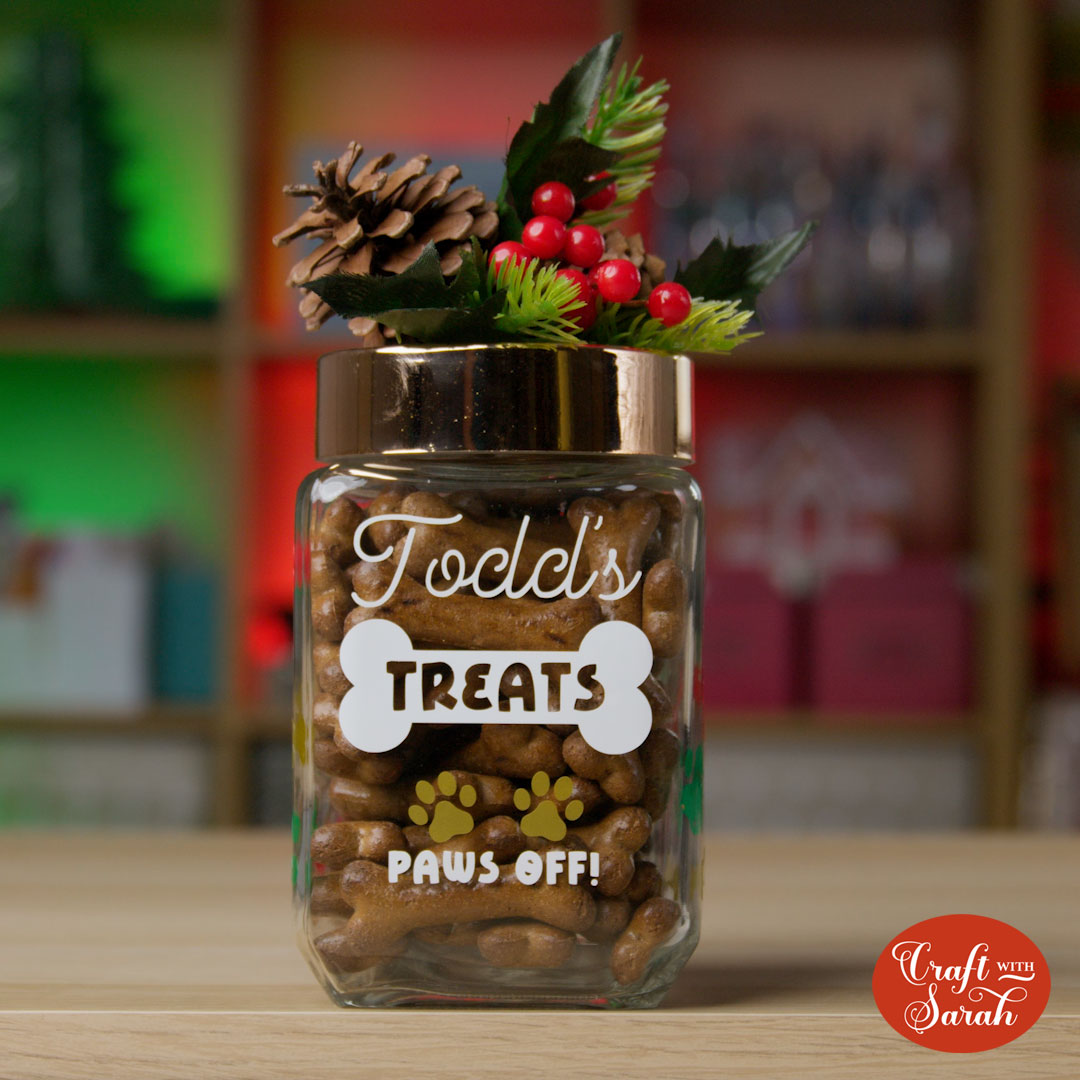
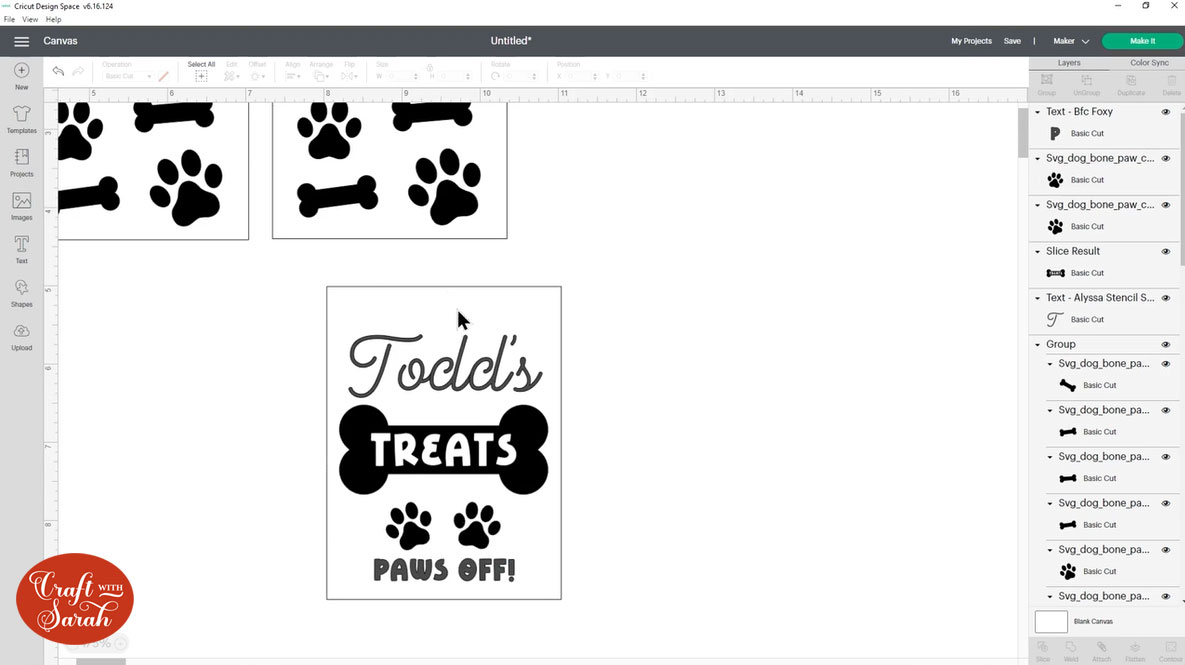
Add a large dog bone image underneath the name and then write the name “TREATS” on another layer. Change this to a bold, simple font.
Position the word TREATS over the dog bone and then use “Align” and “Center” to make sure they are placed exactly in the middle of each other.
Select the bone and TREATS word layers and then press “Slice”.

This will cut the word “TREATS” out of the dog bone.
Delete all the Slice Results layers apart from the one that shows the dog bone with the word removed.
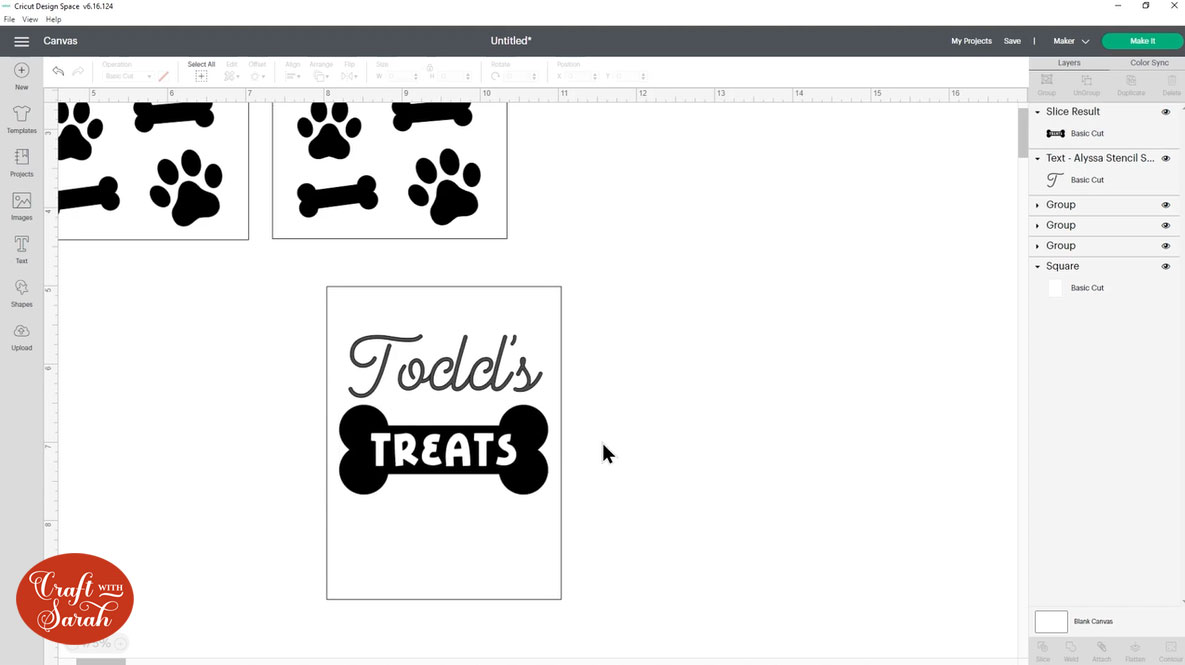
Finish decorating the front of the jar however you choose. I added two pawprint images and the words “PAWS OFF”.
Delete the template rectangles and then colour the designs to the same colours that you will be cutting it from vinyl.
Step 5) Cut the design from adhesive vinyl
When you’re finished with the design, cut it out from adhesive vinyl. Permanent or removeable vinyl will work.
You do NOT need to mirror the designs before you cut it.
Once you’ve cut out all the colours of vinyl, weed away the excess so you are just left with the pieces you need.
Step 6) Stick the vinyl to the jar
Use transfer tape to stick the vinyl to the jar.
Use rubbing alcohol to clear the jar before you stick the vinyl to it. This helps to get rid of any dirt or fingerprints which gives the vinyl a better chance of sticking.
If you need to use a scraper tool to help stick the vinyl to the glass and remove it from the transfer tape, be careful not to scratch the jar itself when scraping.
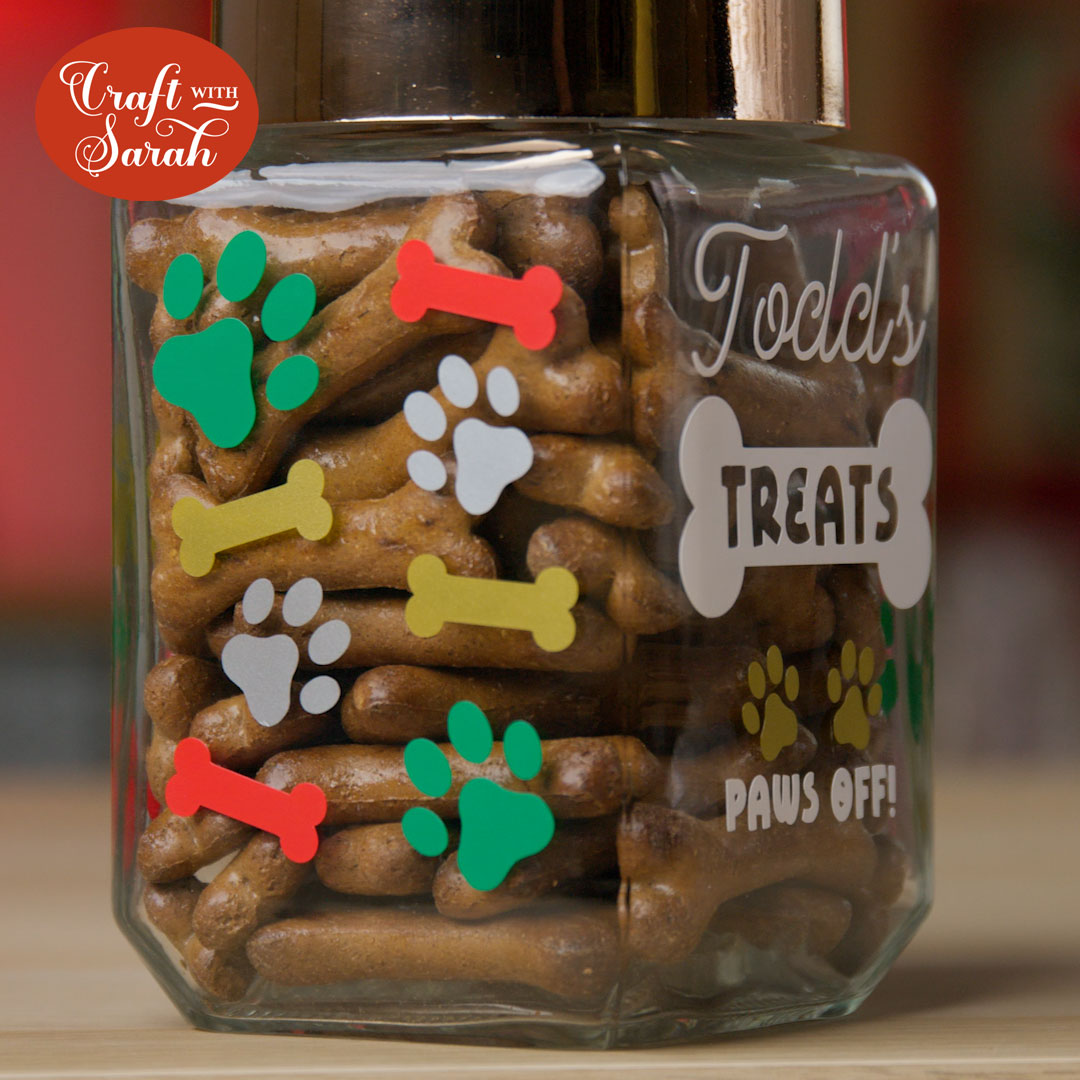
Step 7) Fill the jar with dog treats
When you’ve finished adding the vinyl, fill up the jar with some tasty dog treats! I used Pedigree gravy bones. My dogs LOVE these!
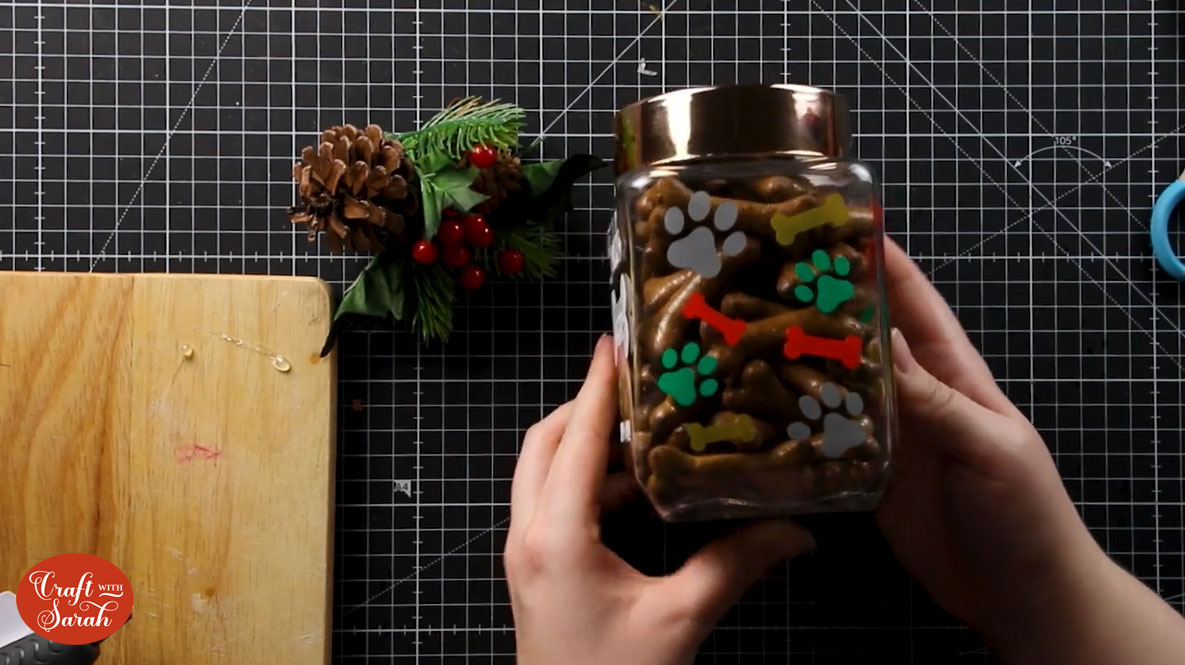
Step 8) Decorate the lid of the jar
This step is optional, but it helps to give an extra festive feel to the jar!
I found this little collection of pinecones and leaves in the same store that I purchased the jars from (The Range).
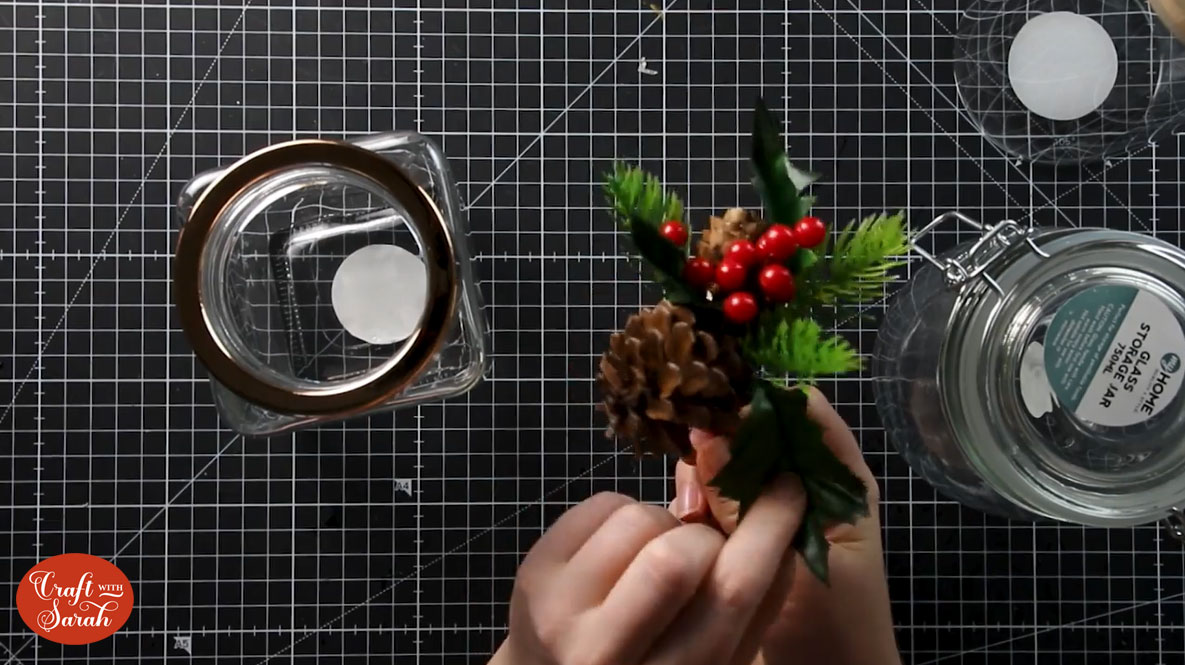
A little bit of hot glue from a glue gun was all I needed to stick this lovely sprig to the top of the jar.
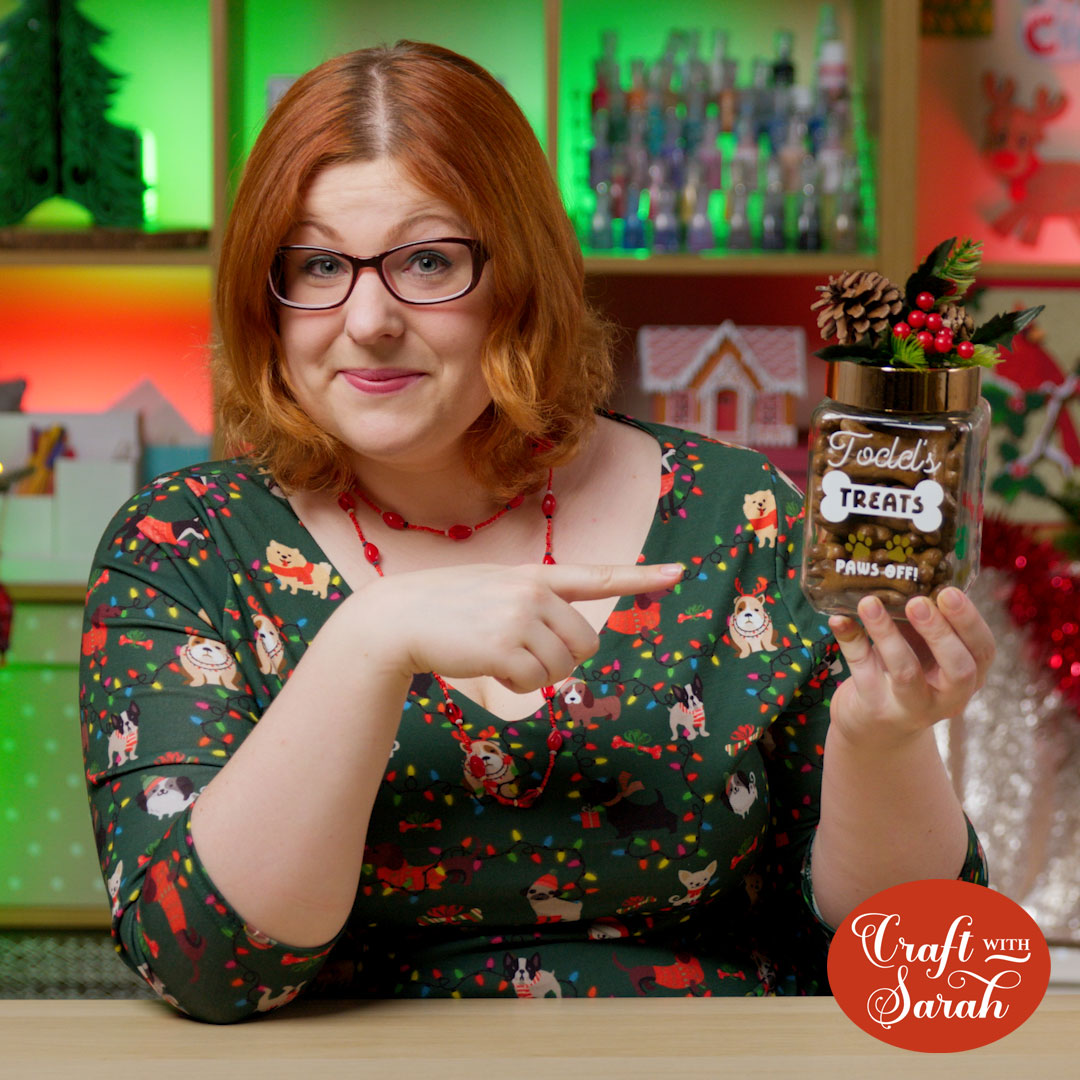
Here’s the finished project!
I hope you enjoyed this tutorial on how to make a DIY dog treat jar for Christmas.
This project is part of 2021's Christmas Craft Countdown.
Happy crafting,
Sarah x