
How to Make & Frame 3D Mandala Letters with a Cricut
Learn how to cut, assemble and frame 3D mandala letters with this easy-to-follow Cricut tutorial.
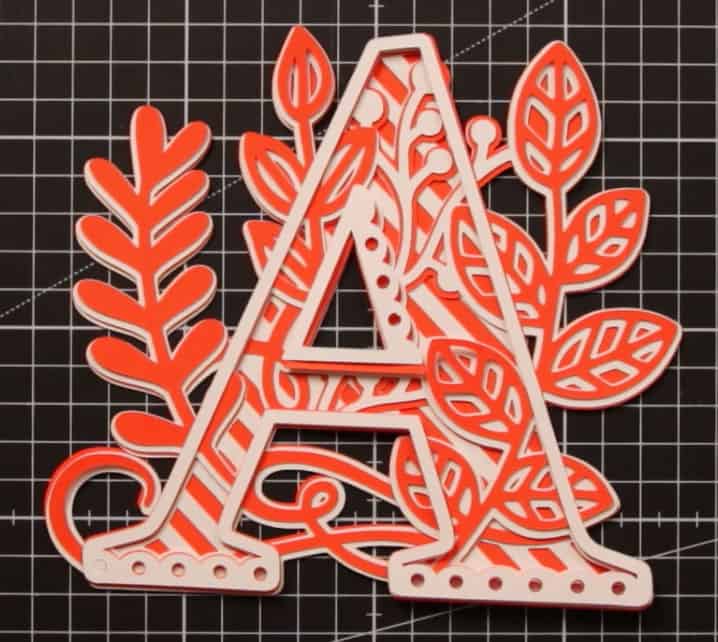
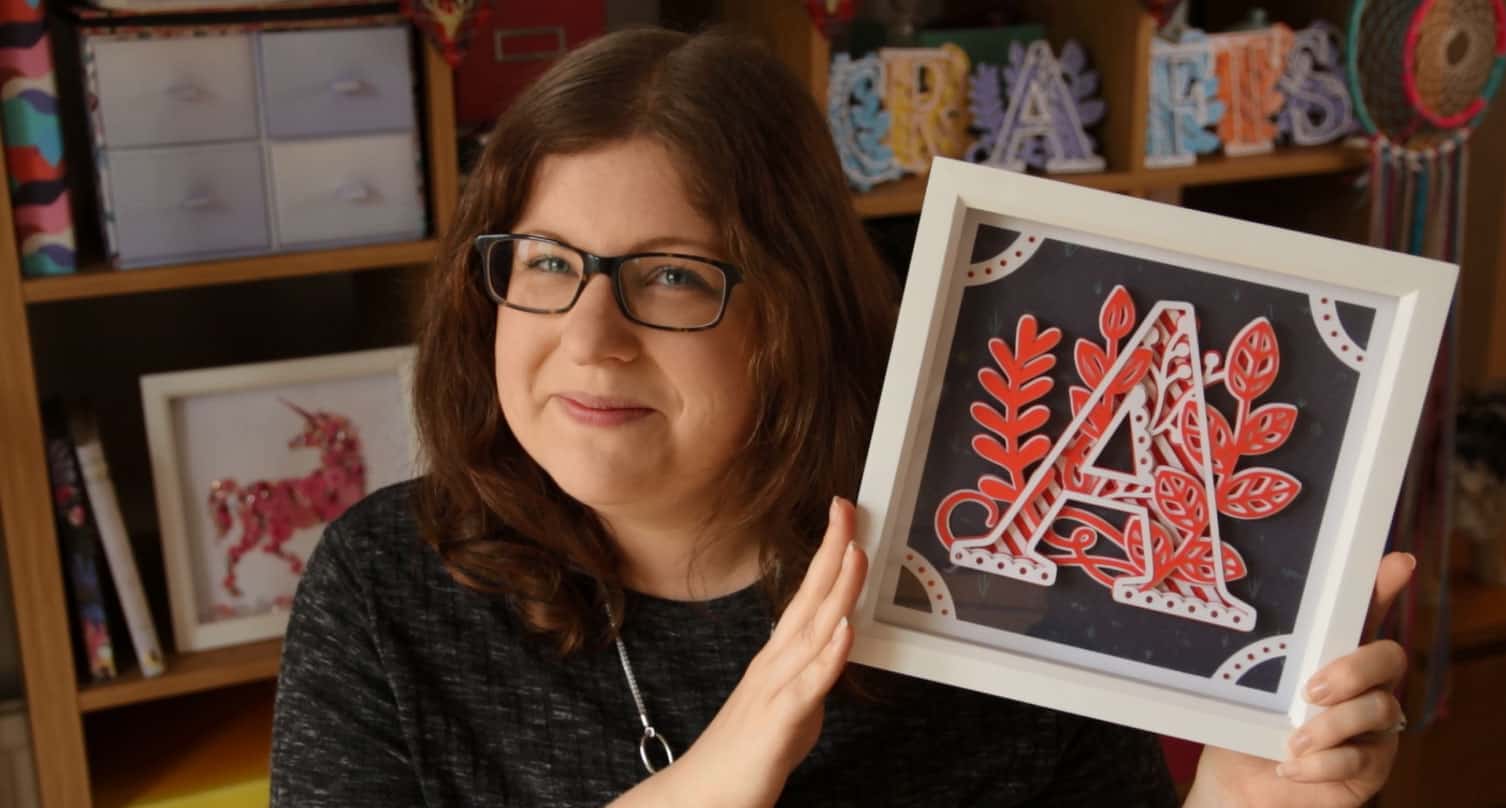
3D alphabet letters are EVERYWHERE in the Cricut community right now and I’m soooo happy about that as they are GORGEOUS!! ?
If you want to have a go at making one, but aren’t quite sure how it all works then this is the post for you!
This tutorial covers:
- How to import layered mandala SVGs into Cricut Design Space
- Tips to make cutting each layer super-easy
- How to take your card off the Cricut mat without it curling or warping
- How to assemble your 3D mandala letter with foam pads
- How to cut a custom border with your Cricut to fit perfectly inside a shadow box frame
- How to frame a 3D mandala letter
Please note that some of the links included in this article are affiliate links, which means that if you click through and make a purchase I may receive a commission (at no additional cost to you). You can read my full disclosure at the bottom of the page.
Want to design your own letters? Check out my free Design Space tutorial.
Materials needed:
- 3D mandala letter SVG in letter of your choice
- Digital cutting machine such as a Cricut Maker
- 160gsm card
- 3D foam pads
- Tacky glue
- Sticky gemstones
- Shadow box
How to assemble 3D alphabet letters
Watch this step-by-step video to learn how to cut, assemble and frame your gorgeous 3D mandala letters.
Or, follow the written instructions below…
1) Open your mandala letter SVG in Cricut Design Space
Visit my 3D mandala shop to purchase the floral alphabet SVG files.
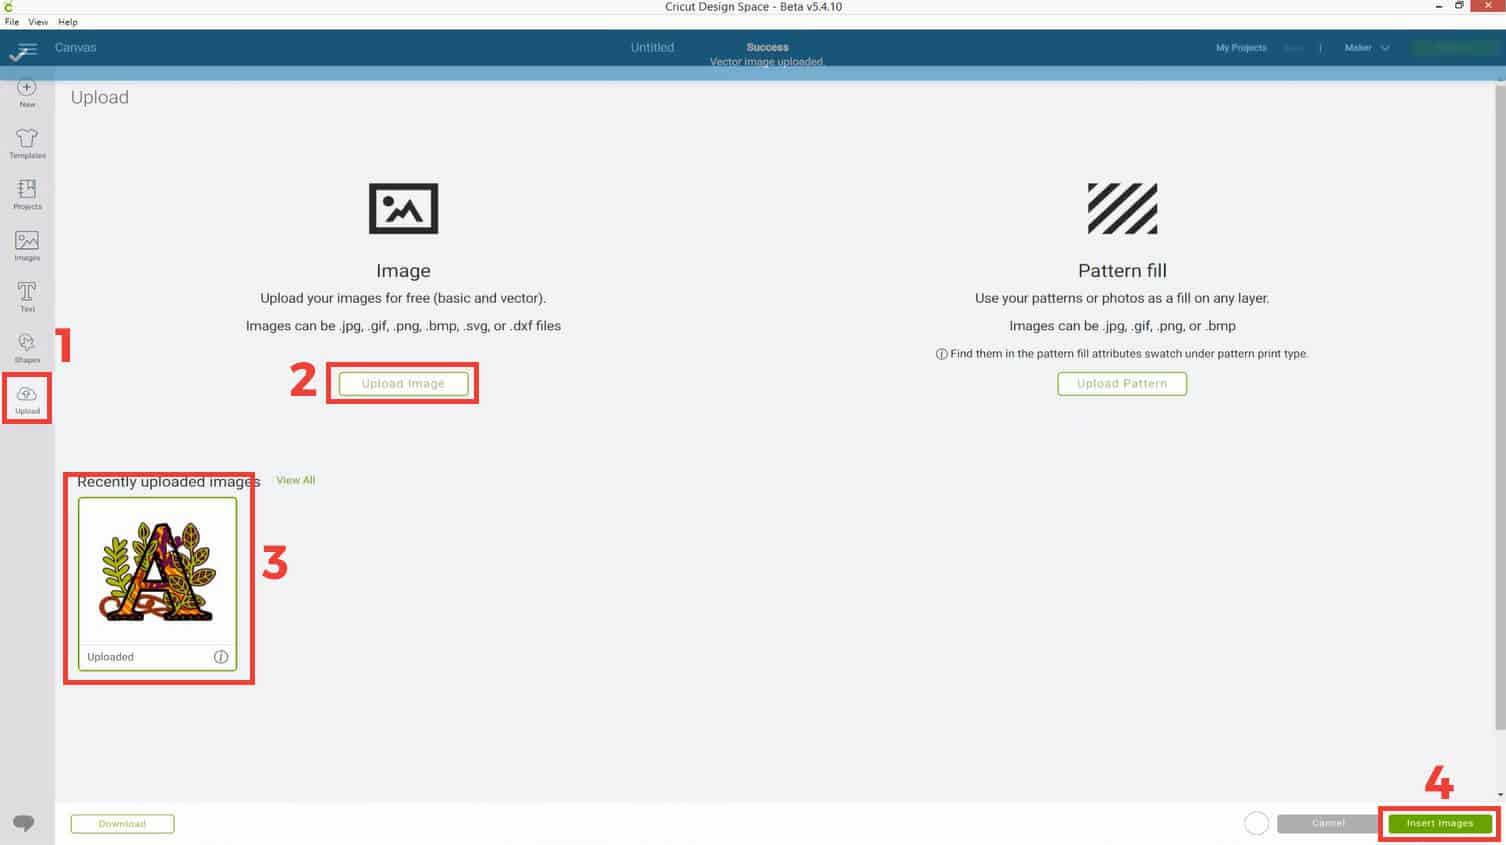
Open up Cricut Design Space and click “New Project” to create a blank canvas.
Click the “Upload” icon in the left column, then follow the on-screen instructions to load your mandala letter SVG.
Be sure to upload the file which ends in .svg as that’s the format that Cricut machines need to be have to able to cut out the design.
If your SVG file is in a zip folder then you’ll need to unzip it before you can import it into Cricut Design Space.
- How to unzip a folder using a Windows computer or laptop
- How to unzip a folder using a Mac computer or Macbook
- How to unzip a folder using an iPhone or iPad
- How to unzip a folder using an Android phone or tablet
Once you’ve added the SVG file it will appear in your “Recently uploaded images”. Click it with your mouse, then click the green “Insert Images” button on the bottom right of your screen.
2) Resize the SVG
Your letter might import onto your canvas too small to be able to cut with a Cricut machine.
Use the width and height boxes near the top of your screen to resize it.
All the layers are grouped, so when you change the size all of the layers change automatically, so you only need to set the size once for the whole design – you do NOT need to change each layer individually.
I recommend making the letter at least 5 inches tall otherwise your Cricut may struggle to cut out the designs due to the intricacy of some of the cuts.
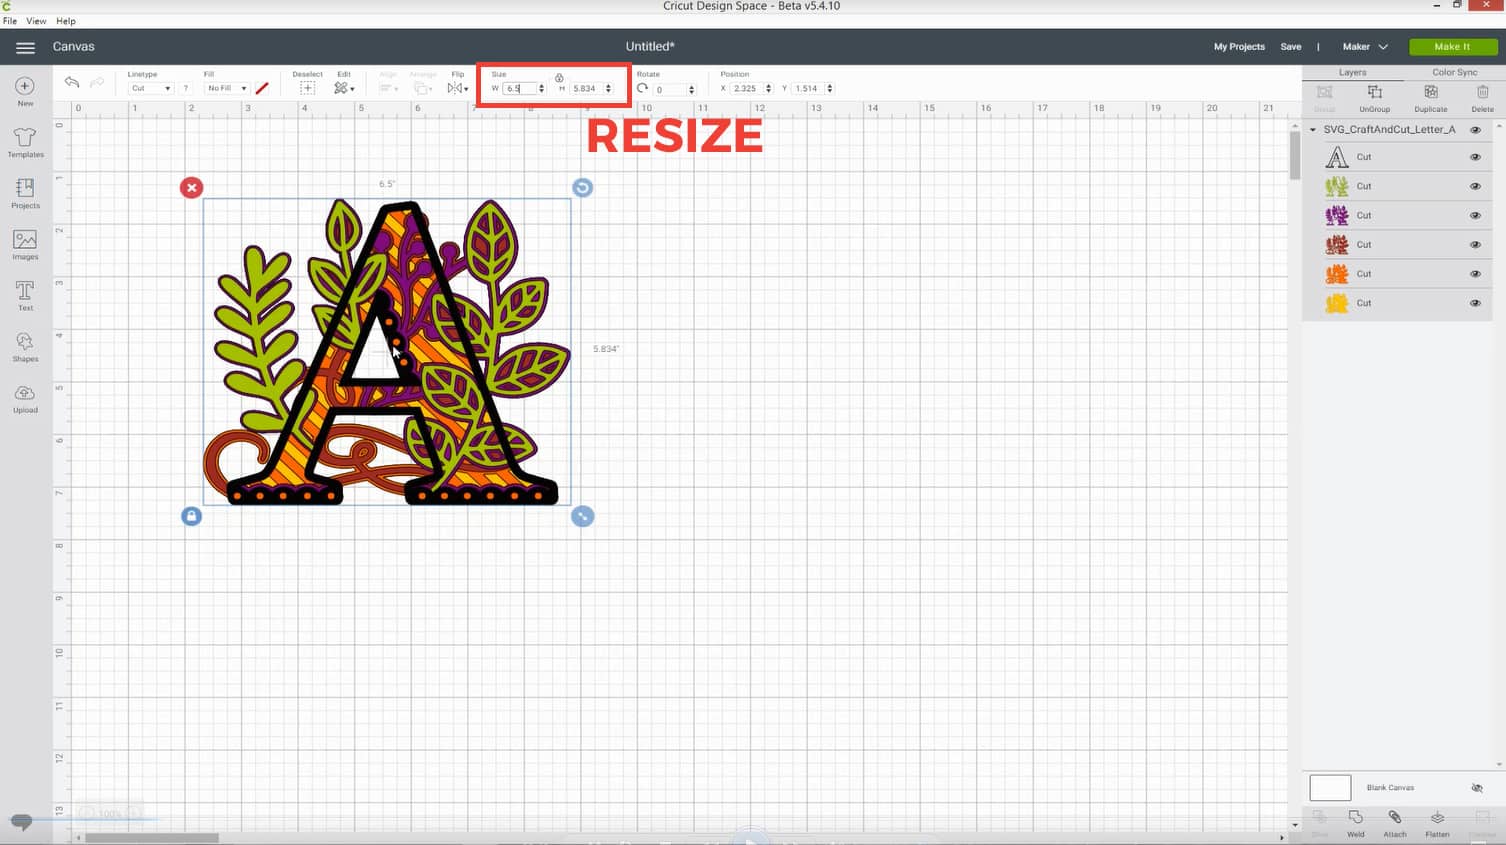
TOP TIP: Make sure the padlock icon above the width and height boxes is CLOSED, otherwise your letter will distort out of shape. If it’s showing as open, click it to close.
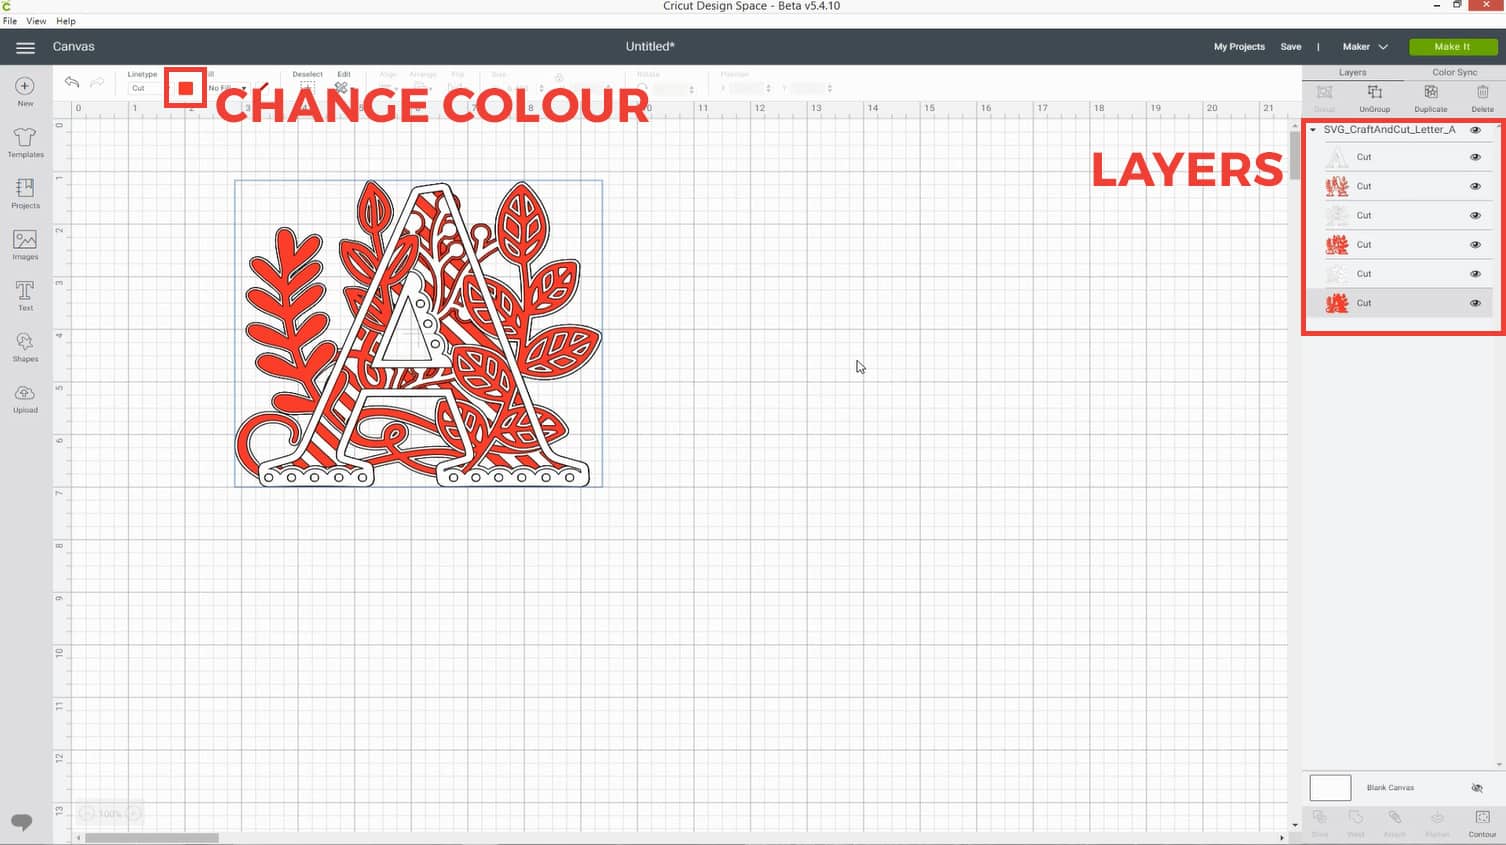
3) Change the layer colours to mach your card
Select each layer one at a time and change the colour to the colour of the card you are going to cut it out of.
This makes the cutting process easier because Design Space mixes up the layer order when you go to cut it.
4) Cut each layer
Click the green “Make It” button on the top left of Design Space and follow the on-screen instructions to cut out every layer of the letter.
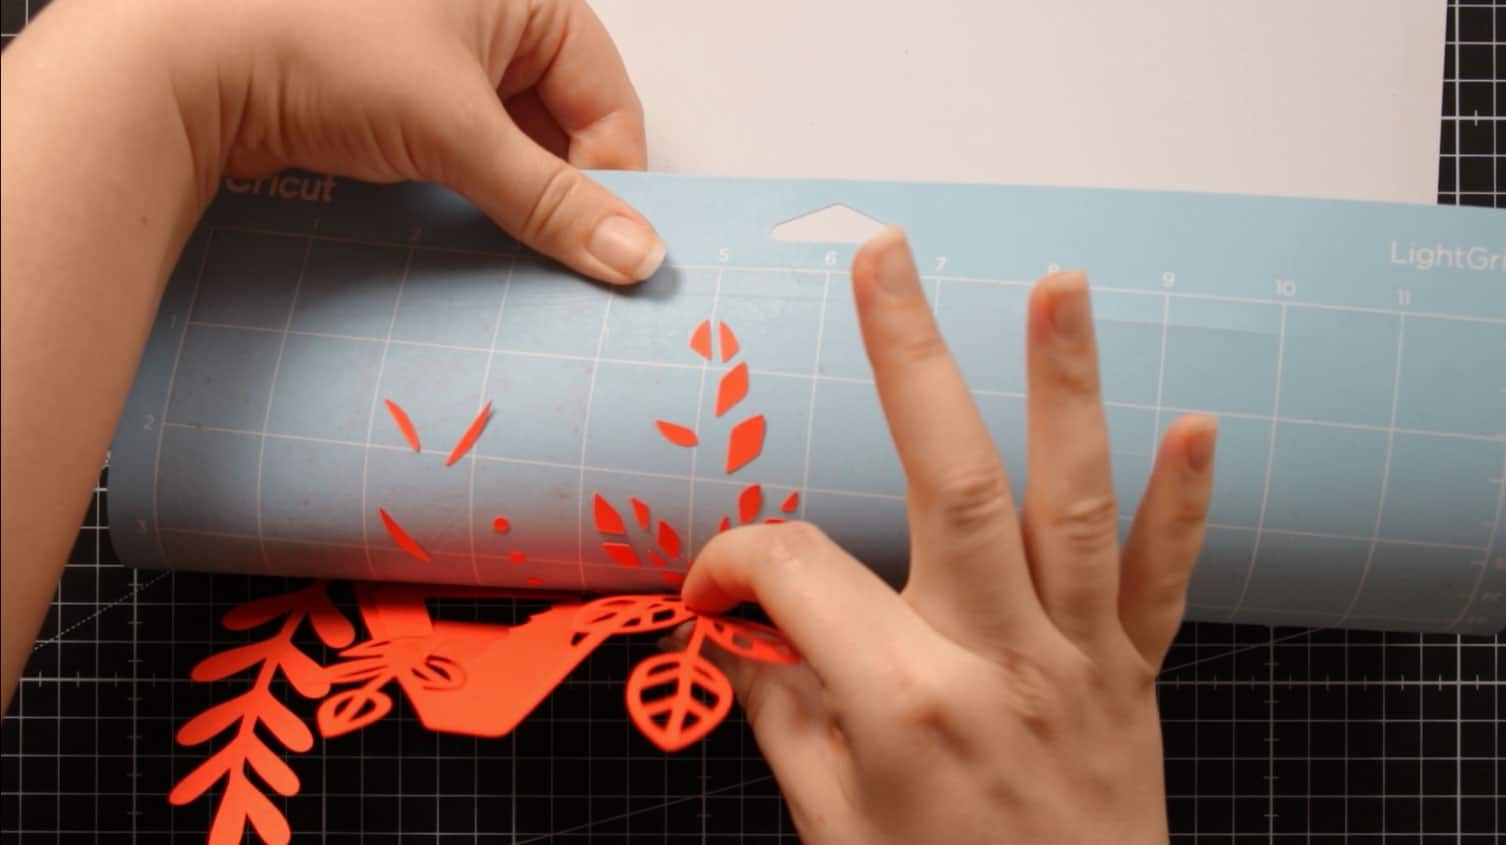
When you take each piece of card off of your Cricut mat, be sure to pull the MAT away from the CARD, not the CARD off of the MAT, otherwise the card will bend out of shape.
To do this, turn the mat upside down and gently bend it backwards to release the card.
TOP TIP: Bend your mat backwards gently. Do NOT fold it otherwise you risk snapping it.
You might need to help the card detach with your fingers or a weeding tool if it’s sticking a bit too well!
5) Place the letter layers in size order
The easiest way to make sure you stick the layers together in the correct order is to place them all in size order.
Carefully put the layers of card one on top of the other.
They aren’t stuck down at this point – we’ll be doing that in the next step.
Once your layers are stacked in order, turn them all upside down so the bottom layer of your letter (the largest one) is the one at the top of the pile.
6) Stick the layers together with foam pads
Starting with the second-to-last layer, stick each layer to the larger one it corresponds to using 3D foam pads.
Put the foam pads on the UNDERSIDE of the layer you are working on.
You don’t need to completely cover it in foam pads, but be sure to add enough so that it will be sturdy when stuck together.
TOP TIP: Only got large foam pads? Cut them smaller with scissors.
Be careful with your foam pad placement. You don’t want any part of them going over the edge of the layer you are sticking them to, otherwise you will be able to see it after you have finished assembling the letter.
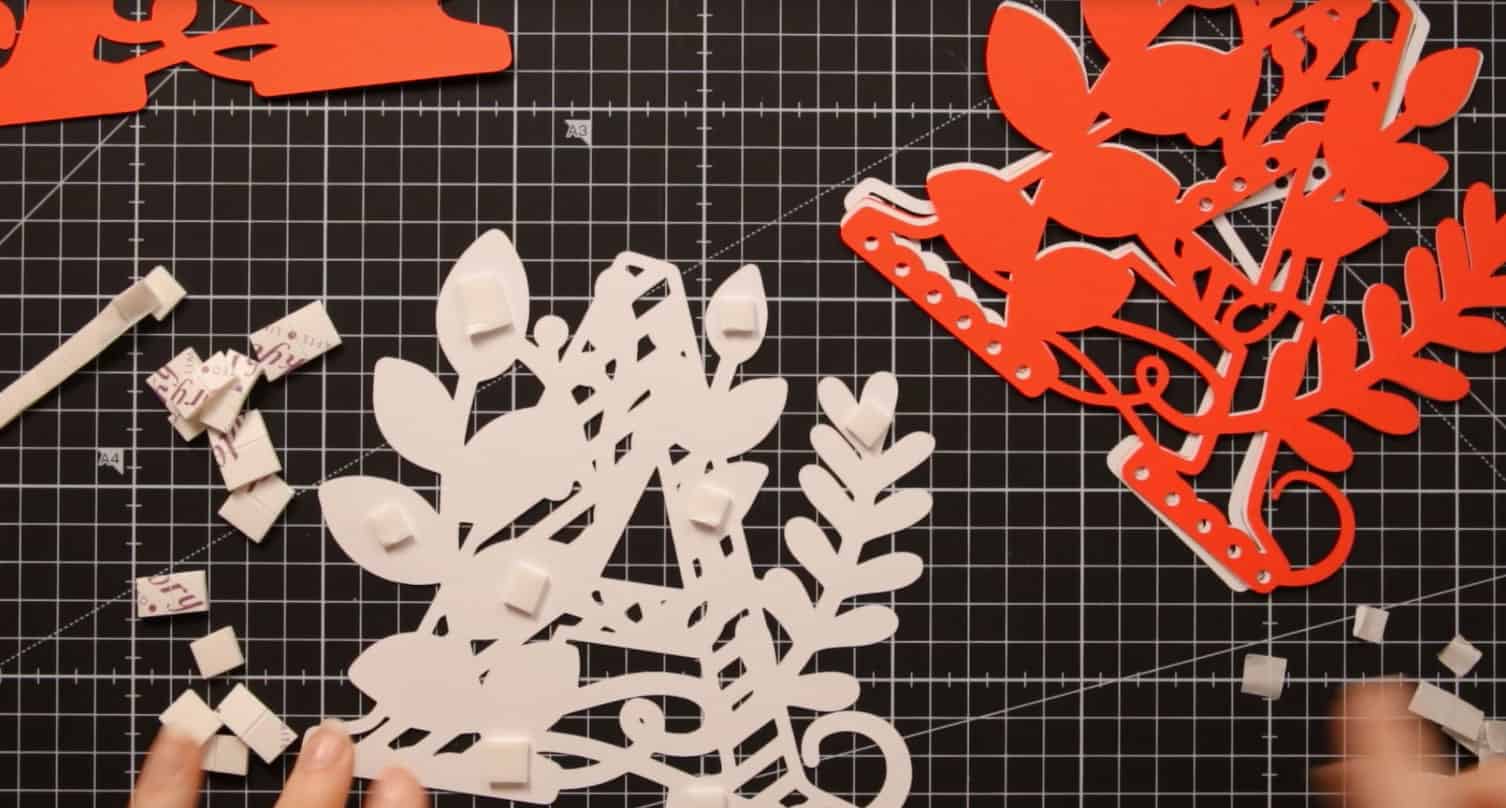
Keep sticking until all layers are put together. You will need to cut your foam pads quite small for the top layers!
I like to stick the top layer (which is just the outline of the letter) with glue rather than foam pads as I think it looks more striking, and it’s really hard to cut foam pads small enough for the very top layer!
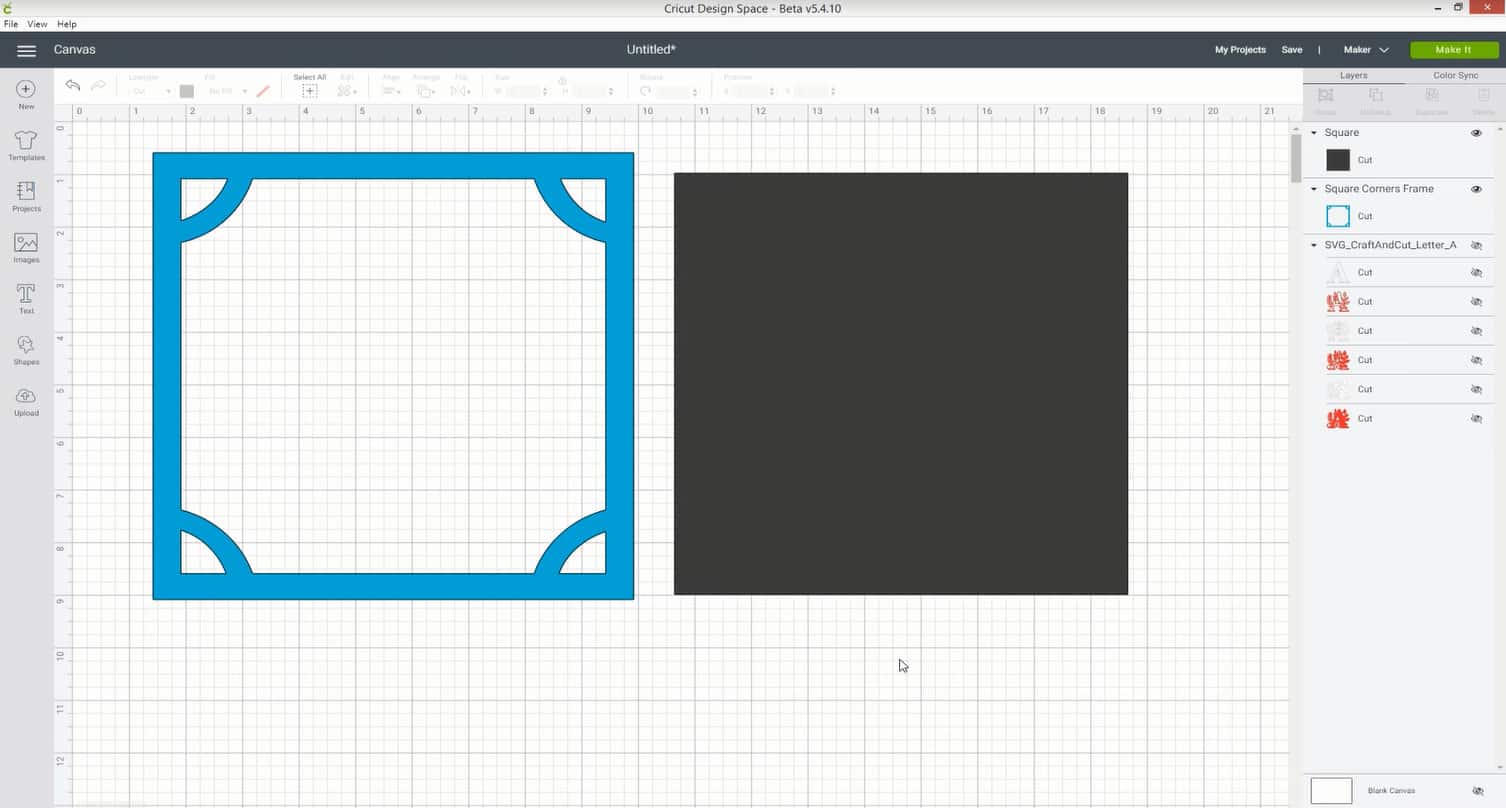
7) Cut a pretty border for your shadow box
Measure the full width of your shadow box by taking out the wooden spacer and measuring it from side-to-side.
Open Design Space and find a pretty border image by clicking “Images” and then searching for “border” or “square” in the Cricut Access search box.
Make the pretty shape the full width that you measured, then click “Shapes” and insert a square.
Make the square slightly smaller than the pretty border image.
Cut out both of these shapes with your Cricut machine.
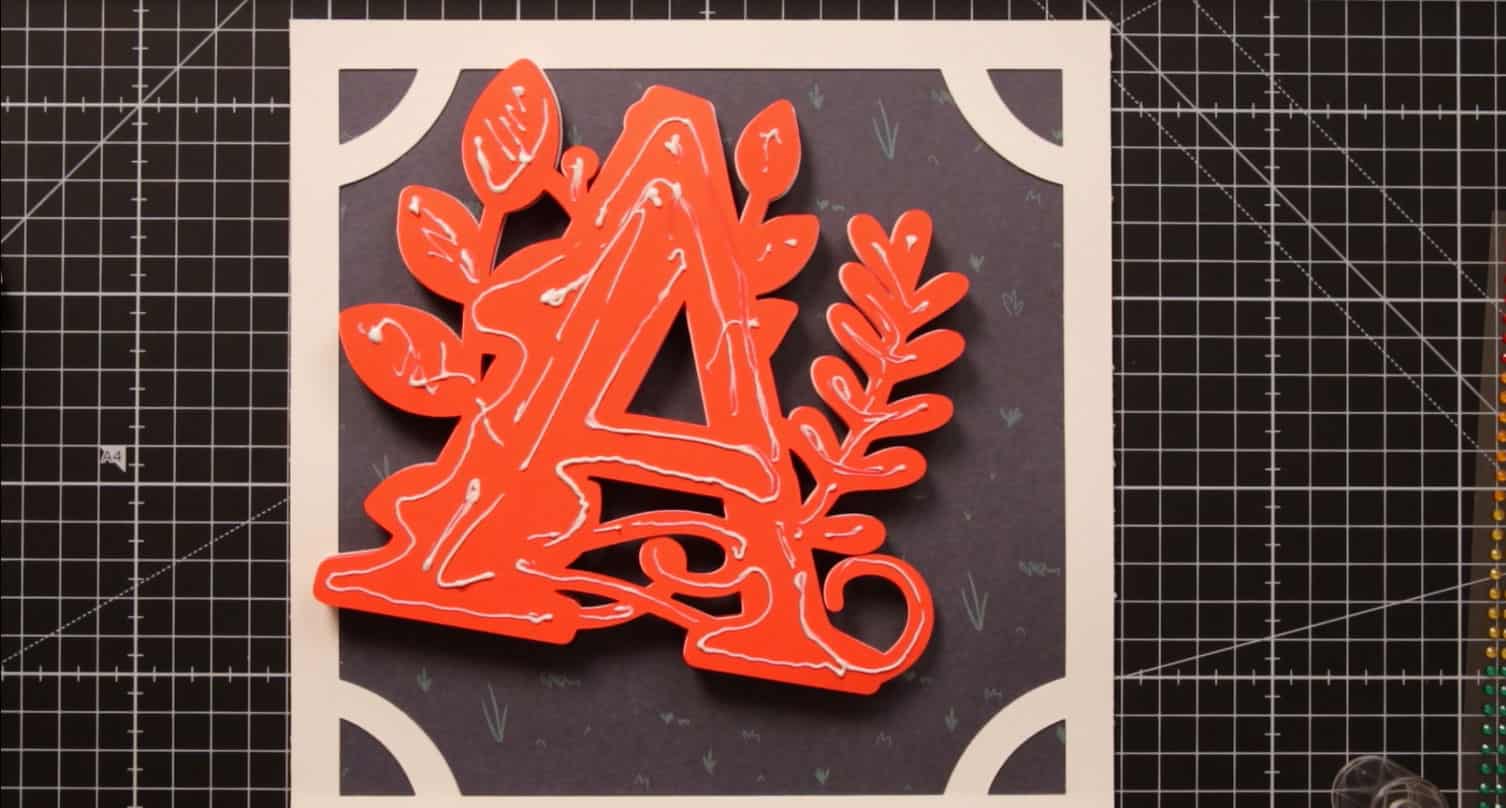
8) Assemble your letter art
Use glue or double-sided tape to stick your square cutout to the inside of the pretty border image.
Add glue or tape to the bottom of your mandala letter and then add it to the middle of the squares.
I used tacky glue, as shown in the photo below.
9) Decorate & place in frame
Now it’s time to decorate your artwork!
I used red sticky-back gemstones to go along each of the curved corners of the border frame.
When you’re finished, simply pop your finished craft piece into the shadow box and turn it around to see your beautiful mandala letter all ready to go on the wall.
TOP TIP: Clean both sides of the glass with glass cleaner and a microfiber cloth before adding your letter to the frame to ensure it’s free from dust and fingerprints.
Now it’s time to sit back and admire your work!
I hope you enjoyed this tutorial on how to cut and assemble 3D layered alphabet SVGs with your Cricut machine.
If you’d like to dive straight in to another Cricut craft project (woohoo!) then check out my free SVGs & Cricut crafts.
Happy crafting,
Sarah x